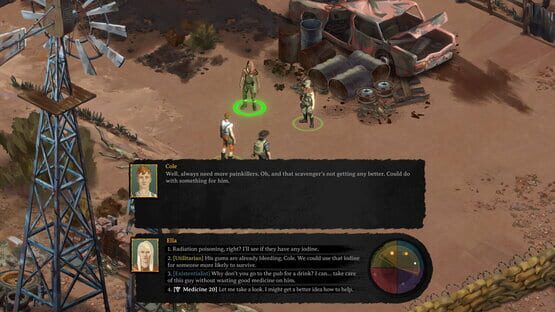

Broken Roads
Melbourne International Games Week, Live streams, & more!
To start the day off, we'll be kicking off the showcase with a live AMA from the Drop Bear Bytes narrative & studio teams here on steam! You can catch it starting at 10AM AEST / 5PM PDT. You're welcome to ask questions either during the live stream or through the #AMA channel on our official Discord!
To wrap up the day, the Drop Bear Bytes art team will be taking over the livestream starting at 8PM AEST / 3AM PDT
You can catch the livestream right here on Steam: https://store.steampowered.com/app/1403440/Broken_Roads/?utm_source=Twitter&utm_medium=Community&utm_campaign=Broken+Roads
Tomorrow, Join Craig Ritchie, founder of Drop Bear Bytes, for the "Death n Dirt" panel at 9AM AEST / 4pm PDT!
More info can be found here: https://store.steampowered.com/sale/migw2022
We hope to see you there!
NEW TRAILER AND VERSUS EVIL PUBLISHER ANNOUNCEMENT!
We are incredibly happy to announce that Drop Bear Bytes have entered into a partnership with Versus Evil, acclaimed indie publisher of such titles as Pillars of Eternity 1 & 2, Hand of Merlin and Eville.
We’ve been working with Versus Evil all of this year and are really stoked to partner with them. They've published some of the best RPGs of the last decade and it's great that Broken Roads is joining their lineup.
There have been a number of significant changes and improvements we’ve been tight-lipped about which we will go into more detail next week at gamescom and show off in upcoming dev blogs and videos, including:
- Major improvements to environment and character art
- Shift to fully 3D maps (from 2D tile-based scenes)
- We have revamped combat, but will touch on that in the future
- Entirely reworked skill system, moving from skill trees to integer-based skills
- Overhaul and improvement of all animations
- UI redesign coming in the next few months
- Additional artists, developers and designers are now in the project
We’re also working with Knights of Unity (the team that helped develop Disco Elysium) who have been doing a fantastic job across the board over the last six months, from Unity tools through to many of the in-game improvements mentioned above.
Please enjoy the new trailer, come say hi if you are at gamescom, and we look forward to bringing you more updates soon!
- The Drop Bear Bytes Team
Broken Roads: Official Gamescom Trailer Live!
To celebrate this announcement, we've released a brand new trailer. Check it out & don't forget to wishlist!
Broken Roads Will Be At GAMESCOM 2022!

We will be part of the Australian contingent heading over to Cologne for our first in-person event in years and really looking forward to getting the game in the hands of press and players.
We’ll confirm exact booth locations closer to the time, but can confirm the following studio members will be there:
Luke Dorman - Level Designer
Ryan Gee - VFX & Technical Artist
Sara Laubscher - Lead Environment Artist
Cassandra Lee - Mid-Level Concept Artist
Colin McComb - Creative Lead
Jethro Naude - CFO & Game Economist
Craig Ritchie - Game Director
Bianca Roux - Lead Character Artist
Tim Sunderland - Composer & Audio Lead
Hope to see you in Cologne!
- The Drop Bear Bytes Team
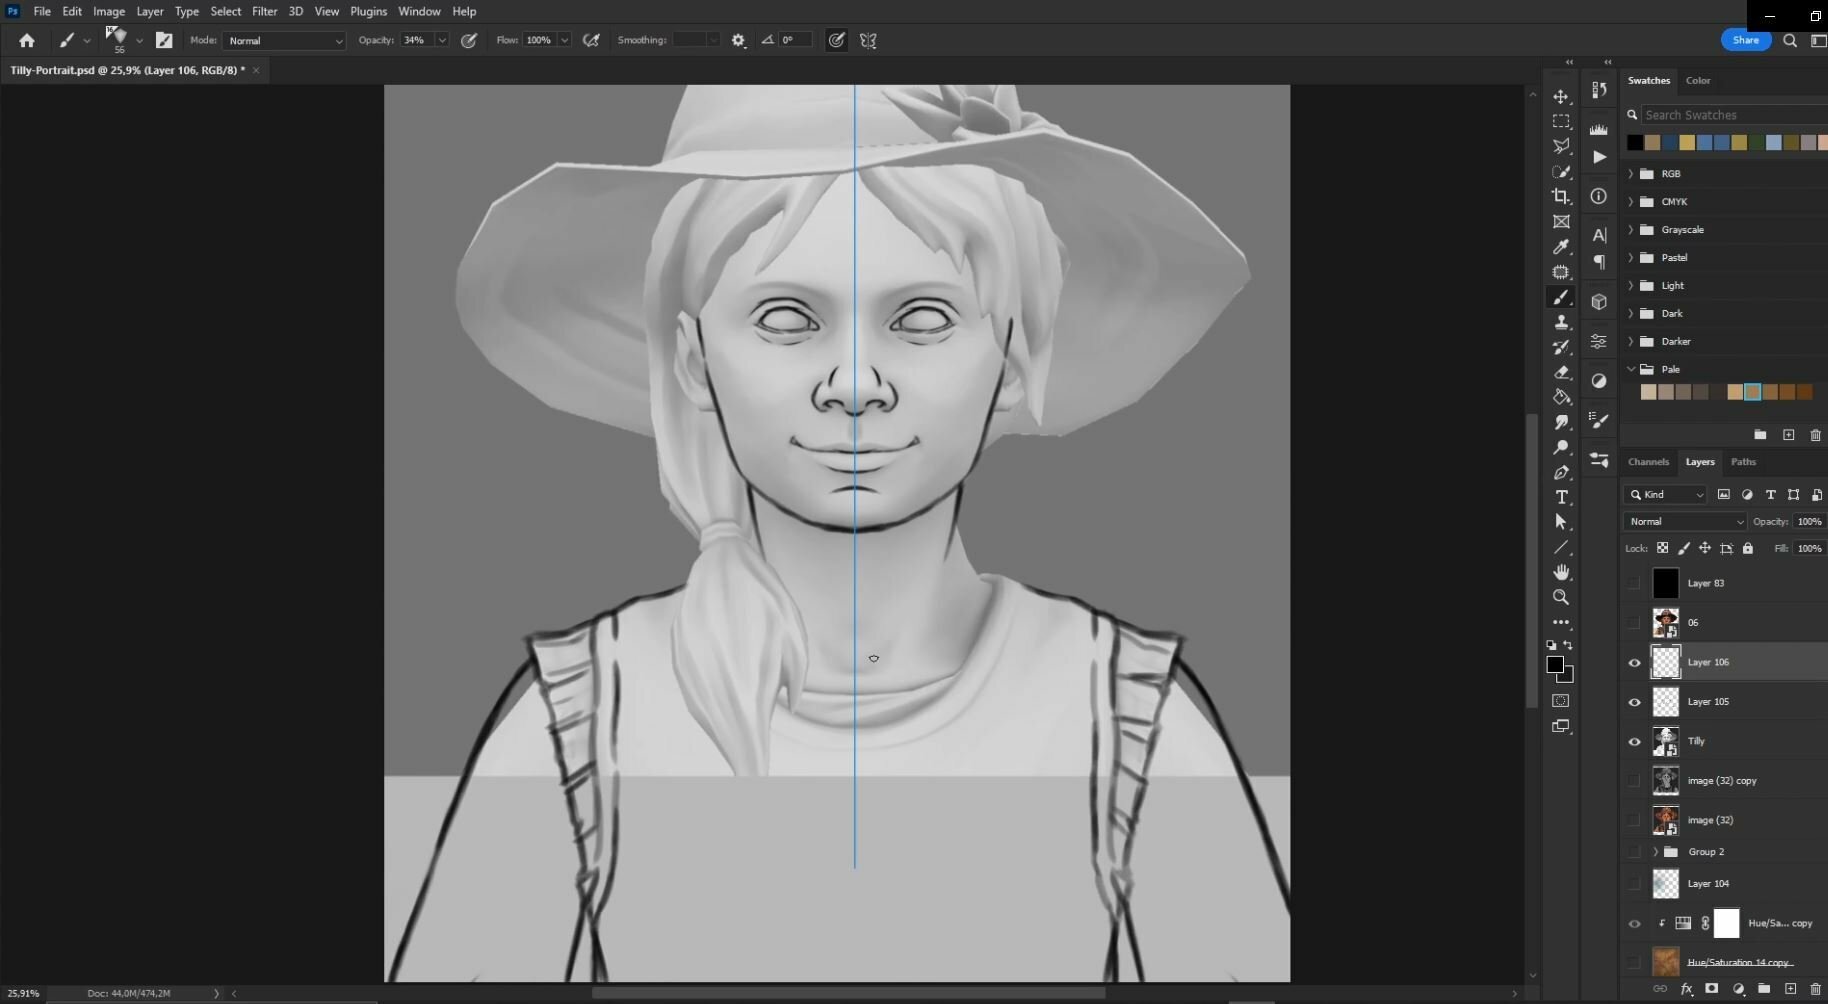
Dev Blog: Portrait Spotlight - Tilly
MY PROCESS
LINE ART
Each portrait is done using rendered images of the 3D model and 3D texture as reference in order to keep each portrait looking consistent with the model in game and to create a more efficient work flow.
I begin by importing the rendered images of the model and texture into my Photoshop file and making sure the character’s face fits within the specific guides set in the PSD template I created for myself. I will start by tracing over the 3D model’s face using symmetry at first to speed things up and then later without the symmetry tool on so it doesn’t look too symmetrical and unnatural. I use a tapered brush with a pencil texture to give it that sketchy drawn feel. I might keep the line art all on one layer or draw each element on different layers depending on what works best for me on that particular portrait.

BLOCKING IN FLAT COLORS
Once all the line art is done I will fill in one solid color on a layer underneath with a big flat solid brush or using the lasso and paint bucket fill tool.
From here I create solid colors on separate layers for each element; the hair, clothes, eyes and so on and then clip each layer onto the main fill layer using clipping masks.
After this I add the rendered images of the 3D model and texture on top and play around with the opacity and adjustment layers until I find what works best for me. I add these images on top of the flat colors to add some ambient occlusion and the color palette from the 3D texture. This is a bit of a back and forth process as I figure out what works best for each portrait.

PAINTING
I start painting on each separate layer with a combination of different textured brushes. I usually start with the skin and face first to establish the direction of the lighting and the overall color tone and move out from there, using smaller finer brush details on the face and larger brushier strokes on the clothes, hair and other accessories. I will also add various multiply layers on top using the lasso tool to create hard cast shadows in areas where they are needed or soft linear dodge layers on the areas catching the light such as the cheeks, nose and forehead.


At some point I color in the line art layers by locking the transparency of the layer and picking a darker color that corresponds nicely with the lighter color that I’m picking from.
Throughout this process I am continually checking back and forth between my 3D texture reference to make sure the portrait is consistent and I am not forgetting any small details. Towards the end of the process I spend time on small details around the eyes, making sure the eyelashes, shadows and highlights within the eyes look good and make the portrait come alive.
One significant detail to add is subsurface scattering. I add an overlay layer on top of the skin and paint in some reddish brushstrokes along the rim of the nose and the edge of shadows to help bring in the effect of the sunlight bouncing through the transparency of the skin.
For Tilly I made sure to add in some cute freckles!

FINAL TOUCHES
Now I duplicate all these painting layers and flatten them. On top of this one flat layer I paint in the last finishing touches. I add in separate strokes to indicate strands of free flowing hair and a cool toned rim light on the left side of the portrait, making sure the rim light is not painted as a solid line but helps inform the volume of the shapes I am painting. I ramp up the brightness and contrast with an adjustment layer and start adding in those last few bright specular highlights on the tip of the nose and one or two other places with a sharp edged lasso tool.
I might adjust the hue of the background color to fit better with the colors of the character. I end with a soft warm glowing gradient on a low opacity linear dodge layer on the right side of the portrait to give that feeling of warm sunlight being cast over the character.


You can see more of Cassy’s work on her Artstation portfolio, or follow her on Twitter.
Dev Blog: Crafting the Flora of Broken Roads
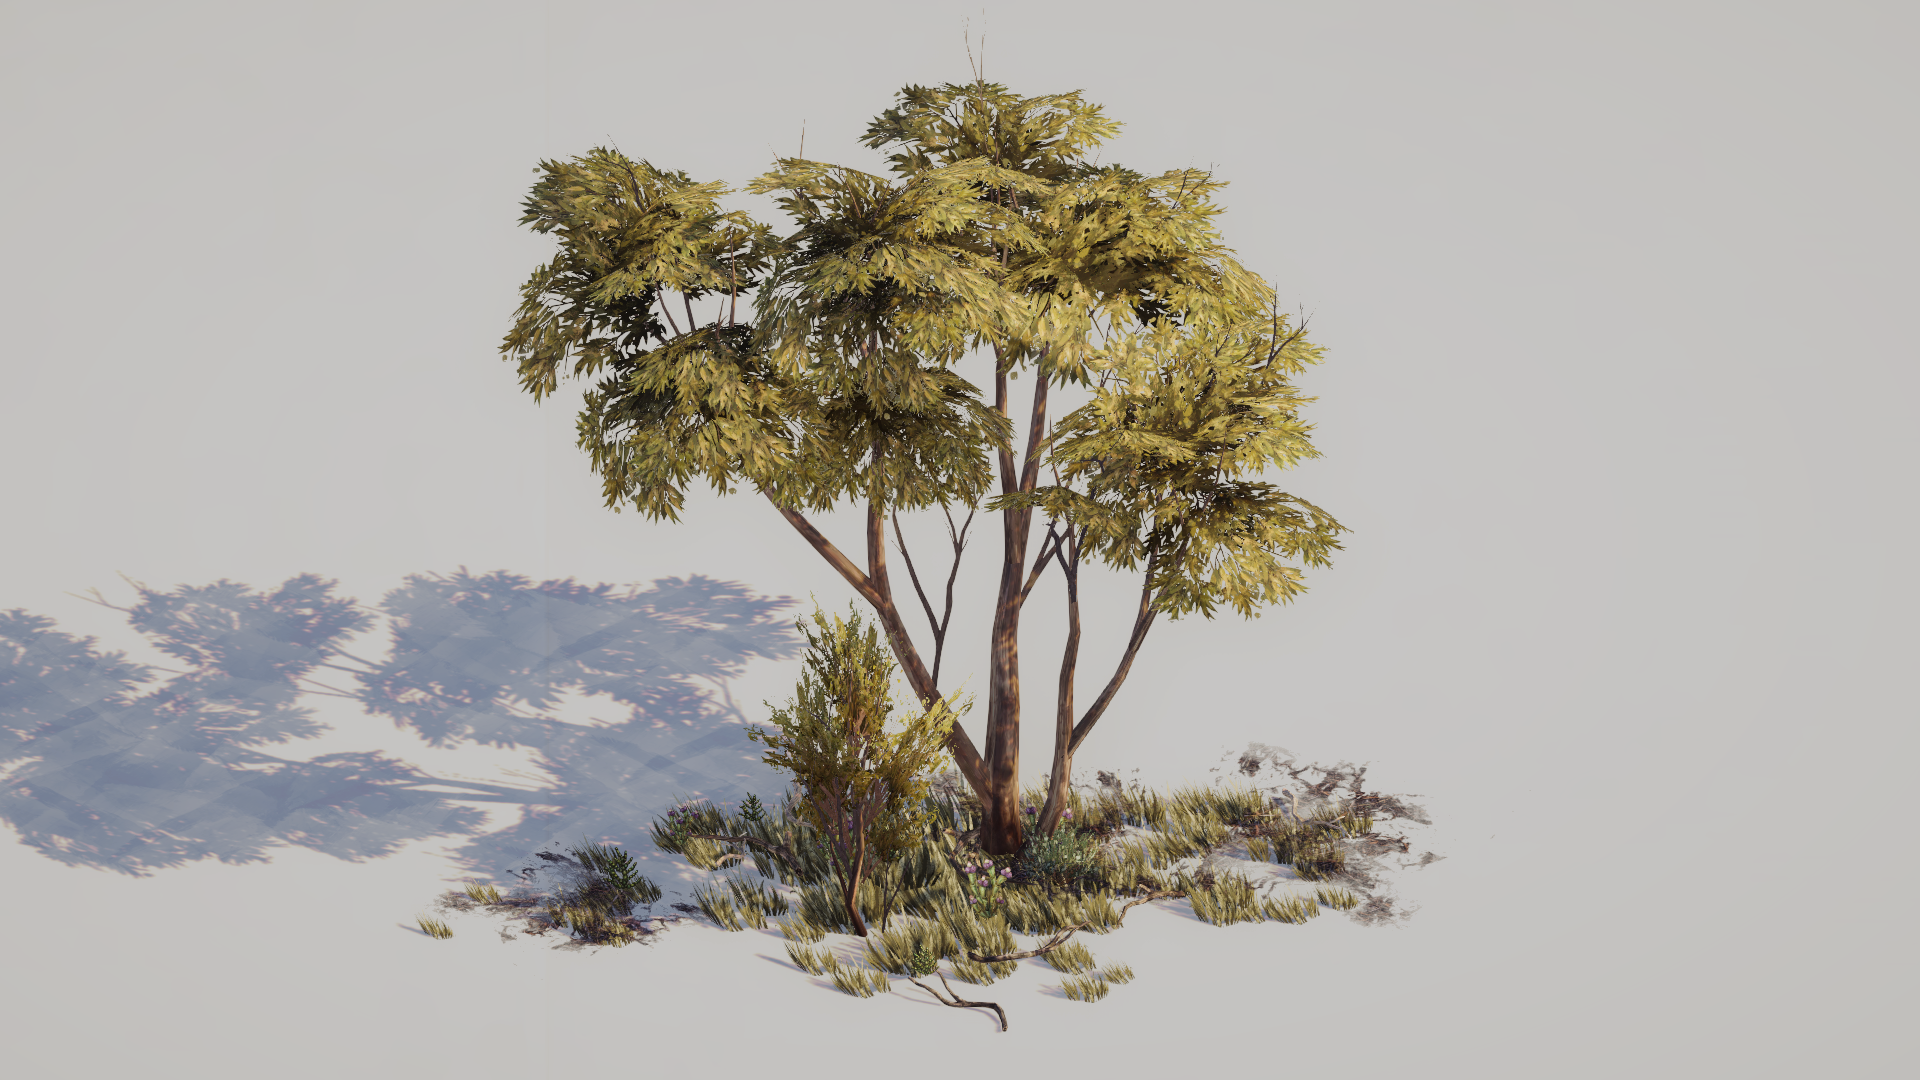
With Broken Roads being set in the Australian Outback, we knew it was important to create diverse and vibrant environments to immerse players in a truly Australian-flavored apocalypse. Australia has a huge range of flora and fauna that varies wildly by region, and many of which aren’t found anywhere else in the world. As the technical and VFX artist at Drop Bear Bytes, one of the coolest parts of my job has been helping the art and level design teams fill our apocalyptic world with trees and plants across the whole range of the outback, from forests to barren wastelands.
As a technical artist, I get to work in the wonderful area in between pure art, pure programming, and the mysterious art of level design. One of the immediate challenges we faced was how to fill large areas with dense vegetation (without having to place each bush and twig by hand), and how to vary the vegetation according to the different regions and areas of the game. As a Canadian currently living in Spain, I’ve not yet had a chance to visit Australia, so I started off on a virtual road trip, thanks to Google Maps.

After having visited each of the real-world locations of the scenes in the game, I had a nice overview of what each area’s vegetation looked like. Armed with this, I was able to make some categorizations of the various biomes, and typical plants, trees, and scrub. However, there was still the challenge of filling large environments with regionally correct vegetation, now that I understood what it should look like.
My solution was to create a custom tool, creatively named the Vegetation Tool™ (I’m not the best with creative naming). It allows our level designer, Luke, to paint in the density of vegetation across the scene, and then spawn vegetation according to a pre-defined biome. These biomes are made of a list of regionally correct plants, debris, grass, rocks, etc, and some information describing how they grow and are scattered. This creates a non-destructive workflow; it ensures everything is editable, reversible, and allows the art team to work on or change any individual assets without level design having to redo vegetation every time (just regenerate vegetation with the updated biome). Here’s how that works in practice:
The gray cubes show the painted vegetation density, which can be painted either by hand or according to a pattern as shown above. The tool in the video is using a fairly dense green biome, but this can be modified or swapped out for any other biome set, and just regenerated.
The generation process roughly simulates the root density of each plant, and how various plants form clumps as a result, collecting loose dirt, debris, and twigs around them. The generation algorithm can also adapt to other trees or objects that have been manually placed in a level if more artistic control is needed over their exact locations.
Creating this tool has allowed us to rapidly fill levels with the patchy, scrubby vegetation that’s common across the outback, and facilitates the workflow between level design and art production. However, placing vegetation is only part of the process: it still needed to be animated.
(Beware, there be technical dragons ahead)
WIND
Realistic wind animation proved to be a challenge, and the first version I came up with looked laughably like seaweed rippling underwater. However, we needed something with sufficiently realistic motion, customizability according to environment or game needs, and something that wasn’t too much of a headache for the art team to create models and textures for. Taking inspiration from a GDC talk that Guerilla Games presented on the subject, I came up with the current system.
First, there’s a global wind manager that controls the direction and strength of the wind in every scene. This allows each location to have different settings, and for those settings to be changed if, say, a dust devil or sand storm rolls in mid-quest. Below is an example of what the primary wind vector looks like in-scene:
Technical visualization or you shouldn’t have trusted that mushroom vendor?
The tree and vegetation models also have information baked into their vertex color channels: the red channel contains a mask, used if we’re animating cloth or something other than vegetation; the green channel contains an index value for each separate part of the tree, and the blue channel contains a value for overall flexibility. These are quick and easy to apply to each model, and the rest of the animation is done in a shader.
The shader calculates bending, based on height and flexibility, as well as detailed fine movements for leaves, small branches, and grass. The amount of bending is controlled by the global wind settings and texture, and offset by the index in the green color channel, to give individual parts of the tree their own sway and non-uniform movement.
GRASS
One of the final steps in adding flora to our environments is adding grass. This posed a similar challenge to spawning vegetation, as it required an editable system that could be easily modified, but also quick to render to allow for thick fields in some of the lusher regions of the game. To this end I created the Grass Tool™ for easily painting grass into scenes, that can also be hooked up to the Vegetation Tool™ to automatically generate grass based on the same density settings as the rest of the environment uses. Additionally, the grass can be animated using the same global wind patterns as the rest of the vegetation, allowing for ripples of wind to flow through grassy fields.
No, I definitely haven’t spent hours drawing smiley faces with it, why do you ask
The difficult part with rendering grass is that in essence, GPUs can render lots of grass, really really fast, but the problem is that everything else about the grass (like where it is, how big it is, its rotation, etc) starts on the CPU, and getting it to the GPU is really slow. To solve this, the grass is rendered with GPU instancing, which effectively bundles up all the information about the grass into one package instead of a zillion small ones, and lets the GPU do what it does best and sort out all the information for each piece of grass.
To make it even faster, we can use a technique called CPU binning (tech artists have very fun lingo). This allows us to limit the size of the package the CPU passes to the GPU (as opposed to passing information about every bit of grass in a scene) by roughly guessing what the camera can see at any given moment. This allows us to have hundreds of thousands of grass cards in a scene with minimal performance impact.
TLDR: GPU go brrr, grass go zoom.
If you made it through all that, thanks for reading! And if you just skipped to the tldr, thanks as well, just a little bit less. Hopefully this article provided a little glimpse into some of the tech that makes Broken Roads tick, and exactly what on earth technical artists do anyway. :)
Ryan Gee, VFX & Technical Artist
Drop Bear Bytes
Dev Blog: Level Design With an Art Perspective
Hello, all! I’m Luke, the Level Designer of Broken Roads, and today I’ll be going over some of the things I use from an art perspective when creating and assembling levels for Broken Roads!
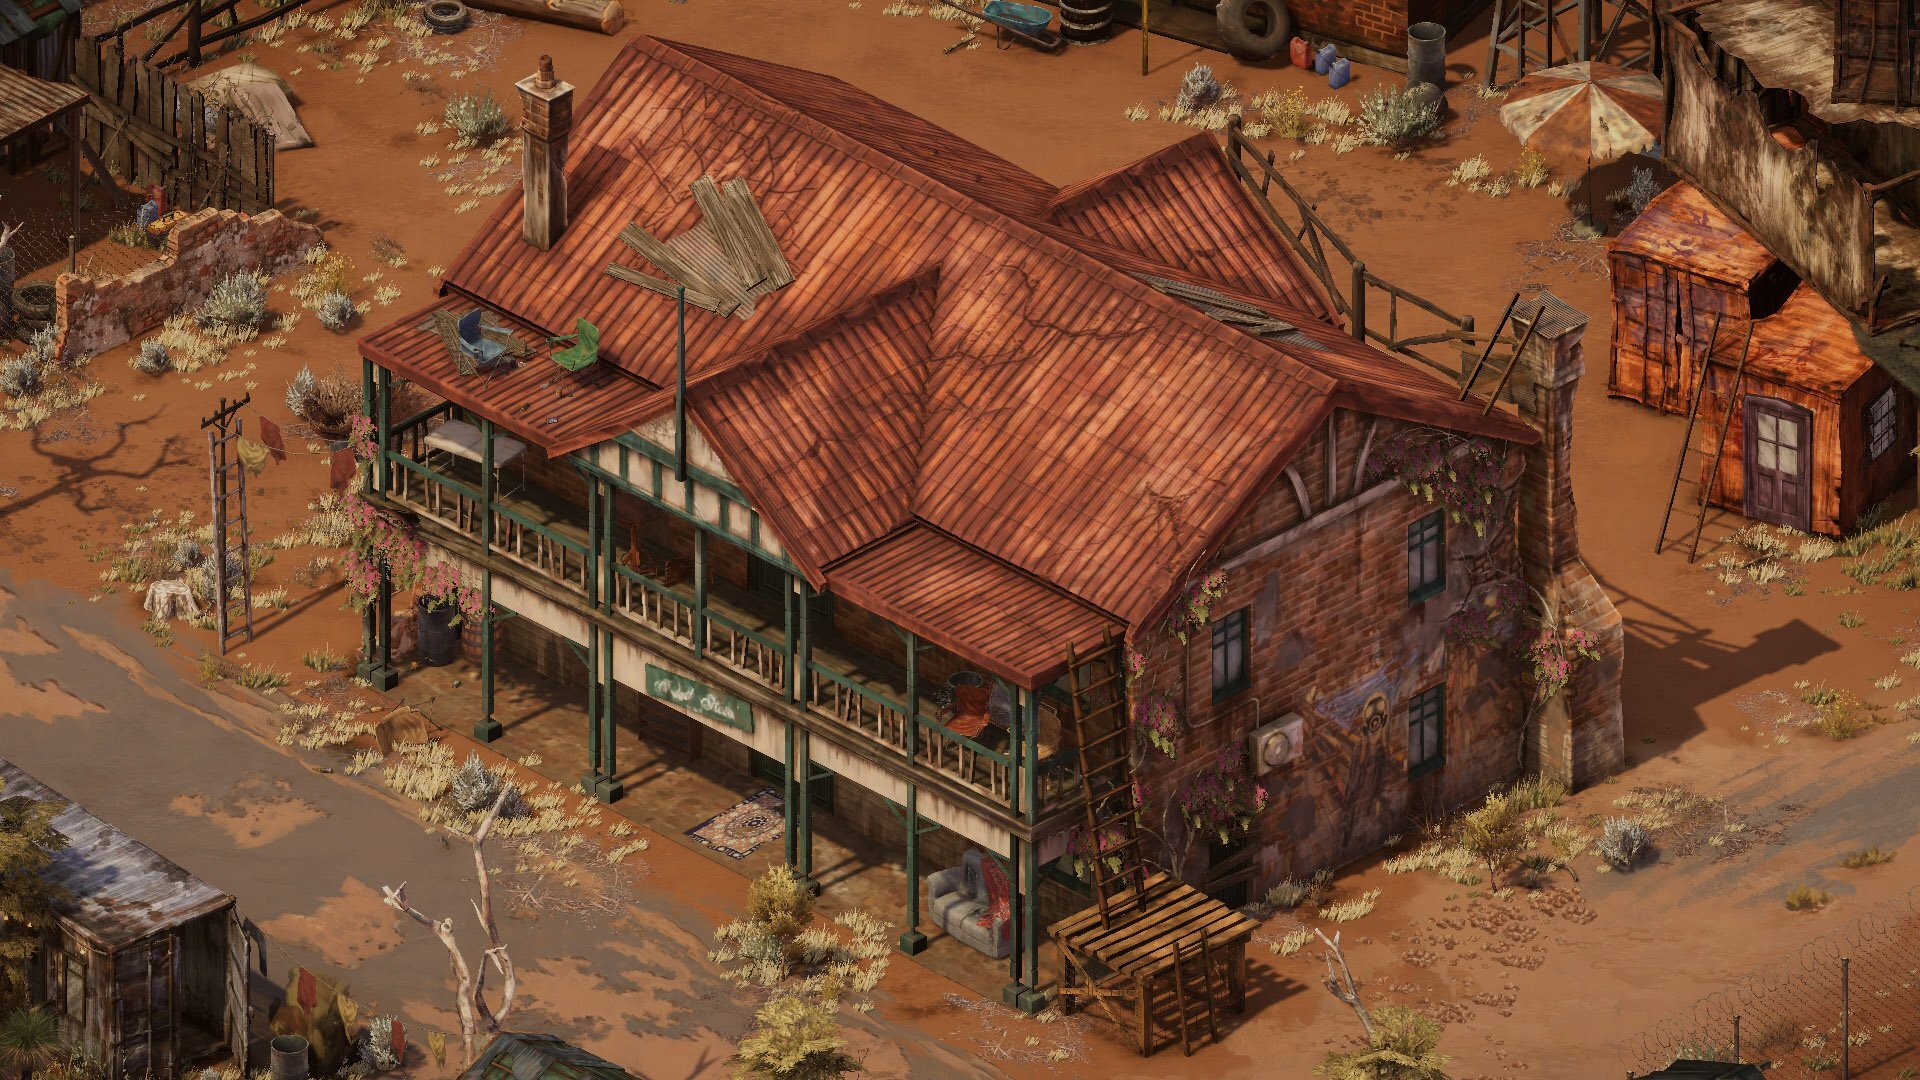
We’ll be looking at some of the props and objects around the Ardath Hotel. Ardath is a small settlement filled with thugs, thieves, artists, and those who were rejected from other societies. These people are bandits, pillagers, and raiders, but they feel truly free here in Ardath.
The Ardath Hotel is of course based on the real-world equivalent in the actual location of Ardath in Western Australia. The 3D model of the building was done by Bianca Roux, and the texturing was done by Sara Laubscher, both brought the building to life while giving it that Aussie post-apoc flair!

Photo from http://www.agathabertram.com/snapshot-the-ardath-pub/
TANGENTS
Firstly, I’ll go over something small I keep a keen eye out for when placing objects in a scene. When two separate lines interact with each other in a way that creates an unintended relationship between them, a tangent is formed. Tangents can sometimes be hard to notice at first but most will stick out like a sore thumb if they’re not kept in check. Let’s look at some examples:

You can see here that the edge of this bookshelf is aligned with the pillar of the building. The top shelf also lines up with the top of the verandah. This makes it look a bit awkward and like it’s almost part of the hotel, so let's rotate it and change its position.

We’ve now rotated it slightly to not align with the top of the verandah, and we’ve moved it away from the pillars. We’ve also made sure the edge of the shelf doesn’t line up with the sign on the front of the verandah. Better!
But that was a more obvious example - what about smaller tangents, like this one?

The top right corner of this table is barely aligning with the roof of the building, so we’ll make sure to move it away from the edge of the roof and rotate the table.

Now we’ve moved it to avoid the corner lining up with both the roof and the lines of the bricks behind it and made sure the legs don’t align with the pillar in the foreground. We also rotated it a bit more to break up the shapes, so let’s talk about that.
BREAKING UP SHAPES
In the previous screenshot, the table is surrounded by lots of straight lines and square shapes, so what I meant by “breaking up the shapes” was that we rotated the table in a way that avoided the table falling into the uniformity of those straight lines. This means the table pops out a bit more as its shape and orientation are different from the objects around it. Let's look at another example:

We have more square shapes and straight lines around here, so we avoid making more by having these ladders angled diagonally. It’s more interesting to look at and helps the ladders stand out a bit more. The camping chairs off to the side and the couch below also break up the shapes by adding curves and organic shapes to contrast against all of the hard edges in this screenshot.
CONTRAST
We can make certain props and objects stand out by contrasting them against other props or using certain coloured props. Let’s go back to those camping chairs from before:

The bin and the mirror behind these chairs allow them to stand out against the orange bricks of the building. Without them, the chairs blend in a bit too much.
We can also use props of certain colours that inherently contrast against their backdrop. Here are some more camping chairs, this time in blue and green against a red roof.

We could of course use green and blue camping chairs instead of having to put a mirror and a bin behind the red and tan ones, but variety is the spice of life, and it lets us have some fun with environmental storytelling. Speaking of which…
ENVIRONMENTAL STORYTELLING
Why is there a bin and a mirror there? Why are there chairs and beers on the roof? Was that a knife in the railing just before? These are all little details to give us some insight into how the people of Ardath like to live - carefree and dangerously. We previously saw ladders leading up to the roof, which is presumably how the chairs and beers got up there. Must be a nice view, but…

Accidents can happen. The empty beers might not be accidental though, they are an untidy bunch, judging by the smashed mirror and the dirty couch lying around.

When they do try to be clean, however, they make it fun. Unless you’re not fun and think climbing up a telephone pole just to hang some washing is “a hazard” or whatever.
That about wraps up what I wanted to show off in this blog post! Creating levels is a collaborative effort. Sara Laubscher lead the environment design and texture work, Bianca Roux modelled the 3D props of the level and Ryan Gee handled the scene lighting and vegetation, without them none of the locations in Broken Roads would be what they are. I’ve learned a lot working with the art team of Drop Bear Bytes, and I’m excited to see what more we can do and how far we can push the visuals of our levels!
Thanks so much for reading, we will see you again soon!
Sculpting the Characters in Broken Roads
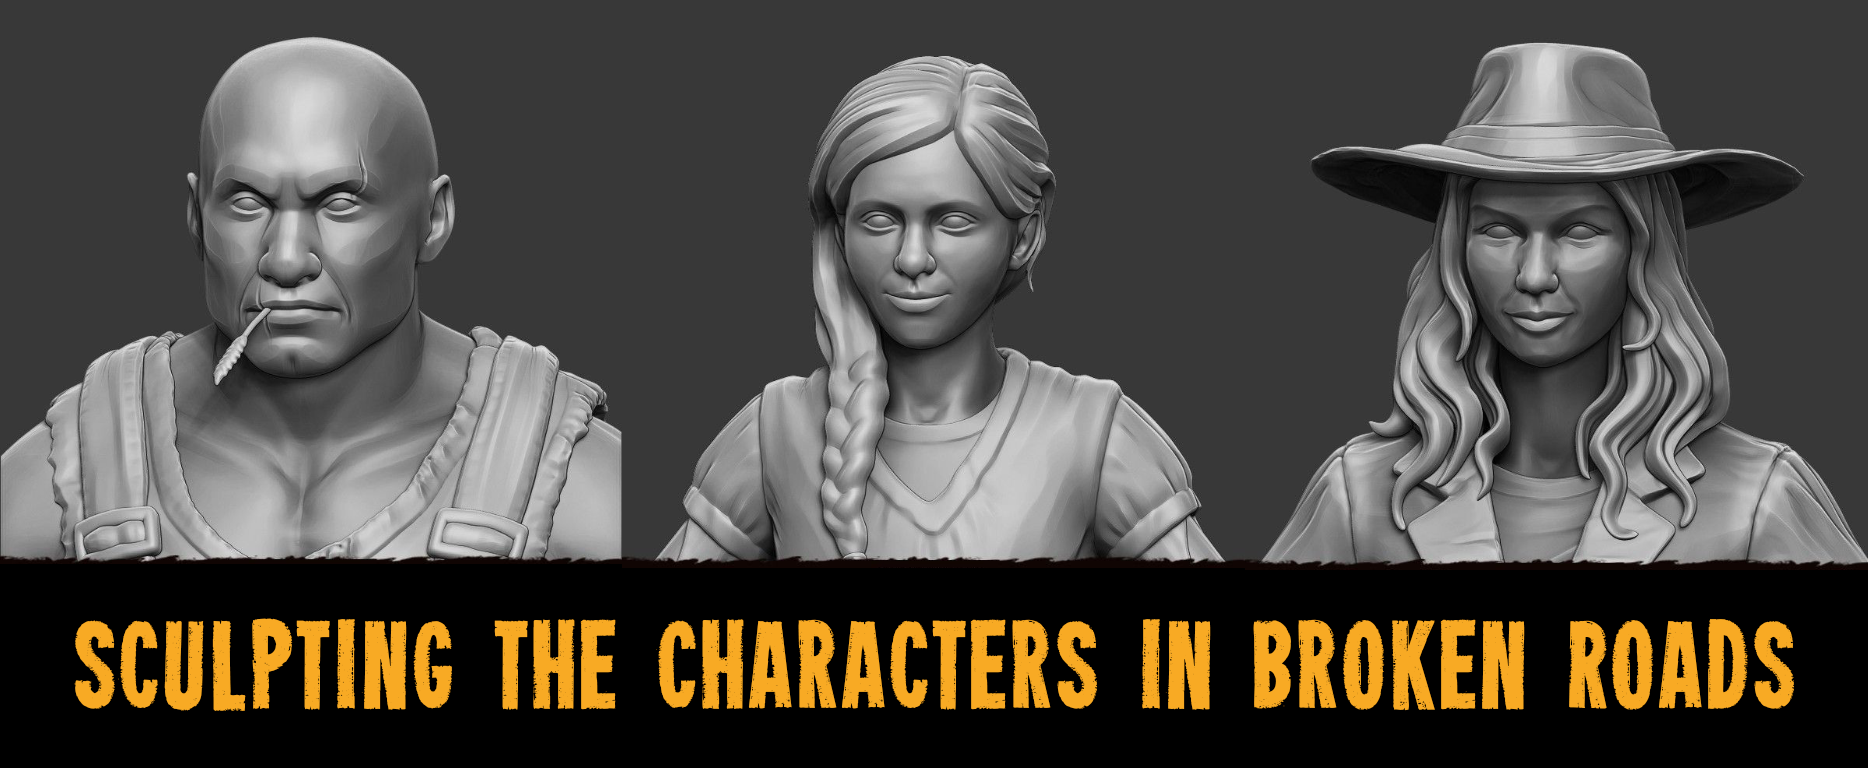
Bianca Roux is Drop Bear Bytes’ Lead Character Artist, a role that covers 3D modeling all the people, creatures and a good few buildings and props in the world of Broken Roads. This week, our Narrative Director, Leanne Taylor-Giles, spoke to Bianca about her work, her inspirations, the differences between working on films and games, and her penchant for True Crime Podcasts. Enjoy!

Lynn Henson face sculpt

Lynn Henson body sculpt

Lynn Henson in-game topology
How do you decide on what face to give a character? Sometimes the concept will just have a blank oval - what kind of references do you use, and how to do you find them?
Narrative will usually have an idea of who the character is based on, whether that be a celebrity or photo references on the internet. I’ll usually head over to pinterest and grab a few photos that interest me which would suit that particular character description. For Reverend Nate Blacke for example, I instantly thought of kind eyes, it was important for me to portray that. For Scary, I would look for references of body builders and people who look tough, his scars in particular would portray that he has been in fights. Each character tells a story with their facial expression, wrinkles, smile or frown, and it really helps to find reference images to base a face on.
What are some of the little details you're most proud of, on these or other characters?
Definitely the cloth work. I have really loved exploring the style for this game. There is a detailed, yet stylistic hard-edged approach which was a challenge to master when I started at Drop Bear Bytes, however practice has achieved some great rewards and I really love how the cloth work brings out details from an isometric perspective.

Reverend Blacke face sculpt

Reverend Blacke body sculpt

Reverend Blacke in-game topology
What’s your favourite part of modelling a character? Getting started, adding fine details, somewhere in between?
The best part is adding detail and seeing the character come to life. In the initial stage of sculpting there is a lot of figuring out and proportion checking, adding detail is when we get to the fun stuff. It makes me really excited!
Is there a particular tool or process you find yourself using more often than others? If so, what is it, and what makes it the mainstay of your workflow?
The Orb-brushes by Michael Vicente is what I swear by. These brushes lend well particularly to this project because of the hard-edged style. I highly recommend purchasing these brushes if you’re wanting to achieve a look and feel similar to the characters in Broken Roads.

Scary face sculpt

Scary body sculpt

Scary in-game topology
Do you listen to anything in particular while sculpting? If so, do you find that it changes by character, or by in-game location, or more by mood?
I have to embarrassingly admit that I listen to a lot of True Crime. My personal favourite is Dateline. :D
It might be quite fitting for the mood considering that this is a post-apocolyptic game haha.
How do you get into a ‘flow state’? Writers often talk about getting over or past writer’s block, but other disciplines have the same struggles. What are some of your tricks for getting yourself motivated on low-energy days?
Funny enough this does relate to the previous question. Most people would think that music might inspire them artistically, for me it’s getting into a serious mindset and listening to podcasts. If I were to listen to music I might get distracted and start dancing. :) Coffee is also a favourite go-to.

Little girl face sculpt

Little girl body sculpt

Little girl in-game topology
Your models are beautifully detailled. How do you retain that detail when you retopologise to a lower-poly version?
I use Normal, Ambient Occlusion and Curvature Maps on the models. The High-Resolution detail is baked onto a low topology version and from that, these maps are extracted.
How different is it working on a game to working on a film? Are models for film optimised in the same way? How do you feel about the optimisation/de-rezzing process in general?
Models for film and games are optimised very differently. With film there is the luxury of pre-rendering the frames, whereas in gaming it is mostly real-time rendering. The Models have to be optimised so that it doesn’t put too much strain on a players computer or console. Therefore the Models have to have far less polygons than a Model for film.
Regarding the question about my feelings about optimisation in general, for each project I adapt and tune into the project’s needs, so I have no qualms either way. :)

Honest Wade face sculpt

Honest Wade body sculpt

Honest Wade in-game topology
If you could share one piece of advice with up-and-coming character or creature modellers, what would it be?
Practice and Resilience. It is a tough industry to break into, especially when you are starting out. You will be comparing yourself to industry experts, which you shouldn’t do. Rather strive to be as skilled as them one day and practice every day at bettering your craft. Keep your mind thirsty and constantly be seeking out tutorials, feed back and advice from more experienced artists.
Follow Bianca on Twitter at https://twitter.com/BiancaRoux4, and visit her Artstation here: https://www.artstation.com/missbee
Broken Roads' Narrative Director and Creative Lead talk story
Topics include: writing for Planescape and Dungeons & Dragons, good writing in videogames, details of Broken Roads' apocalypse, Half Life's immersive narrative, Transistor's combination of mechanics and narrative, remote work across multiple time zones, assuming good intentions in online communications, Leanne having to 'Aussie-fy' non-Australians' writing, gecko egg sushi, dealing with writer's block, what happens at 3pm on October 4th 2036, and much more.
TIMESTAMPS:
00:00 Broken Roads' Narrative Director and Creative Lead talk story
01:12 How did you become a writer and what are some of your influences?
02:51 What are some of the best written games?
05:37 The writing team are in various time zones. How have you made this work?
08:34 Colin, how have you researched Australia, and what is something you've learned that you find fascinating?
09:51 Leanne, what did you miss about Australia while living in Canada?
10:53 Can you give any details on the apocalypse in Broken Roads?
12:05 You both worked on Torment Tides of Numenera. What's it like to be working together again on another traditional-style CRPG?
15:35 What have been some of your influences for Broken Roads?
18:30 What are some of the challenges in writing about a post-apocalyptic world - a genre that's been explored so much already?
21:48 How do you deal with writer's block?
25:46 What's a highlight of your career, or a personal achievement that you're proud of?
27:47 What advice do you have for aspiring writers?
Huge thanks to Tim Sunderland, Drop Bear Bytes' Sound Designer & Composer, for recording and editing this interview!
Join the Drop Bear Bytes discord at https://discord.gg/W9UZzrk
Follow on Twitter at https://twitter.com/dropbearbytes
Follow on Instagram at https://www.instagram.com/dropbearbytes
New environment screens and concept work
We are experimenting with different ground layer styles, adding details to existing props, some possible post-processing and full-screen effects, and improvements to the edges of interior maps (as shown in the pub scene below). Enjoy!
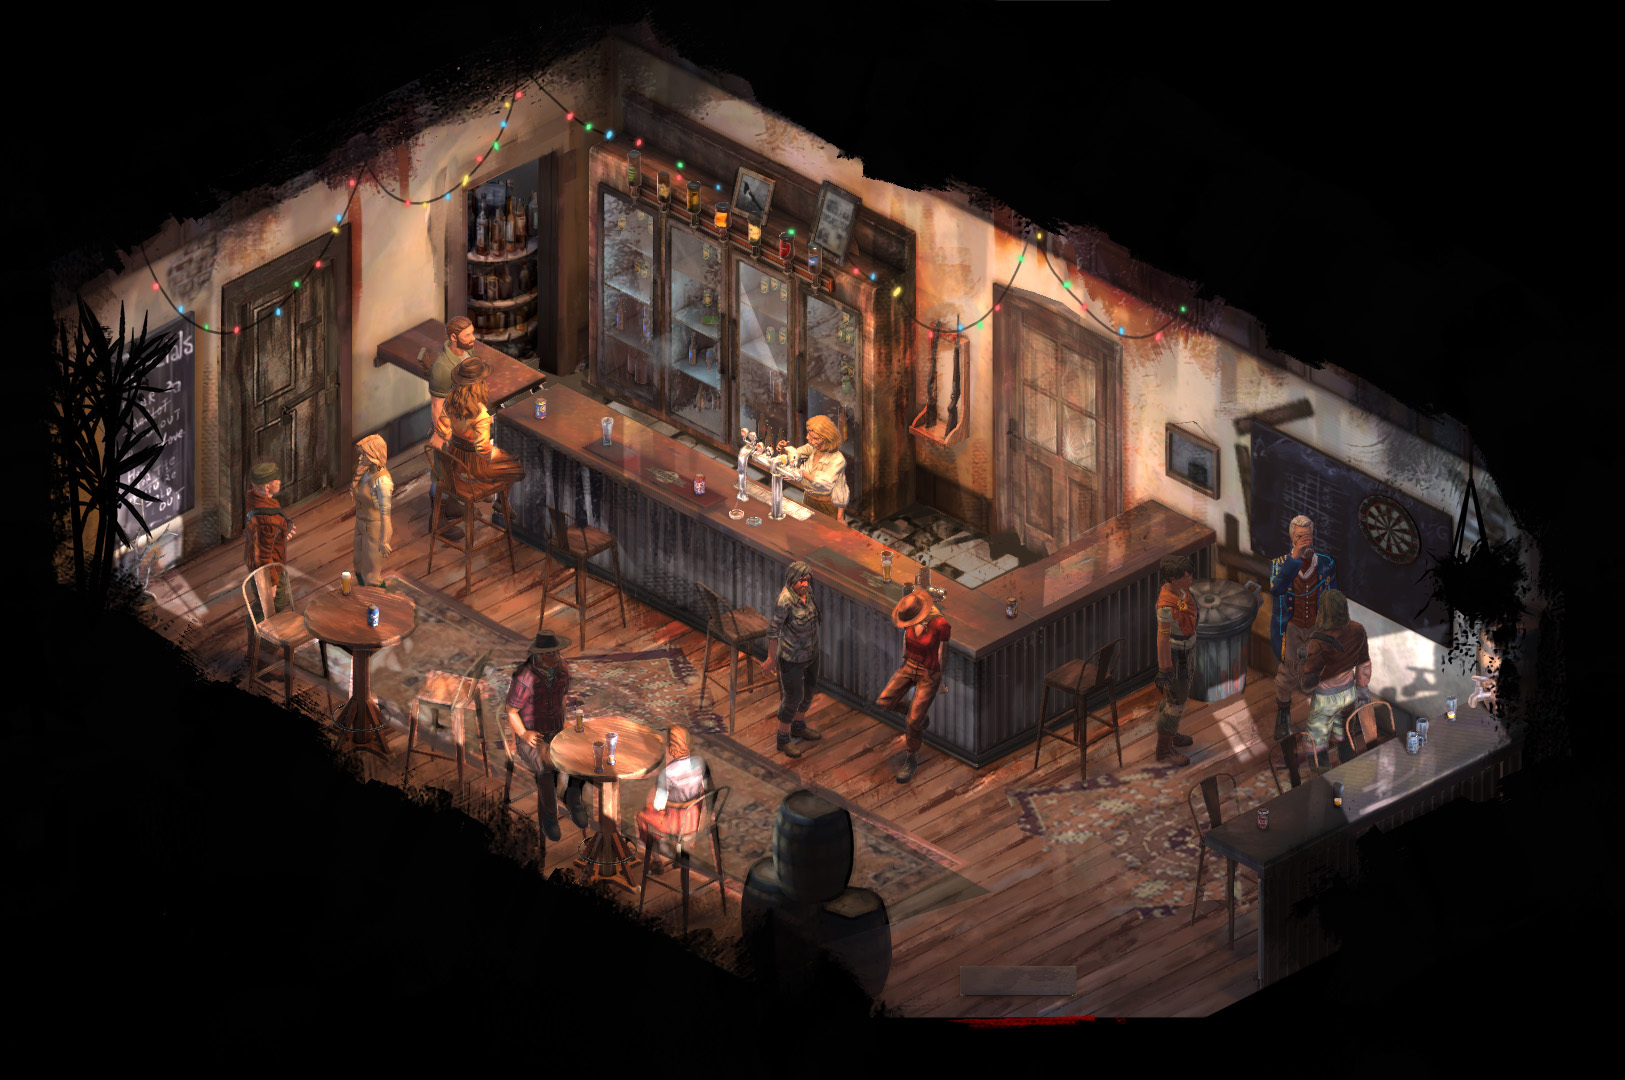
Brookton Pub interior

Brookton Town

Taylor's Farm - Storage Area

Brookton Clinic

Kokeby Waystation

Taylor's Farm - Sheep Pen
Join our growing community on Discord.
Add Broken Roads to your Steam wishlist!
Follow Broken Roads on Twitter.