

Endzone: A World Apart
Keep an eye out for the demo previews
The very-first public demo for Endzone 2 is just around the corner. To help you pass the time until June 7, you should definitely check out Twitch for some exclusive livestreams as well as YouTube for those premiere gameplay videos these coming days.
We'll drop some additional info about the demo and what to expect on June 7. Until then, go and check out those fantastic creators and checkout the Endzone 2 demo.
Stay safe, everyone! Now go and check them out.
https://store.steampowered.com/app/2144640/Endzone_2/
Developer Blog Post - Production Chains


- I can totally understand that you don't want to traverse the entire settlement to gather the resources you need for your work, but constructing your toolmaker right beside our residential area? It's all loud and dirty here now. I don't like living like this.. -

We briefly discussed how production chains work in a past Devlog. Let's dive deeper in this topic now. In Endzone 2, we focus on giving each resource a significant role in the game. Early game resources remain important as you progressively unlock and need new ones. The reason lies in how they are interconnected throughout the game. While wood is primarily crucial for constructing buildings early on, it becomes less important in that regard once a settlement has a stable base. This is why wood is a component in nearly every production chain, ensuring that collecting it still feels essential.
Let’s break this down further with an example:
The Woodcutter only needs a nearby environmental resource, which naturally is a lush forest. As long as trees are present, a Woodcutter can produce wood, which can then be used to construct new buildings.

For a very basic early game building, this level of complexity is more than enough. But let's move a bit further down the progression. Soon, we will need a Coalmaker, as coal is a frequently used resource in many production chains, like protective clothing, iron smelting and many more. The Coalmaker requires wood to function. So, besides its construction costs, wood becomes a resource that is continuously consumed to produce coal.
Let's take a look at their UI in the game to explain this further:


Comparing the UIs of these buildings, which are placed next to each other, reveals a few things:
- The Woodcutter produces about four times as much wood as the Coalmaker produces coal in the same amount of time, even if the full workforce is employed.
- The Coalmaker is connected to a road network, which boosts its efficiency; we'll get to that in a moment.
- The required resource is now wood, which has a small green "+" icon that I will explain shortly.
This demonstrates that wood is a highly essential resource, even for basic production chains. Naturally, we will need a lot of wood, but we don't want to continuously spam the Woodcutter building. We can increase the efficiency of each building by fulfilling a few criteria. The graphic below shows factors that impact efficiency.

As you can see, there are numerous ways to increase the efficiency of a single building. Most of these methods check the building's radius to see if certain criteria are met within this area. To boost the Coalmaker's efficiency, we should place it next to the Woodcutter. Both buildings should also be near storage facilities, such as the Town Center or a Material Depot, and have nearby housing of the economic type. The final step is to connect the buildings and the Town Center with a road network. This setup can boost the Coalmaker's efficiency up to 150%. Of course, the Woodcutter would only add up to 130% as there is no base resource from another building it could profit from.

Now that we have covered the basic functionality, let's look at a more complex example:

To produce copper, a vast number of different steps need to be fulfilled. As you can see, wood is part of four different substeps in the chain, highlighting its importance even in a late-game scenario where maintaining a constant supply is crucial.
The screenshot below shows how such a production chain could be placed if enough space is available. Note however, that this particular zone did not even have proper resource slots for iron or even copper, so 2 mines are still missing here to even make it function. This particular case would require to construct mines on a different zone that has copper and iron available and transfer them via Trading Routes.

To summarize the key points:
- Buildings can exceed 100% efficiency if certain criteria are met.
- These criteria usually involve placing buildings of the same production chain close to each other.
- Road networks and storage buildings, as well as housing of the same settlement branch, also increase efficiency.
- Early game resources remain important for the production of late-game resources.
- Space is limited. Adjust the placement of your buildings based on which resource is needed the most.
Additionally:
- Houses from different settlement branches do not like being near production buildings that pollute the air, such as a Coalmaker or a Copper Smelter.
- Space is not only limited, but different ground types might restrict your building plans further. Remember that fertile soil and swamp areas are required for some buildings to be placed.
Don't forget:
A free Demo for Endzone 2 will be available starting June 7!
You call yourself a true city-builder enthusiast? Tell us what this production chain is for in the comments!

https://store.steampowered.com/app/2144640/Endzone_2/
As Discord is our main platform for feedback and discussion within the community, we highly recommend joining us and sharing your feedback there.


Demo is coming soon!
Today, we're happy to announce that the official demo for Endzone 2 is about to happen soon! Be prepared to experience the highly anticipated sequel to Endzone - A World Apart with the very first publicly available demo on June 7.
The demo includes the sandbox mode as well as a comprehensive tutorial. Oh, before we forget, you can also unlock an exclusive in-game achievement in the demo to upgrade a cosmetic item available at the game's Early Access release. We'll keep you posted about this, for sure!
Here's a little treat for you:
Stay tuned for more infos closer to the demo's release and event start.
Developer Blog Post - Ground Types & Mines
Introduction
- "The soil has suffered greatly over the years. We must tread cautiously in choosing where to sow our seeds. The land is barren, devoid of nourishment. I ponder whether this plateau holds the last vestiges of fertility, where life may yet thrive." -
To start of, we need to explain a few mechanics in Endzone 2. Zones, or the plateaus that you settle on, are predetermined terrain stamps created by us, while the overall map generation is procedural. This means that each seed selected for a new session has a slight chance of containing a certain zone you've encountered before, but its position and even its existence are random.
We classify zones into three types and three sectors, which divide the playable map by the large river in the badlands. New Sectors are only accessible through an Expedition that involves repairing the bridge to cross the river.


There are Small, Medium, and Large zones, and each of them can appear in any sector. However, as the sector number increases, the more exclusive resources the zone can contain, while also being more challenging to navigate.

Screenshot taken from in-game view of the Map with a detached Camera. Only for preview purposes.
Each zone can feature different Ground Types, Forests, Lakes, Mines, Ramps, and Ruins. While we can designate the area where certain parameters will spawn during map generation, we cannot determine their exact shape, distribution, quantity, or which specific Ground Types, Mines or Ruins will appear. However, we do background checks to adjust the ground types, mine placements, and difficulty levels of the zones based on the sector they spawn in. Essentially, this means that a zone you're familiar with may have different conditions in another playthrough.
You always start in Sector I, which does not contain certain Ground Types and Resource Slots such as Iodine for example. So if you happen to encounter a zone in a different playthrough later on in Sector II or III it certainly might have different Ground Types or Resource Slots that were different before, but the zone shape and distribution remains the same.
Ground Types
There are 8 different ground types that influence where buildings can be placed and what resources can be harvested. Here's a breakdown of each ground type and its significance:
- Water:
Although not a ground type per se, lakes determine where certain buildings can be constructed. Some structures require placement on a lake shore, while others might need proximity to a water source for functionality.


- Mountain:
Similar to water, mountains aren't buildable areas but play a role in determining where specific buildings can be situated. Certain structures might require placement on a mountain slope for optimal functionality.

- Fertile Soil:
This ground type is crucial for agricultural activities, as it's where crops can be cultivated. Farms require fertile soil to grow crops effectively, so managing the availability of fertile soil within a zone is essential for sustaining food production.

- Swamp:
Like fertile soil, the swamp area has its unique set of buildings and resources. For example, the Swamp Farm specializes in cultivating herbs, requiring swamp ground type for optimal growth. Additionally, wells placed in the swamp area can extract water from the ground.

- Forest:
Forests provide an environment for trees and berry bushes to grow. While not restricting building placement, forests are essential for woodcutting and gathering resources. Placing buildings like Woodcutters and Gathering Huts near forests maximizes resource extraction efficiency.

Pro Tip: Trees don't naturally regenerate. To ensure a sustainable source of timber, players need to construct a Tree Nursery to facilitate reforestation efforts. - Meadow:
The default ground type, meadows allow for unrestricted building placement. Players can construct buildings anywhere within meadow areas without any specific limitations.

- Intermediate Area (Badlands):
Situated between different zones, the intermediate area, also known as Badlands, contains remnants of past civilizations in the form of ruins. While players cannot construct buildings in the Badlands, they can freely explore the area using vehicles, uncovering secrets hidden within the ruins and gather leftover resources, meet traders and more.

- Contaminated Area:
The Contaminated Area ground type introduces a unique and mysterious element to Groundtypes, presenting players with intriguing possibilities for gameplay mechanics and narrative depth. While its exact implementation is still being explored, here are a few potential ideas to consider:

- Environmental Hazard: Contaminated areas could pose a significant threat to players' settlements, requiring them to invest resources in cleaning up the contamination to expand their territory or access valuable resources. This could involve constructing specialized buildings or deploying units to mitigate the contamination's effects over time.
- Special Resources: Alternatively, contaminated areas could harbor rare and valuable resources that cannot be found elsewhere on the map. Players may need to develop advanced technologies or employ specialized techniques to extract these resources safely, balancing the risks of contamination with the rewards of accessing unique materials.
- Dynamic Evolution: Contaminated areas could evolve and change over time based on players' actions and decisions, leading to dynamic shifts in gameplay and narrative outcomes. For example, successful efforts to clean up contamination might result in the area becoming habitable and fertile once again, while neglect or mismanagement could lead to further deterioration and new challenges for players to overcome.
We are open to any suggestions on how this feature could be implemented into the game. So if you feel creative, hop on our Discord Server and let us know what you think.
- Environmental Hazard: Contaminated areas could pose a significant threat to players' settlements, requiring them to invest resources in cleaning up the contamination to expand their territory or access valuable resources. This could involve constructing specialized buildings or deploying units to mitigate the contamination's effects over time.
Resource Slots
Apart from the Ground Types, which mainly concern players within a zone, there are also Resource Slots and their corresponding mines. Resource Slots are designated areas where a related building's radius must be placed to generate that resource. Most production buildings have a radius around them, which is important to consider for certain boosting buildings located nearby, connected roads, and other factors. For Resource Slots and Mines, this radius only needs to encompass the cell in which the resource is located. In this example below, we place the Claypit directly on top of the Clay Slot.


There are currently 5 different resources that can be mined. However, there is another type of Mine that we will discuss soon.
- Clay
- Copper
- Iron
- Lead
- Iodine
In the case of the Iodine mine, similar to the Claypit, the building needs to be placed close to the resource slot, which, for this type of mine, is located on a mountain slope.

Resource Mines
Now, we've nearly wrapped up everything, with just one thing left to mention. Although constructing buildings in the Badlands is not directly possible, there is a unique way to utilize the ruins found there. These ruins can be transformed into what we call "Resource Mines." Initially, these ruins contain a playable expedition. Upon successful completion of the expedition, the ruins are converted into a building that generates the related resource. Players can then visit these mines repeatedly to collect resources, even outside of their settlement, adding a strategic element to exploration and resource management.


Currently there are 2 different Resource Mines in the Badlands: The Claypit and the Scrapyard. Throughout the Early Access we are aiming to implement more ruins that can potentially become a Resource Mine.
https://store.steampowered.com/app/2144640/Endzone_2/
As Discord is our main platform for feedback and discussion within the community, we highly recommend joining us and sharing your feedback there.
Developer Blog Post - Weather Conditions
- "Is that another rain cloud, or is a sandstorm rolling towards us? The weather's as unpredictable as ever in these times. It'll be a while before we can figure out what the next days have in store for us. Let's just cross our fingers and hope we make it through that long..." -
The weather in Endzone 2 isn't just a visual backdrop; it significantly impacts your settlement and game strategy. Immersion in natural weather effects is crucial to us, ensuring they feel as impactful as they do in real life. As a survival city-builder, natural disasters must challenge you as the leader of your colony and threaten the supply of essential resources such as water and food.
For the Early Access phase, we will be featuring three primary weather conditions: clear skies, heavy rains, and drought. These conditions can further be subdivided into more nuanced factors. In essence, weather in Endzone 2 is not just a backdrop but a dynamic force that shapes the survival challenges you face and the decisions you make as the leader of your colony. Your ability to effectively manage and adapt to these weather-related challenges will determine the fate of your settlement.
How do the different conditions influence your settlement?
Clear Sky

While a clear sky may not be considered a distinct weather condition, it serves as the default state in Endzone 2. Characterized by its absence of significant weather events, a clear sky doesn't inherently provide any positive or negative impacts on your settlement. However, it's the most common weather pattern you'll encounter. Despite its neutrality, a clear sky plays a crucial role in providing a baseline against which to contrast other weather conditions. Its presence sets the stage for the dynamic interplay of weather phenomena, highlighting the contrast between calm and tumultuous environmental states within the game world.
Rain

Rain in Endzone 2 can have both positive and negative impacts on your settlement. On the positive side, regular rain significantly boosts crop growth, effectively doubling productivity and ensuring an ample food supply for your settlers. However, rain isn't always benign; toxic rain poses a serious threat. Toxic rain elevates radiation levels in the soil, which can have dire consequences for your settlement. You must ensure that your settlers are equipped with sufficient protective gear. Failure to do so may result in radiation sickness, gradually weakening your settlers and compromising their health.

Tailor and Weaver working on Protective Clothing
Drought

Drought, on the other hand, presents its own set of challenges. A drought parches the land, causing crops to wither and lakes to dry up. This scarcity of food and water can quickly escalate into a crisis for your settlement. Your survival hinges on finding alternative sources of sustenance. You may need to seek assistance from neighboring settlements that can provide additional food and water resources. Alternatively, if you're fortunate enough to have swamp soil in your settlement, you can construct a well to access groundwater and mitigate the effects of the drought. However, navigating through a drought requires careful planning and resource management to ensure the survival of your settlement.


Well and Upgraded Well pumping water during a Drought
While rain only affects specific plateaus, a drought is affecting a whole sector! Keep that in mind when stockpiling for the event.
Sandstorm

While not a standalone weather condition, sandstorms can occur during droughts in Endzone 2, posing additional challenges to your settlement. These violent storms wreak havoc, damaging buildings and leaving them covered in sand, significantly reducing their efficiency. The aftermath of a sandstorm requires immediate attention and resources to repair and clean affected structures to maintain the functionality of your settlement. Sandstorms, occurring in tandem with droughts, compound the difficulties faced by your colony, underscoring the importance of resilience and preparedness in the face of environmental adversity.
We're planning up to elevate the significance of weather in Endzone 2 by introducing additional mechanics for each condition. These mechanics will enable players to either capitalize on favorable weather or implement crucial counterplay strategies to mitigate the impacts of adverse conditions. While we're unable to delve deeper into the weather mechanic prior to the Early Access phase, we're eagerly seeking feedback from our community.
We welcome any insights regarding potential disasters, strategies to navigate them effectively, or even suggestions for enhancing the visual representation of weather in the game. If you're feeling inspired, we encourage you to join our Discord server by clicking the link down below and utilize our ticket system to provide valuable feedback. We're closely monitoring input from dedicated users for potential inclusion in closed feedback rounds or even further development iterations. Your contributions are integral to shaping the future of Endzone 2, and we greatly appreciate your participation in this collaborative process.
https://store.steampowered.com/app/2144640/Endzone_2/
As Discord is our main platform for feedback and discussion within the community, we highly recommend joining us and sharing your feedback there.
New Screenshots & 175k Wishlist Milestone
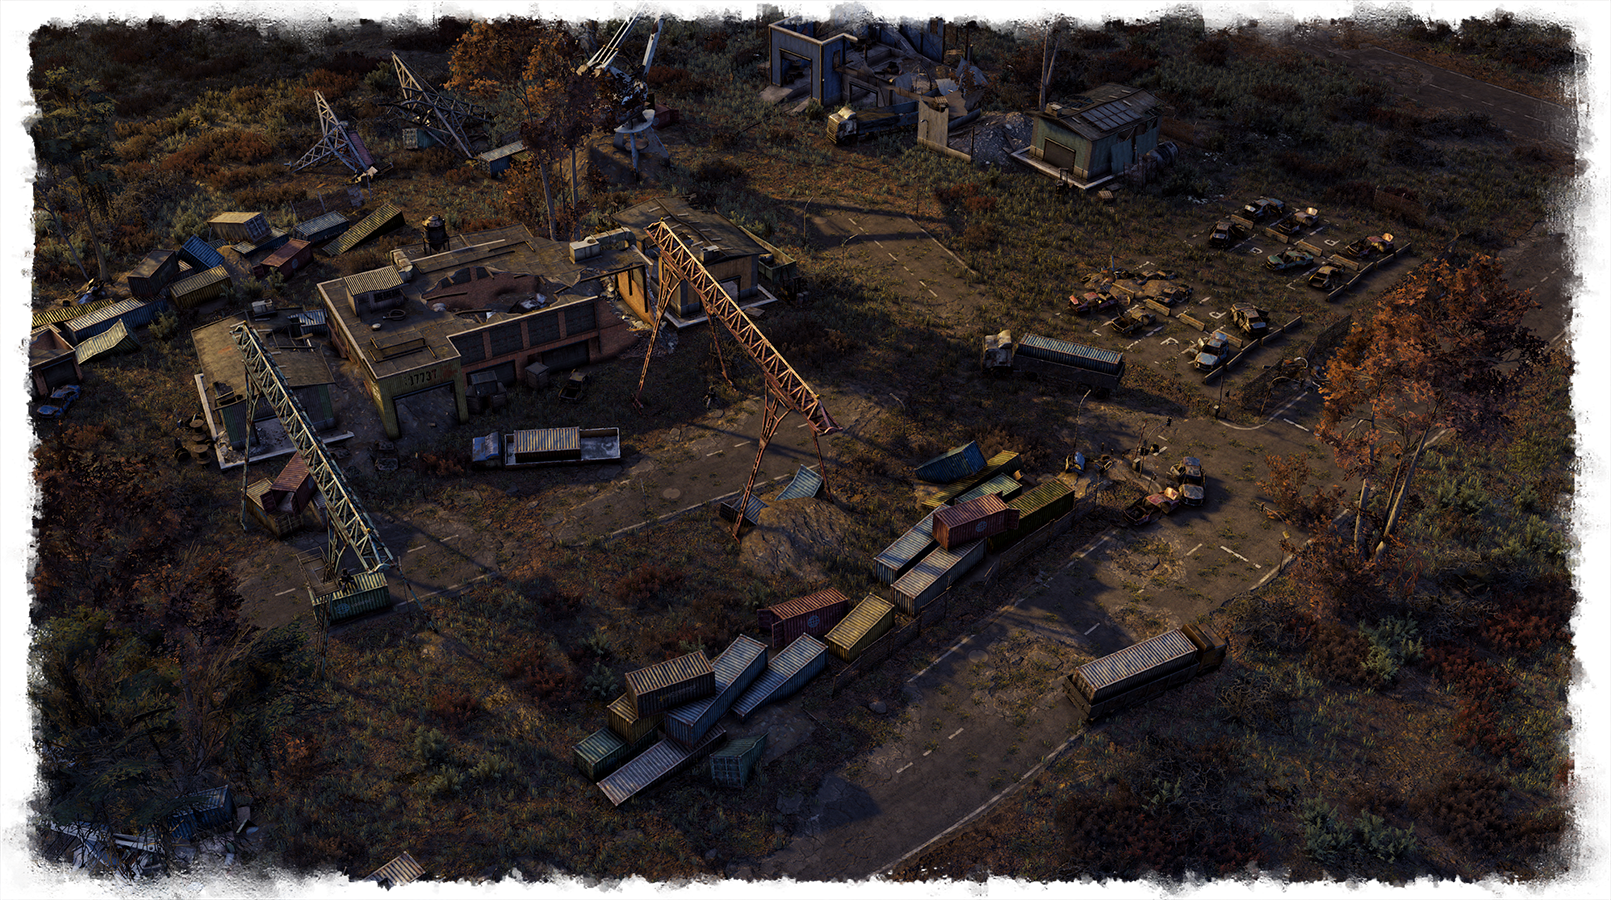
we've just released a bunch of new screenshots for Endzone 2, showing the current state of the game. From flourishing nature shots to grey and drab rainy seasons to dusty sandstorms; and we don't want to keep you away from those lovely sunsets, of course.
We hope you'll enjoy them! Here's a small selection - the full batch is available on the game's store page:


On top of the new screenshots, we're happy to celebrate yet another wishlist milestone: 175k - CHECK!
The recently aired Triple-i Initiative showcase has been a blast, and the additional exposure draw some new survivors to this place. Ultimately boosting our wishlists to more than 175k in like no time. We're baffled and more than thankful.
Stay safe, everyone.
https://store.steampowered.com/app/2144640/Endzone_2/
Developer Blog Post - Settlement Branches and Building Placement
- "I wouldn't have imagined seeing a settlement like this just a few miles from here. And you're supplying yourself with just wells in that swamp? It's amazing to see how we all develop our very own strategies to survive out here." -
Research
Endzone 2 allows you to claim, create, and manage multiple settlements. Settlements or Zones can only be built on plateaus. Each settlement has a certain progression for each specialization or "Settlement Branch" that essentially provides feedback about which buildings of which category are most prominent there. While this can naturally vary, the more you progress in the game, the more specialized certain zones may become. Some advanced buildings are only available after at least one zone reaches a certain progression level for the relevant branch. Each building is always categorized in one of the available Settlement Branches and provides progression points, once built.
To make things clearer, here is a breakdown. Here are the 3 different settlement branches:
Disclaimer: The graphics showing the UI are in German, as this is our mother language. We naturally prioritize creating localization for German first, as we can add new text on the fly and ensure that everything new is localized correctly. This is needed for testing purposes.

When you reach a value of 10, you unlock your first available research. In this example, that would be Advanced Housing. These buildings allow for a higher settler capacity and also provide a buff to nearby buildings of the economy type. At a value of 15, the Upgraded Material Storage can be researched and so forth. You can observe how advancing in multiple branches at a time is possible.

Every building is assigned into one of these three categories. However, it's crucial to note that each progression only allows for researching the new buildings but doesn't unlock them automatically.

In addition to resource costs, some technologies require Knowledge points, which can be obtained through expeditions. These points cannot be generated by a building but need to be manually collected. To do so, you will need to send your explorers to an expedition and progress until you reach a certain threshold.

It's important to plan ahead for your settlements, both in terms of space to build on the zone and the availability of certain resources and ground types to determine, which buildings need to be prioritized in research. Some zones are better suited to ecological use, while others profit from economic specialization.
Building Placement
The simplest way to boost production of a branch is to place the correct housing type near a production building of said type. In addition, it is helpful to place the right type of housing near certain production buildings to avoid any negative effects. In this example, you can see how the housing below the selected coal maker is marked in red. Since the housing is of the ecological type and the coal maker creates a lot of filth in its production, the inhabitants are unhappy.

Production chains are not only important on paper. This means that in order to maximize your production efficiency you need to plan where to construct your buildings. This is important in relation to the resources it needs, as well as which resources it is providing. Further below, you can see how the Tool Maker has the Scrapyard, which produces scrap, and the Woodcutter, which produces wood, both in the direct vicinity of itself. This is beneficial because it requires both resources to craft tools. It is also connected to a storage, in this case, the Town Center, and a Road that connects both with each other. This, along with housing of the economy type in proximity, provides the maximum production value this building can possibly have.

Here are 2 more examples of complex production chains in Endzone 2. It's important to note, that buildings can only provide a boost to a higher graded building in the chain. This means, that a Wood Cutter does boost a Coal Maker, if they are in proximity, but not the other way round.

Production Chain of Coal Mask and Production Chain of Lead
https://store.steampowered.com/app/2144640/Endzone_2/
As Discord is our main platform for feedback and discussion within the community, we highly recommend joining us and sharing your feedback there.
Endzone triple-i Sale + Gameplay Trailer Endzone 2
You can get at a discounted price in celebration of the recent triple-i initiative showcase.
In case you missed it, you can rewatch it here and check out the first Endzone 2 gameplay trailer:
Also, if you can't get enough of Endzone, don't forget to wishlist Endzone 2:
https://store.steampowered.com/app/2144640/Endzone_2/
Thank you everyone!
Truly grateful - 150k Wishlists for Endzone 2 + First Gameplay Trailer
With your help we've recently surpassed the milestone of 150k wishlists on Steam for Endzone 2 - and we’re still going strong! There's still so much things about to happen on our road to release. We're truly grateful that you are part of our journey.
We can't wait to head into Early Access and shape Endzone 2 together with you; just like we did with Endzone - A World Apart a few years ago. This is gonna be an awesome ride.
Also, as part of today's Triple-i Initiative showcase, we're happy to show you a first glimpse at Endzone 2's gameplay:
Triple-i Initiative Steam Event Page
Keep the support coming and stay tuned for more!
Stay safe.
Developer Blog Post - Building Animations & Fluff Paths
- "It's the hustle and the collective aspiration to elevate what we possess. Witnessing the machines in operation - observing our companions harvesting berries and sifting through scrap - that's what ignites the drive within each of us. We all yearn for advancement and renewal." -
What makes a game feel alive?
A city-building strategy game thrives on detail. As a player, you want to be able to understand how your own settlement grows and comes to life. In addition to detailed buildings and a vibrant environment, animations play an immediate role in immersing oneself directly into the experience. In Endzone 2, it's important for us to continue visually depicting the lives of settlers and making all processes within the settlement readable and accessible. In this context, the term often used is the 'Wuselfaktor'. To achieve this, we have implemented several systems that enable animations of buildings and settlers within buildings.
Building Animations
To animate buildings in Endzone 2, certain precautions need to be taken. It's necessary for us to plan ahead in the visual design phase and make compromises. For instance, all objects intended to receive animation must already exist as separate sub-objects within the final building. An example of this would be the crucibles that hold the molten metal of the Iron Caster.

Upgraded Well placed on swamp area.
Furthermore, we've developed several custom tools that allow us to create keyframe animations for each individual object. This involves generating a bone object at the necessary location. Bones can be envisioned as actual skeletal structures. By manipulating the rotation and translation of these objects at any given point in time, we craft smooth animations for the various components of the building.

In-engine screenshot of the Iron Caster Building, showing the single Bone components and interface.

Brick Factory Animation.
By individually treating subcomponents within the building, highly complex workflows can be coordinated and depicted as animations. For instance, the complete animation of the Iron Caster spans nearly 60 seconds. However, we typically aim to keep each animation within a range of 15-30 seconds.

Iron Caster Animation.
Fluff Paths
"Fluff paths" is our system's term for a path that is detached from the actual navmesh. This allows settlers, who typically follow their established routes, to spontaneously wander into building areas and trigger scripted animations. An example of this would be the fishing hut. A settler walks from their house to the fishing hut, where, in a scripted animation, they take a fishing rod, walk to the front of the pier, and then cast their line. This is observable in the example below, where the orange area depicts the collision or “border” of the fishery and the small blue dots are visual pointers of the coordinates to the right. Each point represents a checkpoint of the path and a possible Animation that is played there.

In-engine screenshot of the Fishery, showing the available Fluff Paths.
The Fluff Path system is also used to specify where builders should stand to support the construction of a building with animations. Within Unity, we can precisely designate individual points or, in our case, "anchors," where a path ends and the construction animation can be played.
Another outstanding feature of our custom solution is the ability to directly link the number of possible Fluff paths and animations to the number of settlers working in a specific building. For instance, if the Iron Caster can accommodate up to 10 settlers working simultaneously, we can create 10 different animation presets. When a settler enters the building, they randomly select one of these presets. This approach allows us to showcase complex workflows while ensuring that settlers never get stuck in each other.
https://store.steampowered.com/app/2144640/Endzone_2/
As Discord is our main platform for feedback and discussion within the community, we highly recommend joining us and sharing your feedback there.
