As Hyper Light Breaker approaches its early access launch, one element of the game stands out as a unifying force across its vibrant biomes, high-stakes combat, and cooperative exploration: its music. Composed by Joel Corelitz (JC) and Troupe Gammage (TEG), the soundtrack is more than just background noise; it’s an integral part of the game’s atmosphere, storytelling, and emotional resonance. Here’s an inside account by Troupe and Joel about how the music of Breaker came to life.
What is the overall theme and vibe of the music in Breaker?
JC: Breaker’s music conveys hope and heroism in a desolate time and place. It’s ambient yet thematic, evocative yet distressed. It weaves its way into the fabric of the environment and shifts to match its purpose. In some areas, it feels like cultural music of the land’s inhabitants, while in others, it’s a melody carried by the wind.
Duality plays a significant role. I love intense music that also communicates deep emotion. One recurring motif, the Abyss King’s theme, embodies this duality—it’s intense, tragic, and heroic, carrying players from the title screen to epic battles.
How did you arrive at Breaker’s musical aesthetic?
JC: The discovery phase of composition is one of my favorites. It’s all about experimentation and play—finding what works and what doesn’t. We began with extended ambient pieces to evaluate in-game, iterating on elements like energy, theme, and production, particularly with different ways to “distress” the sound, until we landed on something that felt unique. Through that process, I think we created a really strong musical language for Breaker that is special and immediately recognizable - even if it’s just a simple piano chord.
How does collaboration work between composers?
JC: There are two of us—myself and Troupe Gammage. We each focused on different areas for the long form pieces and composed complimentary components of various musical systems. Our collaborative process has been so seamless that when we play the game, we often can’t remember who composed what!
How is the music in Breaker similar to and different from Drifter?
JC: It is an incredible honor to carry the Hyper Light legacy forward. We aimed to forge new creative territory, not simply create a replica of Drifter’s soundtrack. What I think made Drifter’s soundtrack so successful is the use of timeless, compelling compositions communicated with an interesting, original palette. We tried do the same thing, but completely unique to Breaker - drawing on a wide range of influences, from jazz fusion to neoclassical.
TEG: For Breaker, I wanted to bring Drifter’s inspirations forward in time. While the late 19th-century impressionist spirit remains core to the Hyper Light universe, I incorporated 20th-century idioms, like the jazz of Gershwin and Miles Davis and modernist influences such as Stravinsky and Reich. These styles felt appropriate for the improvisational nature of the game and its themes: cyclical rebirth, challenges to authority, and a grappling with technological progress.
The foundation of the Breaker score is electronic music. The destructive, self-consuming worlds of Fennesz and William Basinski in particular fit the tone of the game perfectly, and inspired a new, even gnarlier decayed Hyper Light texture that doesn’t feel derivative of the original game.
What considerations went into composing for a spiritual successor?
TEG: Writing music in an existing universe requires fluency in its language—then writing poetry with it. It took a year to master Breaker’s musical vocabulary, and it was important for us to communicate fresh ideas. Thankfully, the shift to 3D and multiplayer added new dimensions, giving us space to fill with huge synths and reverbs that were out of place in Drifter’s labyrinths.
JC: The addition of 3D environments was a huge opportunity for differentiation. While Drifter was intimate, Breaker’s soundtrack is more expansive, though it still has poignant moments of intimacy. With this massive 3D world, we were empowered to fill it with grander textures.
How do you handle combat music?
TEG: At Heart Machine, we avoid the “combat drums” aesthetic common in games with discrete combat states. Our gameplay is often fast-paced and transitions fluidly between action and exploration, which requires a more subtle approach.
In Breaker, we used a nuanced set of transitional layers and musical snippets to express the idea of tension, climax, and release during encounters. Some fights may never rise above the level of simple “tension” – just the anticipation before a jump scare in a horror film. A tussle with a few slime enemies may not even get a nod from the music system!
For larger battles, the music builds in intensity, roaring and receding based on the threat. We’re excited to add even more variety during early access, with unique layers and melodies for specific enemies. For example, larger more threatening enemies could have their own unique layers or melodies. An experienced player might hear a particular riff and think “uh oh, there’s a Leaper behind me…”
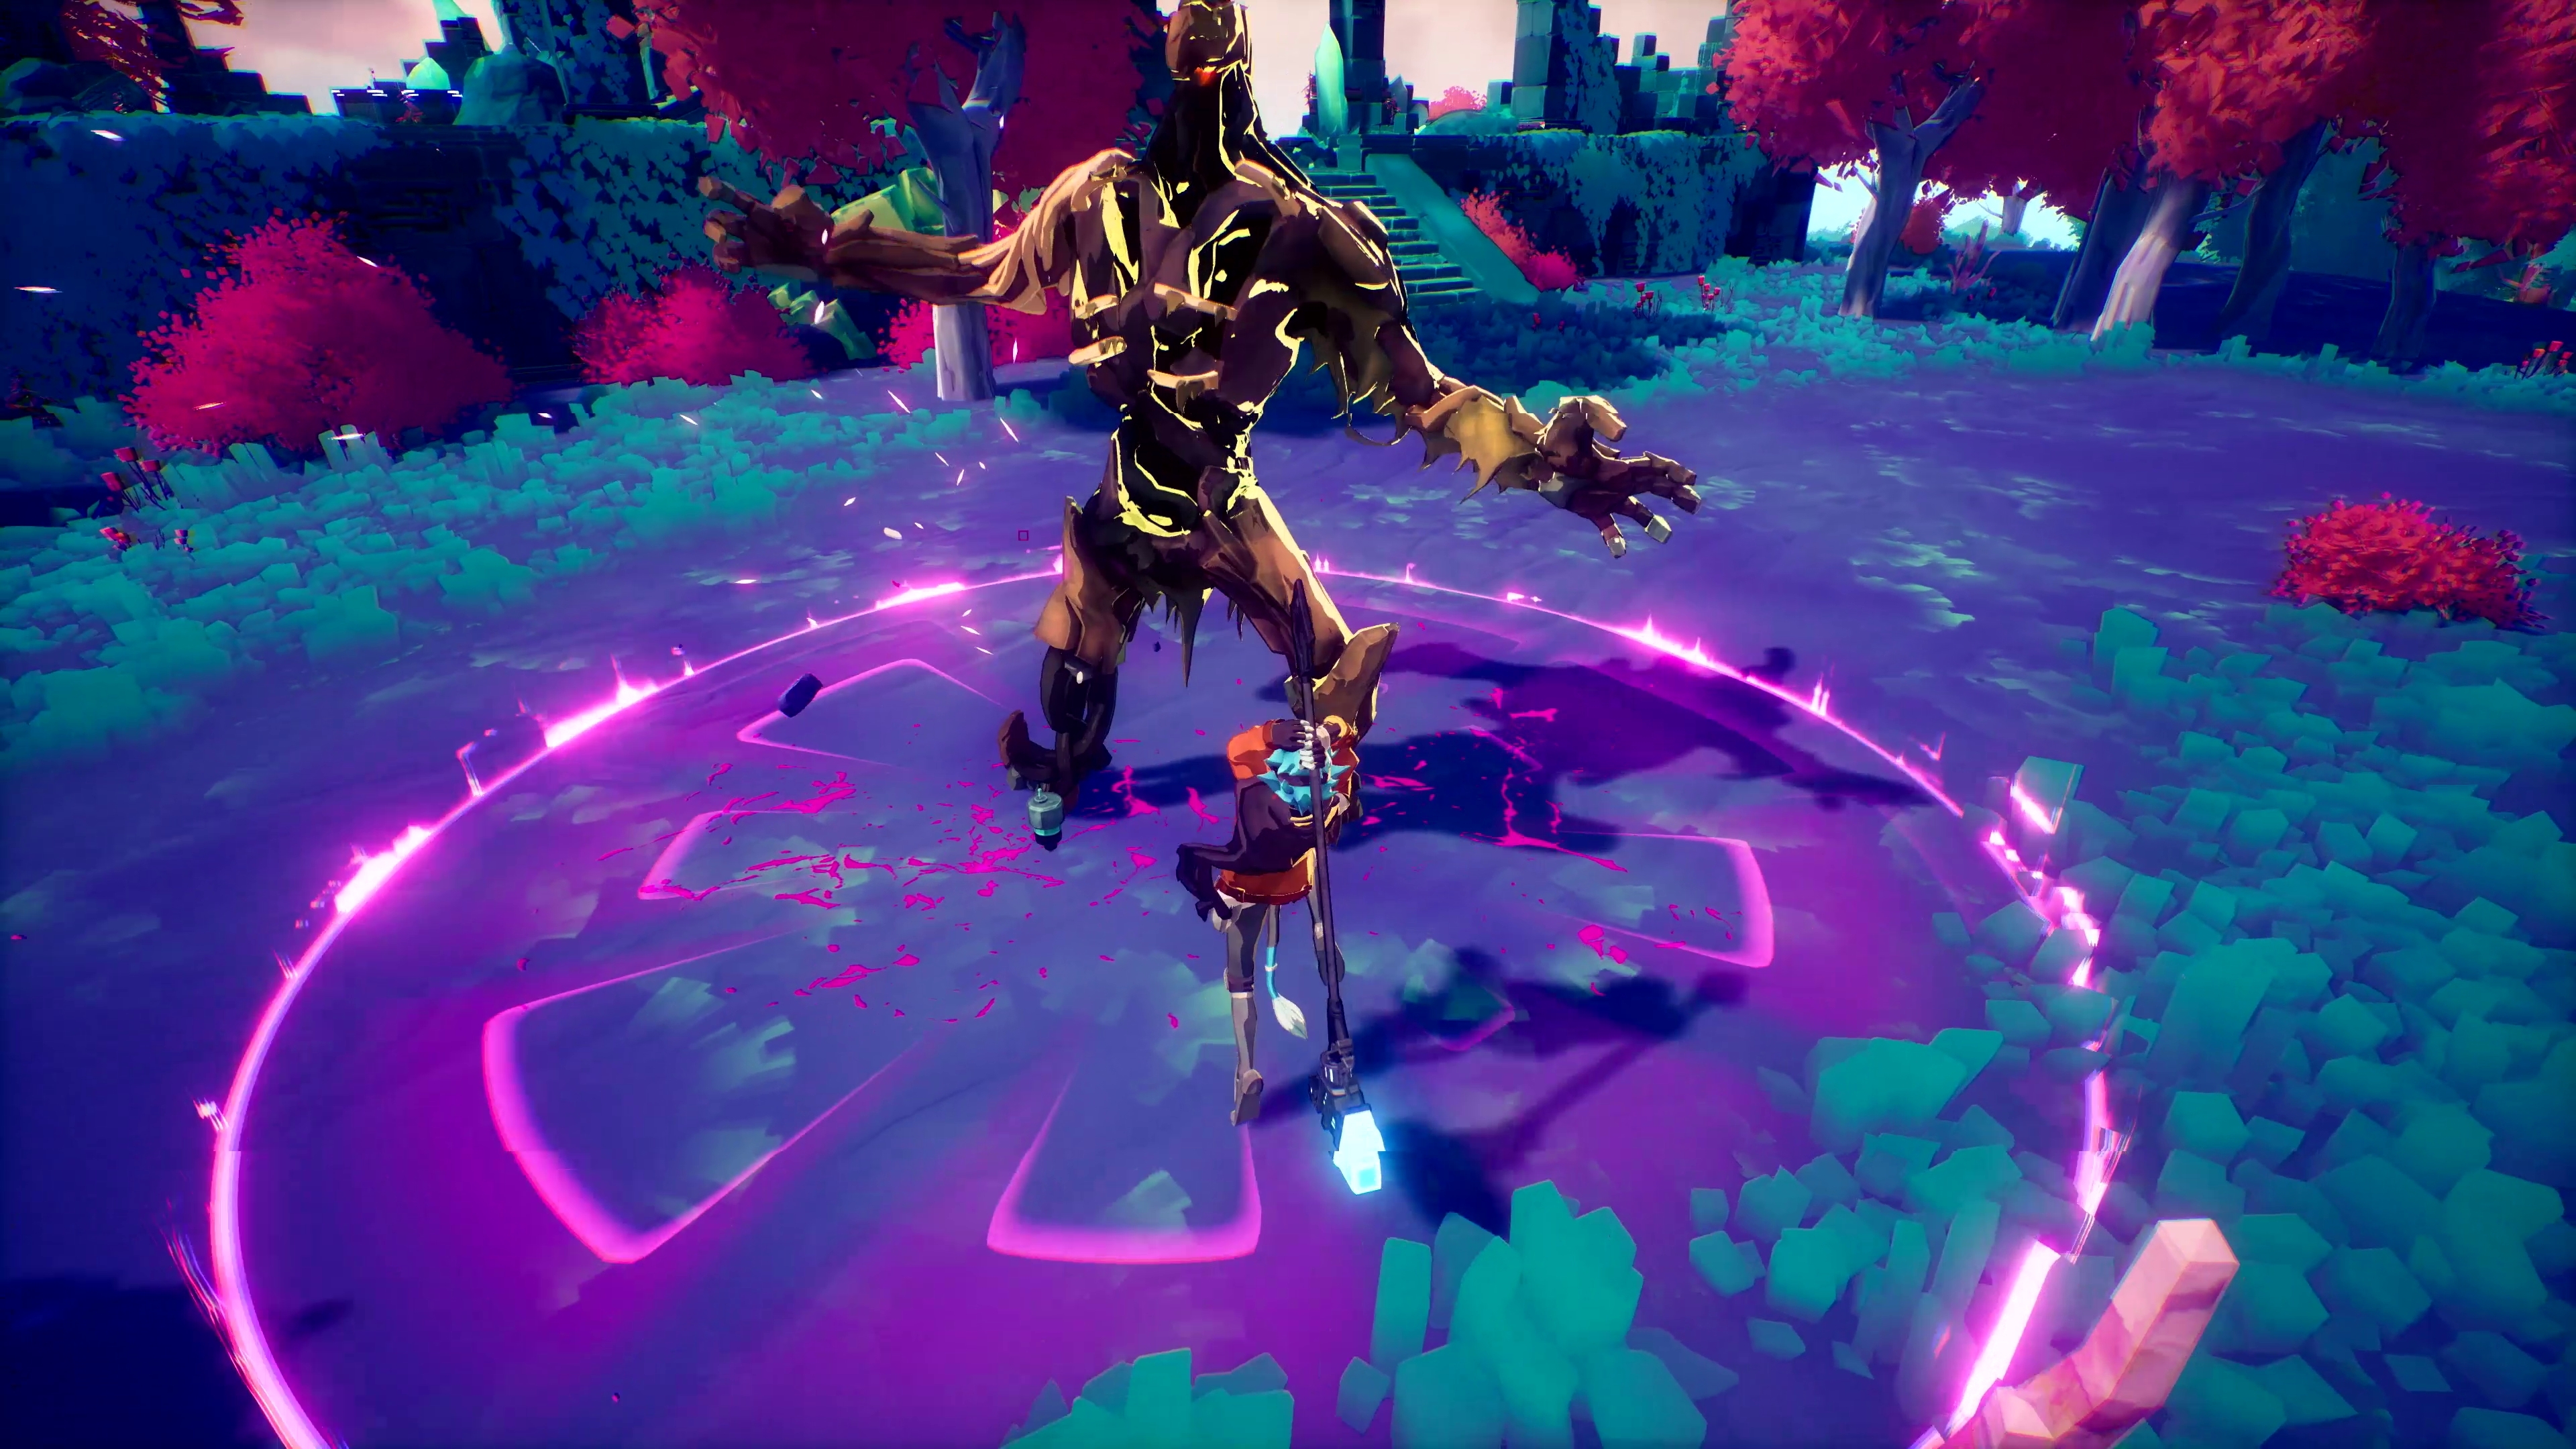
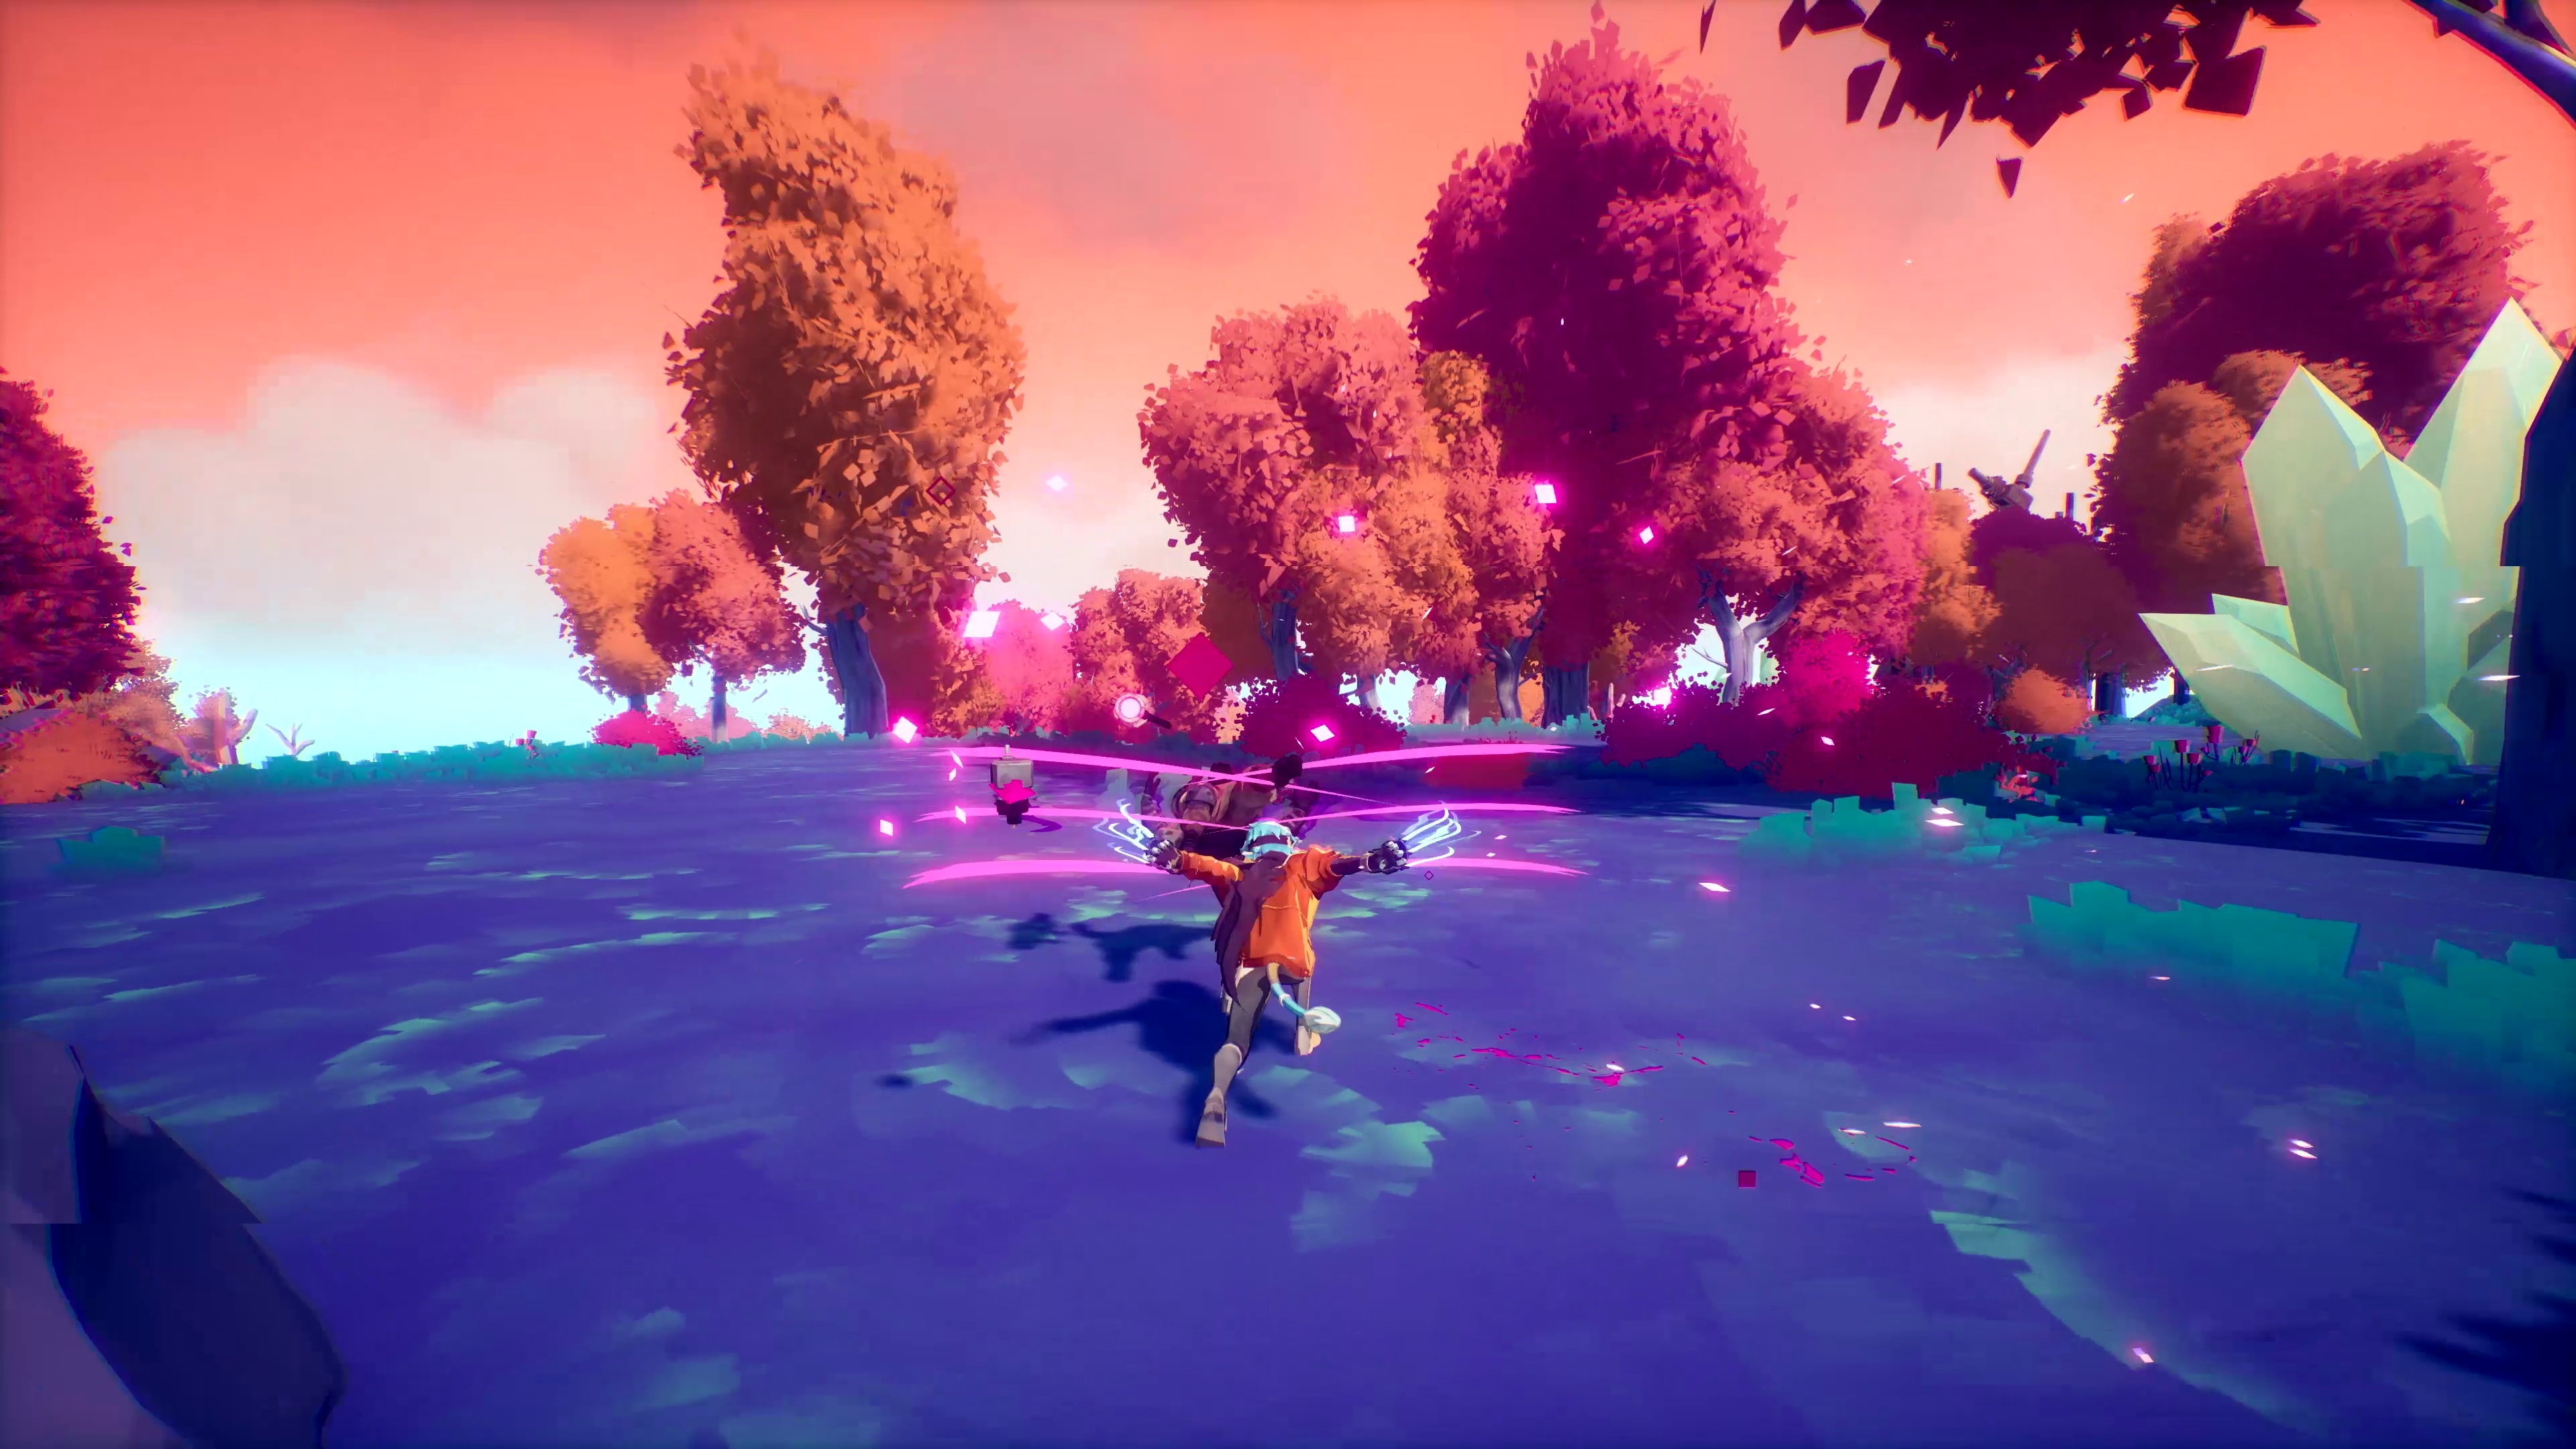
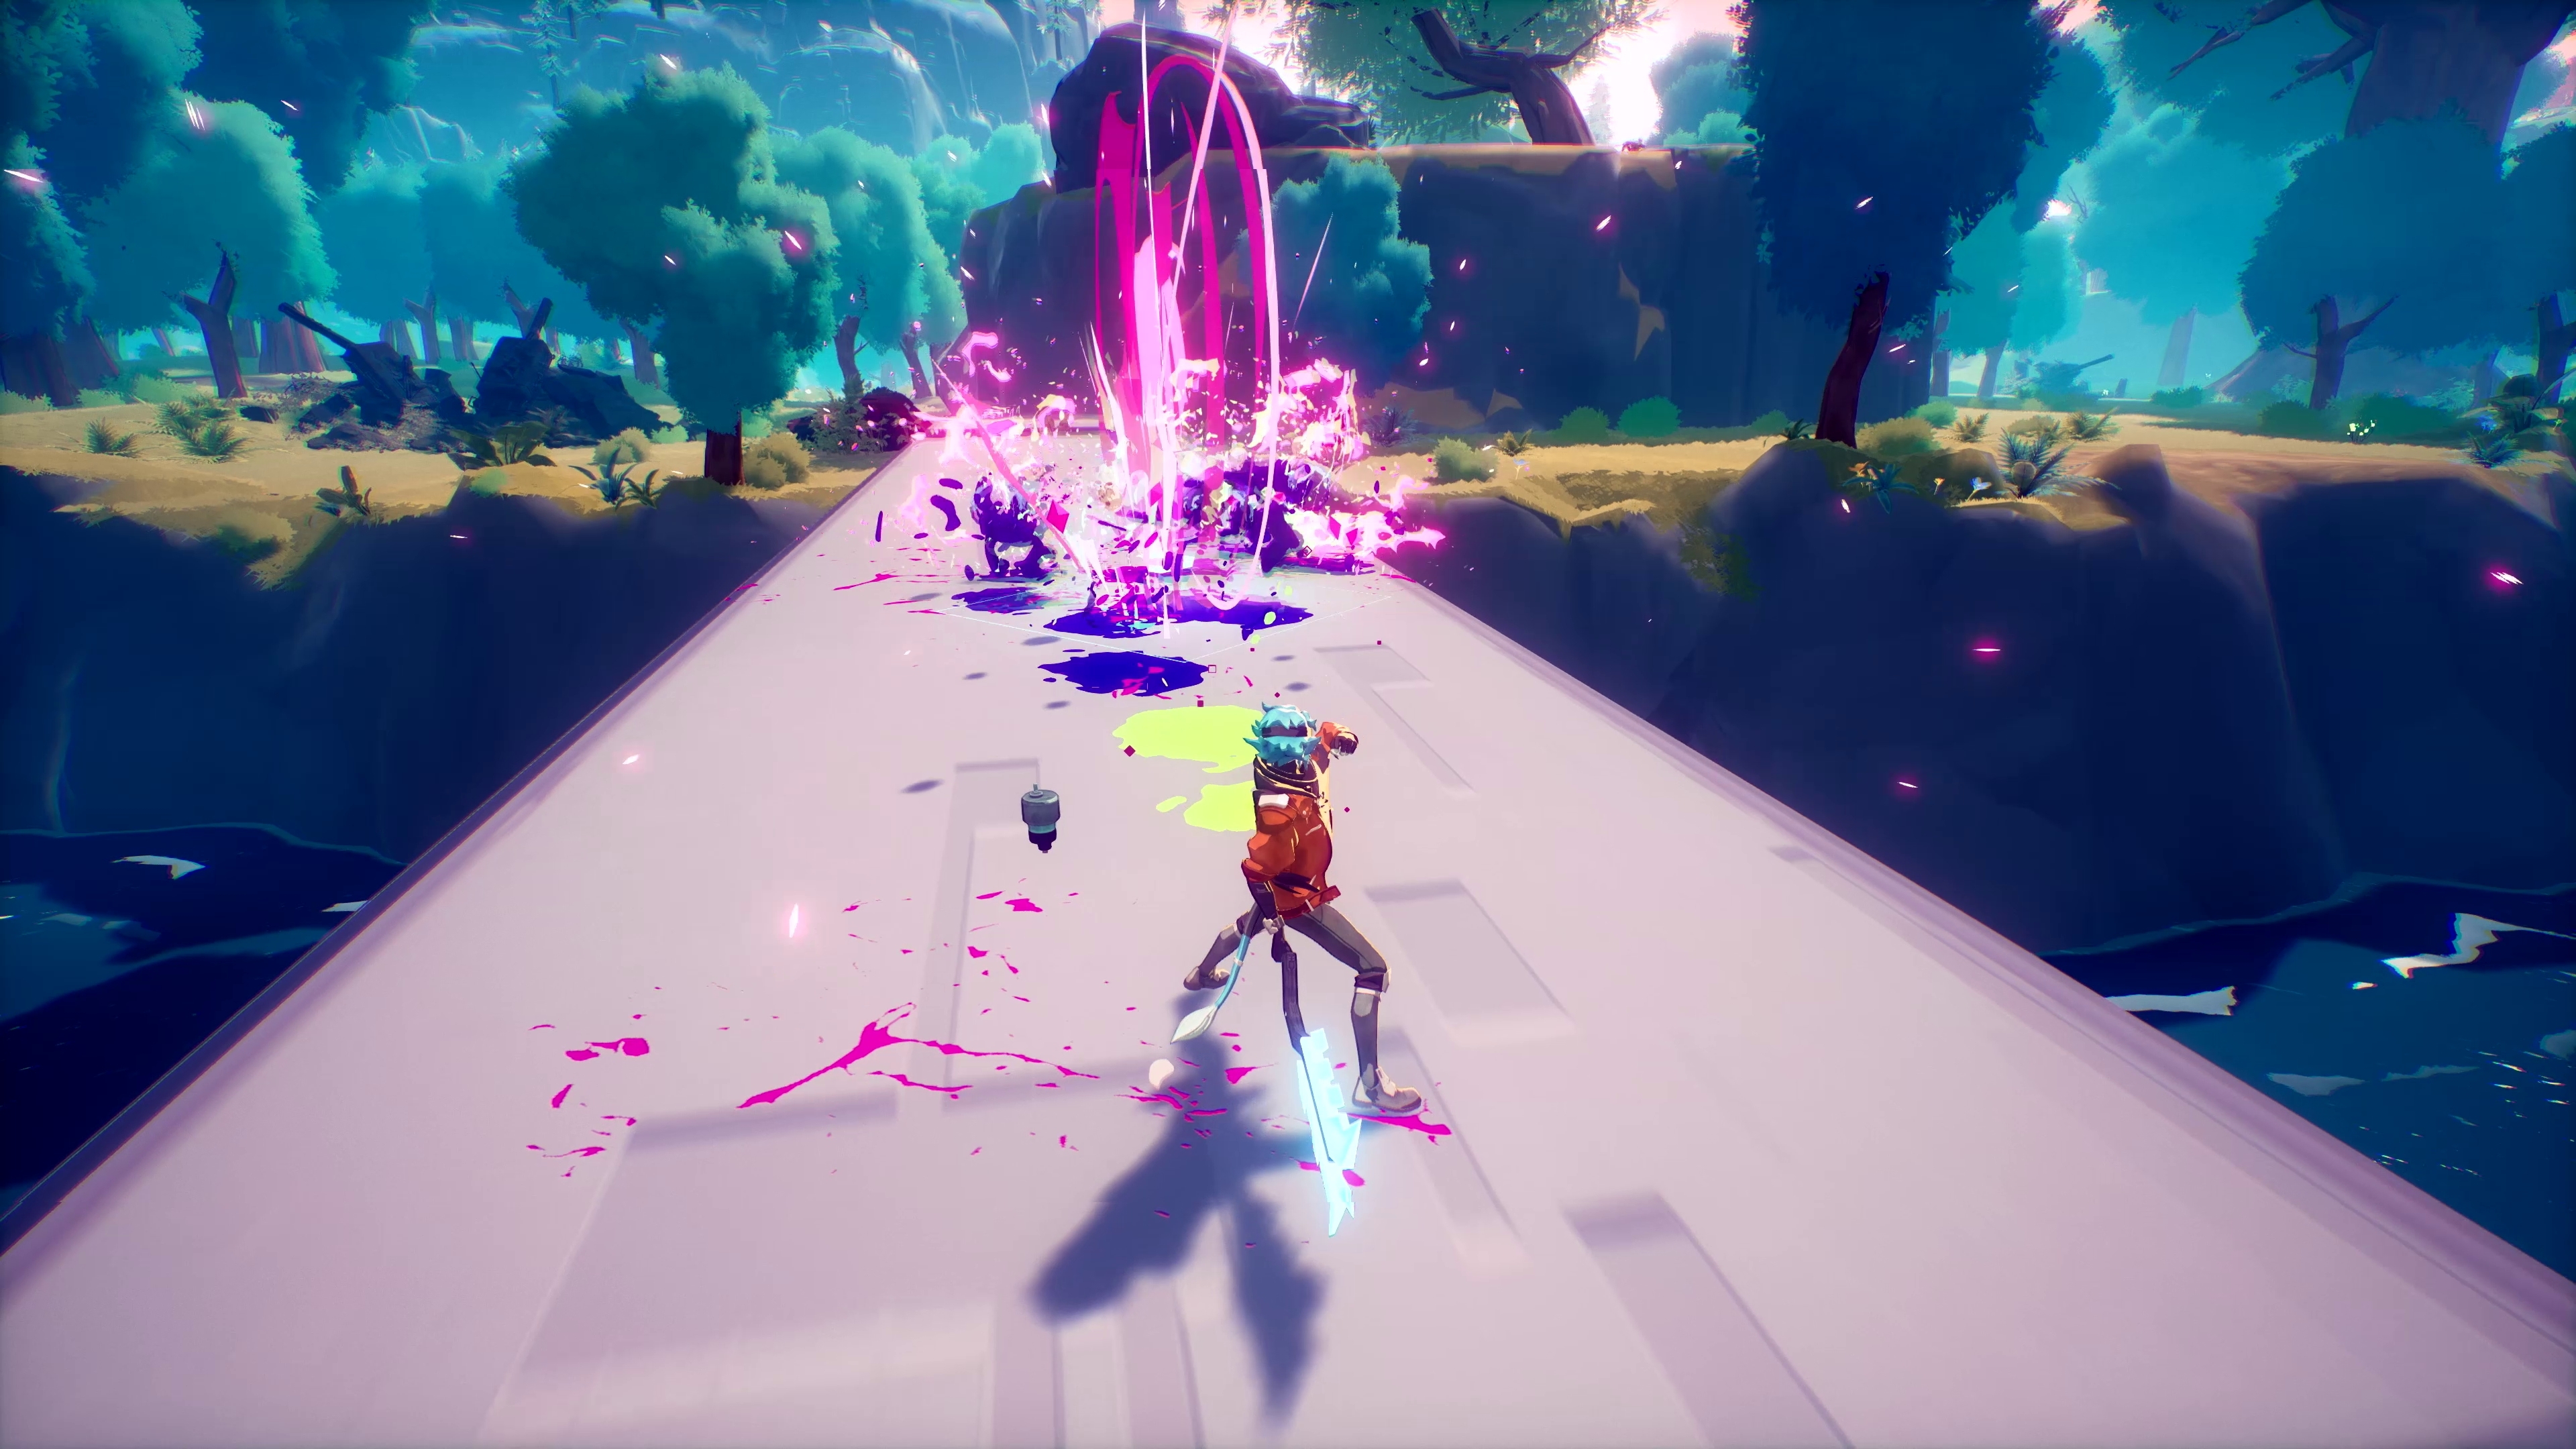
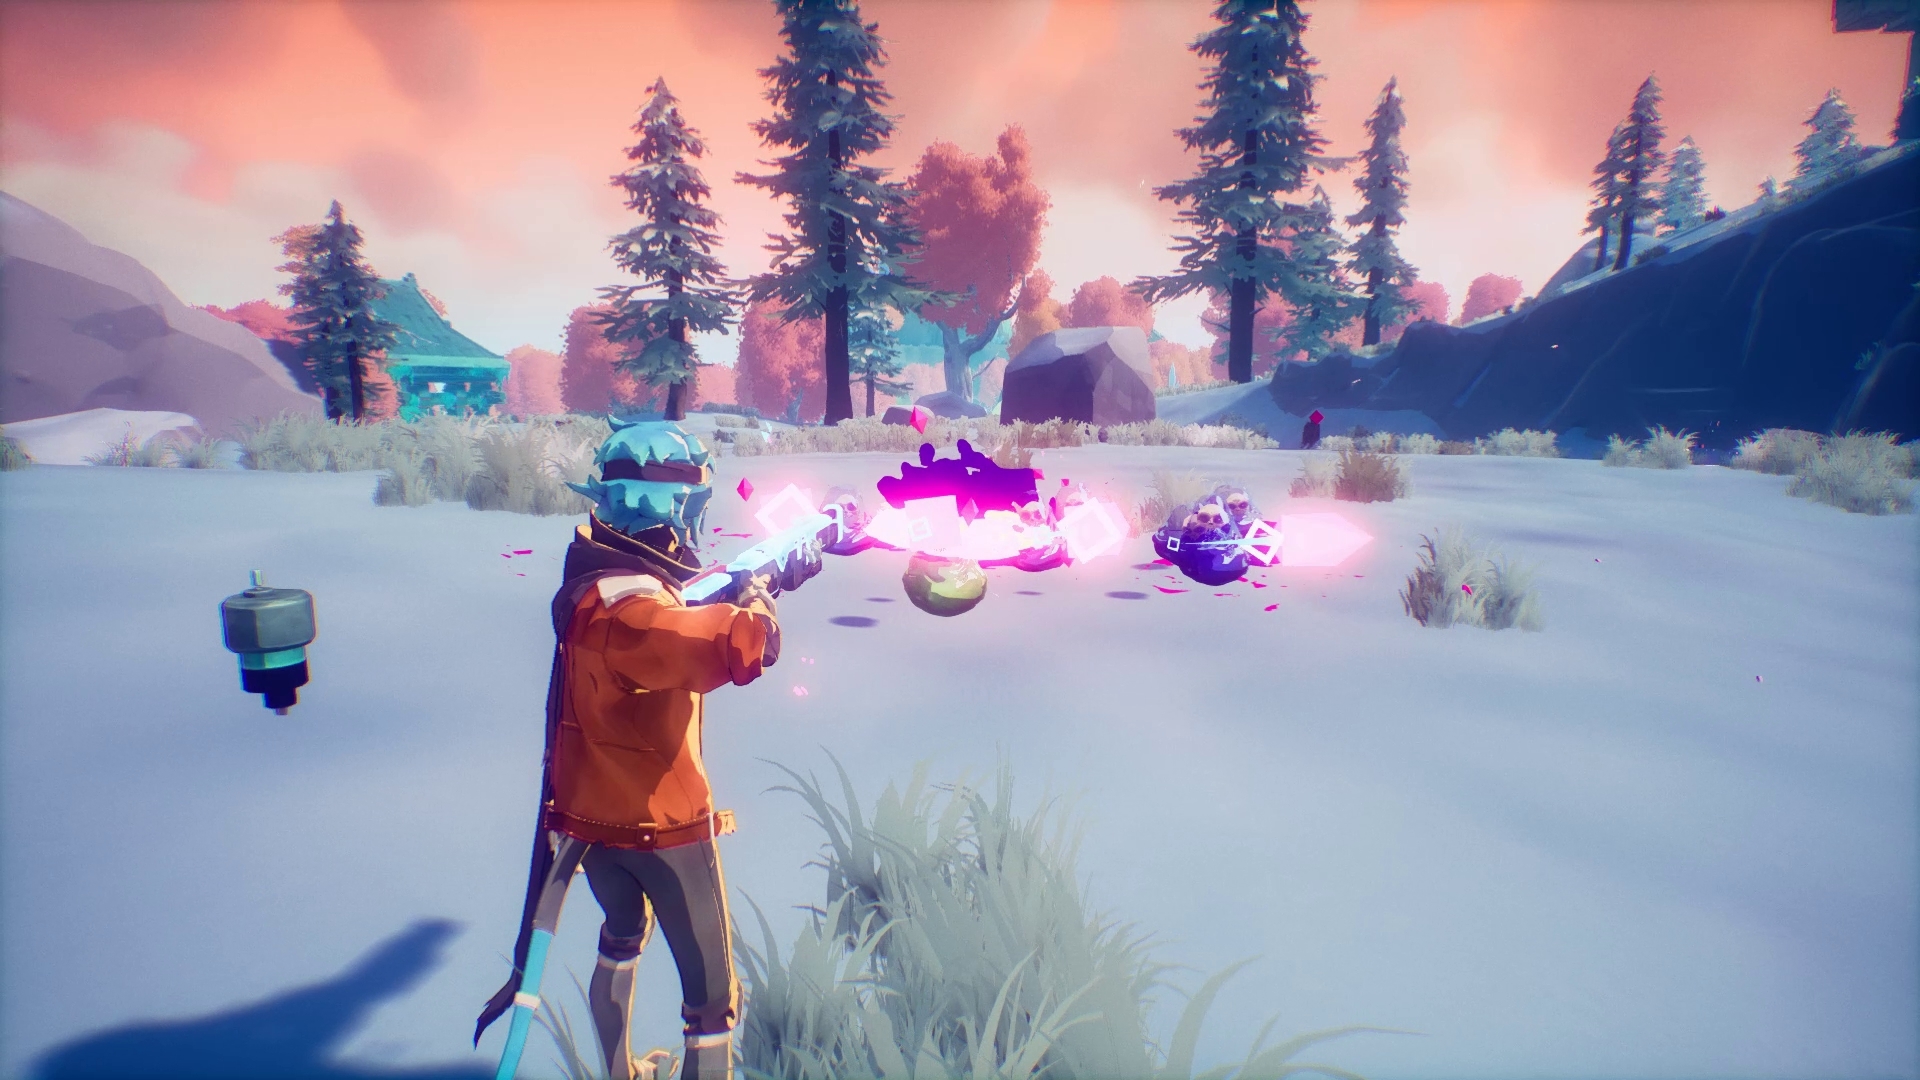
BELOW: Some examples of different in-game scenes with music / audio transitions. What do you think of how the music enhances or changes the actions occurring in each scene? Systems Music 1 Systems Music 2 Systems Music 3
How do you manage transitions between zones and events?
TEG: Biome definitions and interactions evolved during development, so we needed a highly reactive music system. We used a hybrid approach with “short form” layers and snippets (5-25 seconds) that are triggered randomly, and “long form” composed pieces (1-3 minutes). These systems weave together seamlessly, reacting to player activity without getting stale.
Short form sections help provide a subtle, unintrusive baseline that reinforces the identity of the biome, and can transition quickly between regions and game states with no fuss. Long form compositions tend to get more specific tonally and emotionally, and provide a really nice peak to the short form valley. In moments of intense combat these tracks will subside in favor of the short form combat layers, and they can be stopped if the player transitions to a new biome or activity, like extraction.
We’re excited to add more depth during early access, tailoring music to elements like dense foliage or ruined cityscapes and layering in narrative surprises.
How does the hub music reflect player progress?
TEG: Unlike most Roguelikes which have simple “win” or “lose” states at the end of a run, *Breaker* players experience ups and downs throughout the course of a single game cycle. Success and failure are a spectrum of states, not binary.
Our hub music changes to reflect the player’s performance on their previous run, which makes the hub feel more dynamic and helps reinforce the significance of key moments in a player’s journey.
In a procedural game, time spent in the hub is also one of the few opportunities for us to showcase uninterrupted music, which gives us a platform to delve into the cultural and thematic content of Breaker’s world.
BELOW: Some examples of different hub ambient music - how does each one make you feel? What do you think happened in the previous run?
Looking Ahead
As Hyper Light Breaker approaches early access on January 14, 2025, its music promises to evolve alongside the game. With its blend of heroism, tragedy, and experimental textures, the soundtrack is set to be as unforgettable as the environment it inhabits.
We hope that for fans of Hyper Light Drifter, Breaker’s music will offer a fresh yet familiar chapter in this beloved world, and that new players will fall in love with the soundscape of our universe.
Hyper Light Breaker Launches in Steam Early Access January 14!
During Day of the Days: The Game Awards Edition, we announced that our open world co-op rogue-lite Hyper Light Breaker is officially set to launch in Steam Early Access on January 14, 2025 for $29.99. The trailer above covers an in-depth overview from Hyper Light Breaker Lead Producer, Michael Clark, of what you need to know about the new Hyper Light adventure before the game enters Early Access next month.
“We’re thrilled to be a part of Day of the Devs: The Game Awards Edition and finally reveal that Hyper Light Breaker will be launching in Early Access in just a month,” said Alx Preston, Heart Machine Founder and Creative Director. “From all of us at Heart Machine, we really can’t thank our community, friends and colleagues enough for all of the support over the years and sticking with us as we’ve worked on our most ambitious project yet. Launching Hyper Light Breaker in Early Access will be just the beginning, as we want the community to be part of the game’s development journey. We really can’t wait for players to join us in the Overgrowth to bring Hyper Light Breaker to its full potential.”
Those who embark on this new adventure will be able to experience multiple challenging playthroughs solo or with fellow Breakers via online co-op multiplayer, explore the vast, ever-changing worlds within the Overgrowth, and die and retry as they face hordes of deadly enemies. Hyper Light Breaker will continue to evolve throughout the course of Early Access, as we have plenty of content planned, including new Breakers, Crowns (bosses), gear and more. We developed Hyper Light Breaker with Early Access in mind as we’ll be setting our sights on taking community feedback to heart to balance the experience and evolve the game before it enters 1.0 launch.
Wishlist and follow Hyper Light Breaker today: https://bit.ly/3Zrbws5
Loadouts in Hyper Light Breaker: Building A Better, More Optimal You
Before you jump into the Overgrowth, in this blog and in our next blog we’re sharing a couple of important systems you need to know! First up is Loadouts.
Quick update from us before you dive in... we’re close getting Hyper Light Breaker ready for launch in Steam Early Access. Stay tuned.
In Hyper Light Breaker, your loadout isn’t just about picking the right gear—it’s about optimizing your playstyle for each Cycle. As you progress, you'll collect new weapons, equipment, and abilities that allow you to adapt and evolve your combat strategy. Whether you elect to charge into the fray with powerful melee attacks or pick off enemies at range, Breaker’s loadout system allows you to experiment, find synergies, and tailor your approach to try and survive your journey into the Overgrowth.
What Does It Mean to Build Your Loadout?
Each Cycle offers fresh opportunities to experiment with new combinations of gear. In one Cycle, you might build a close-range powerhouse focused on regenerating health while dealing massive melee damage. In the next, you could shift to a more tactical, ranged approach, slowing enemies down with a hack-infused rail and picking them off from a distance. The possibilities are nearly endless. As you explore and conquer new areas, you’ll pick up weapons and equipment, becoming more powerful with every upgrade. Plan to adapt and evolve your loadout meet each new challenge.
Equipment Types
Your loadout is made up of several key gear types, each offering different ways to enhance your character’s abilities and playstyle. From your primary melee weapons to powerful support systems, each piece of equipment can influence your combat strategy in significant ways.
The loop of acquiring, upgrading, and experimenting with gear is one of the key aspects of the loadout system. The gear you equip will directly influence how you play, so choosing the right gear based on your desired playstyle is crucial.
SyComs: Buffs and Stat Customization SyComs are unique to each Breaker and serve as the foundation of your build. These provide specific buffs and stat modifications. As you progress through the game, you can upgrade SyComs and unlock new ones at The Outpost, aided by PB. SyCom upgrades give you more control over your character’s strengths and weaknesses, and set the overall tone for how you approach combat.
Blades Blades are your primary melee weapons in Hyper Light Breaker. Each Blade comes with unique passive and active abilities that allow you to approach battles in different ways. Higher-tier Blades come with additional modifiers, increasing their damage or utility. Choosing the right Blade is crucial depending on your combat strategy, and below are just some of the Blades you can have.
Force Hammer: Ideal for dealing heavy damage to tough enemies, thanks to its inherent damage boost against heavy targets.
Dual Claws: Perfect for clearing out swarms of enemies, offering fast and wide attacks that let you control swarms.
Heavy Axe: Charge up a powerful wave of energy and unleash it across the battlefield to cut down groups of enemies from a distance.
The variety of Blades means that you can adapt your melee combat style to fit any situation, whether you’re taking on massive bosses or mowing down groups of smaller enemies.
Rails Rails serve as your secondary weapons, allowing you to engage enemies at range. These weapons rely on ammo drops from fallen enemies, so managing your resources is key to making the most of them. By equipping Rail-themed Holobytes, you can further enhance their effectiveness.
These are some Rails that will come in-handy:
Diamond Shot: This weapon rewards precision. To maximize its damage, maintain the perfect distance from your enemies and ensure the spread of bullets converges into a diamond-shaped pattern for optimal damage.
Grind 42R: A powerful charged shot that lets you attack from a distance, keeping enemies at bay while you control the flow of combat.
Rails add another layer of tactical flexibility, allowing you to focus on ranged combat while you manage the battlefield from a distance.
Amps Amps are your tertiary weapons, charged up as you defeat enemies, and they offer powerful activated abilities that can change the way you approach combat. Each Amp has a short window of activation, so timing is everything. Amps add a layer of depth to the game by giving you potent abilities that can either heal, deal massive damage, or offer tactical advantages when used correctly.
Here are just a couple of examples of Amps:
Berserker Exoskeleton: Activate this Amp when you’re surrounded and need to stay alive. For a short period, every hit you land replenishes lost health, letting you power through tough situations.
Crush Block: A devastating Amp that allows you to drop a massive amount of damage on a single enemy, such as a Rifle Elite, all while staying safely behind cover.
Choosing the right Amp for the moment can turn the tide of a battle, whether you need to heal or unleash a devastating counterattack.
Blade Specials Blade Specials are another form of activated abilities that allow you to make special powerful melee attacks to help turn the tide of battle.
Armor Armor provides you with protection to help you resist more damage. However, heavier armor comes with the trade-off of reduced mobility, making you less nimble and slowing down your dashes and dodges. Finding the right balance between offense and defense is key here, as you’ll need to tailor your armor to the specific challenge at hand.
Holobytes + Affixes Holobytes are modifiers that can be slotted into your loadout to change your stats or grant new abilities. These powerful tools are essential for crafting a truly unique build, and they come with a permanent effect — once a Holobyte is swapped out, it’s destroyed. You’ll have five slots for Holobytes, so every choice counts.
Holobytes can synergize with your other gear, enhancing your damage, defense, or even offering new special abilities. Whether you’re stacking damage modifiers or improving your survivability, Holobytes provide a crucial layer of customization that lets you fine-tune your loadout. Affixes are modifiers that can be added to every piece of equipment that provide further nuance and let you go even deeper on build customization.
Acquiring Gear
As you explore the world of Hyper Light Breaker, you’ll encounter a variety of ways to acquire new gear and upgrade your loadout.
The Overgrowth: As you explore this world, you’ll find fallen enemies, chests, and the corpses of past warriors, all of which can provide new gear and upgrades. Looting these items is essential for building your loadout.
The Outpost: Here, you can spend Bright Blood and other materials to purchase new gear from various vendors. As your affinity with these vendors grows, you’ll unlock new items and upgrades. Eventually, they’ll be able to help you upgrade your existing equipment, making it even more powerful
Stats and Rarity
Gear in Hyper Light Breaker is color-coded by rarity, with higher-level items offering better stats and additional modifiers. As you progress through the game, you’ll encounter a range of rarities, from basic common items to ultra-rare Hyper Light Red gear.
Rarity: Items are color-coded from white (common) to Hyper Light Red (legendary). The rarer the item, the more powerful it will be, and the more modifiers it will offer.
Stats: Each piece of equipment has specific stats, like damage, health boosts, or passive abilities. These stats will play a big role in determining how effective a piece of gear is, and you’ll want to look for gear that complements your overall build.
The Evolution of the Loadout System
The loadout system in Hyper Light Breaker has evolved significantly over time. What started as a basic system with Blades and Rails has grown into a full-fledged customization experience, with the introduction of Holobytes, Amps, and Affixes adding more layers of nuance.
With each new addition, the Loadout System became more robust, providing more avenues for player expression and unique builds.
Can You Equip Any Gear with Any Breaker?
Absolutely! Our team felt it was important for players to have full agency to craft the exact build you feel best represents your preferred playstyle, so there are no restrictions on which gear you can equip with each Breaker. Each player character has unique stats that affect how different gear performs, but the flexibility of the loadout system means you can mix and match gear however you like. You’re free to build anything from an indomitable god to something a sub-optimized goof.
Your loadout is more than just a collection of gear — it’s a chance to express yourself through the tools and abilities you choose. With so many options for customization, the possibilities are endless, and the choice is yours. How will you build your perfect loadout?
3D Environment Art for Hyper Light Breaker: From Concept to In-Game
Our Visual Legacy
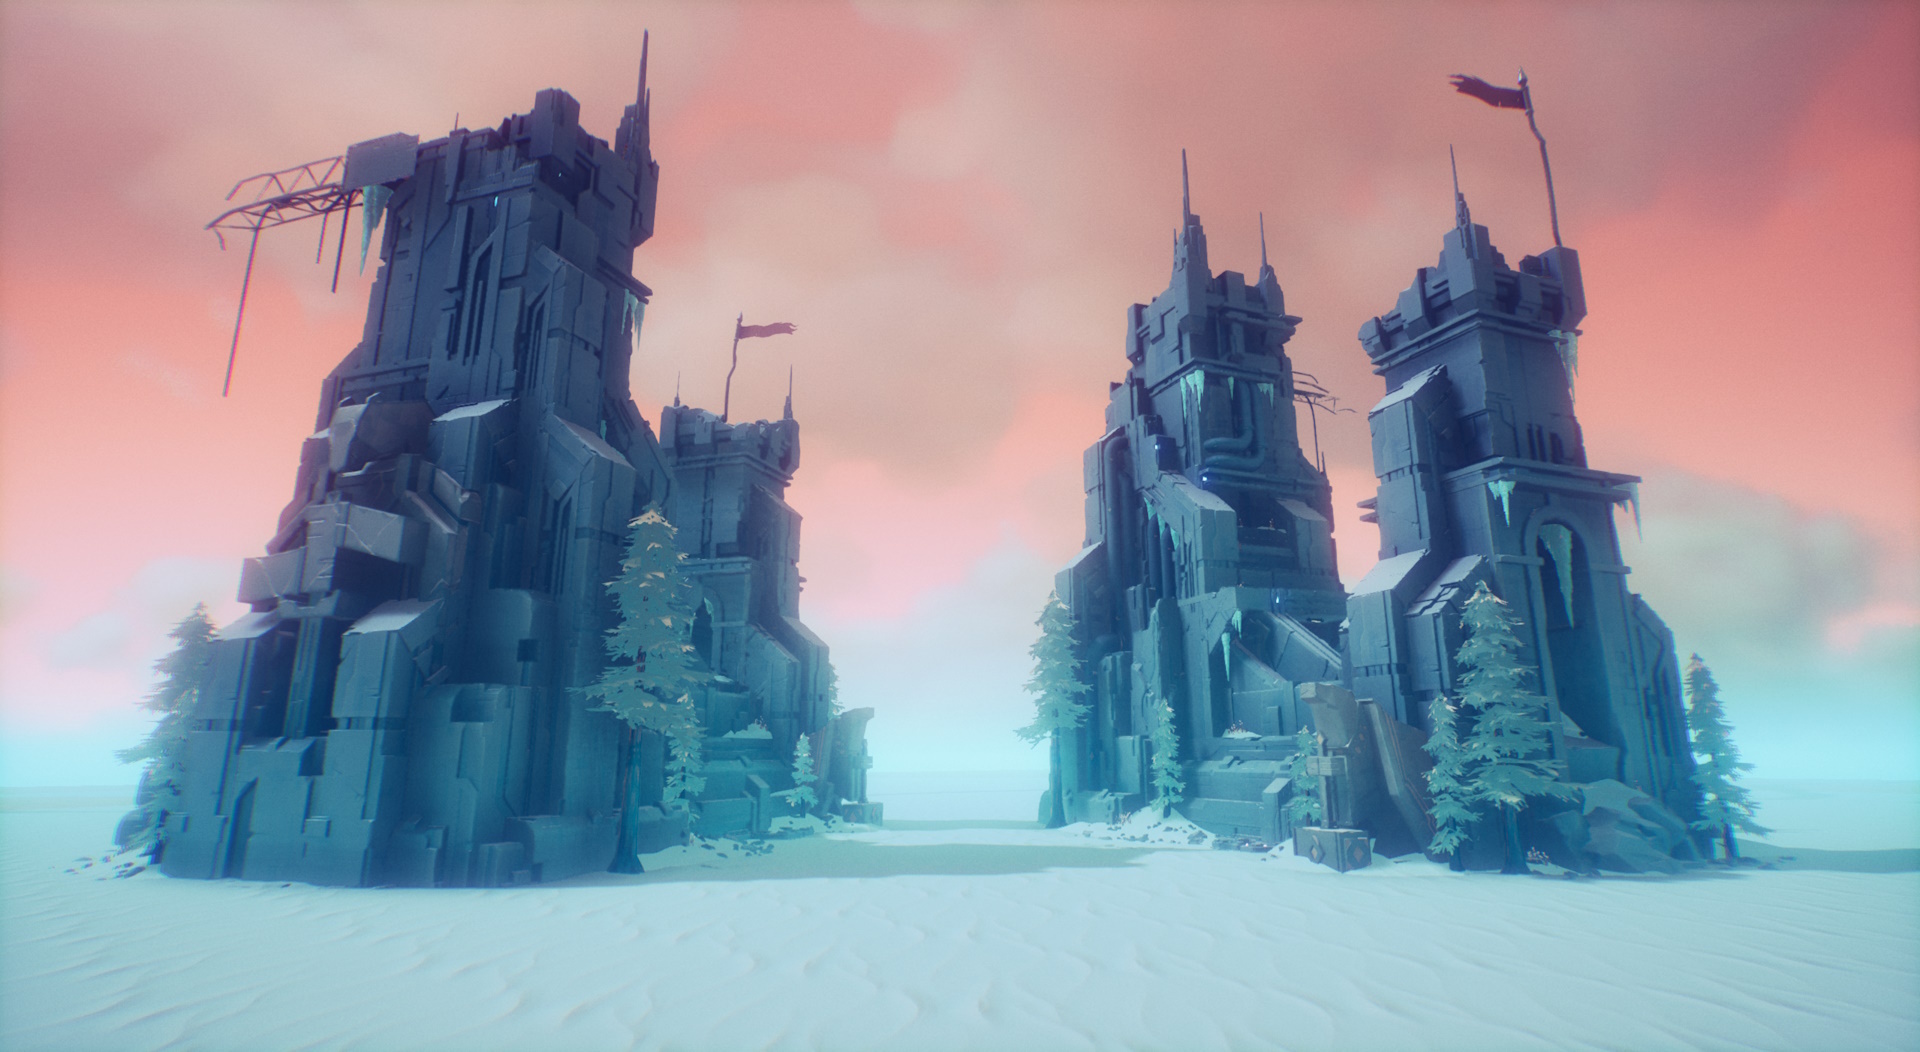
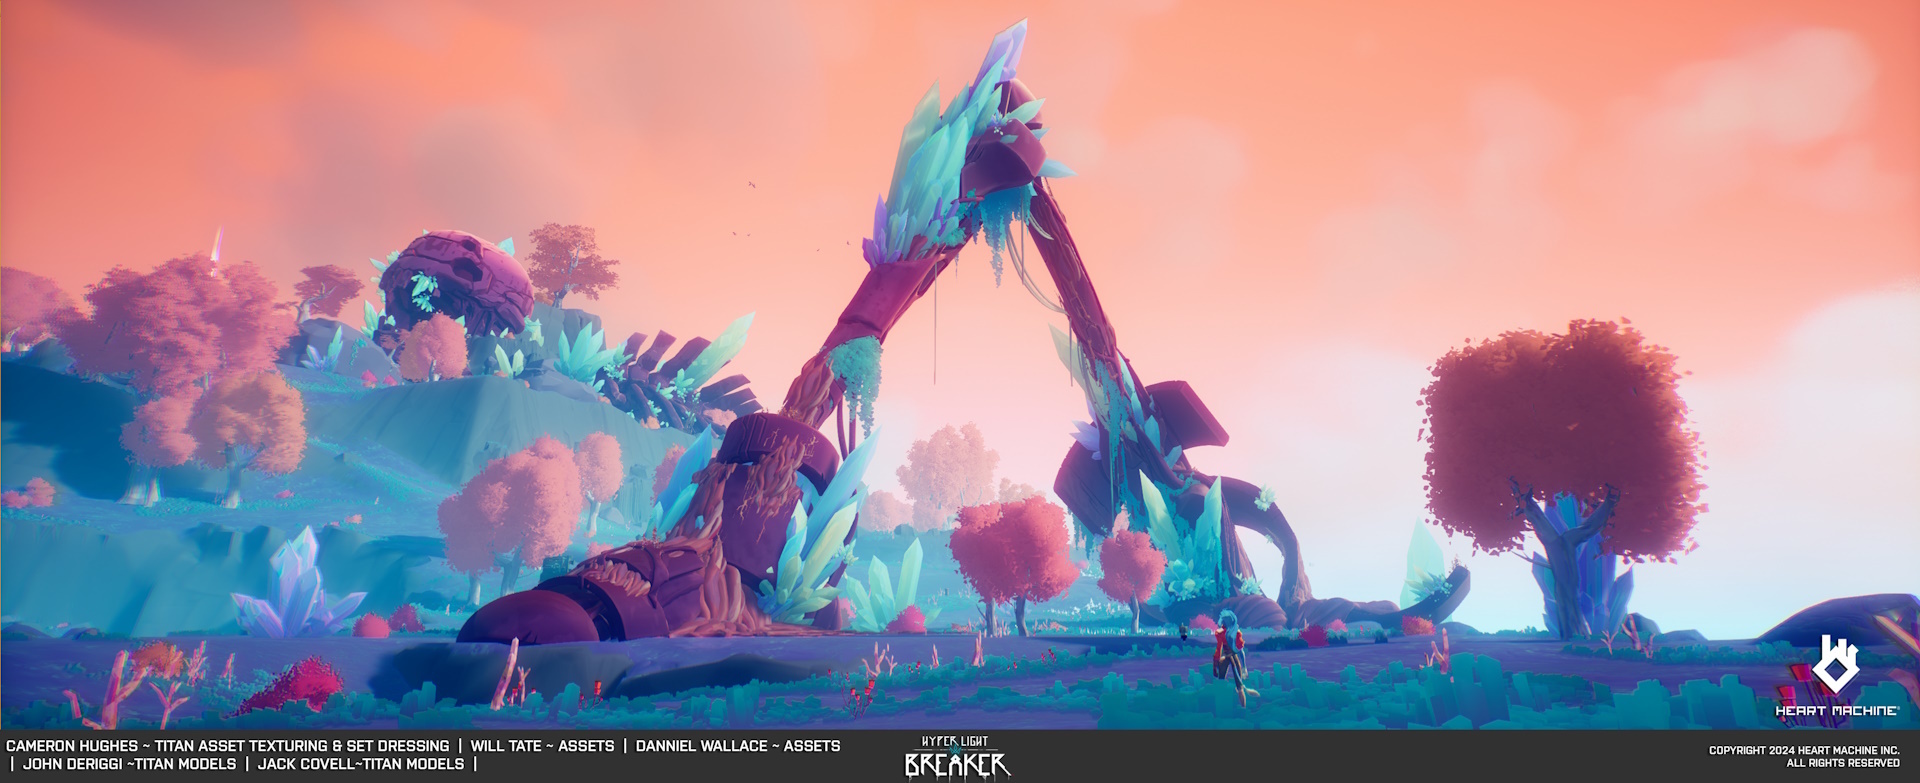
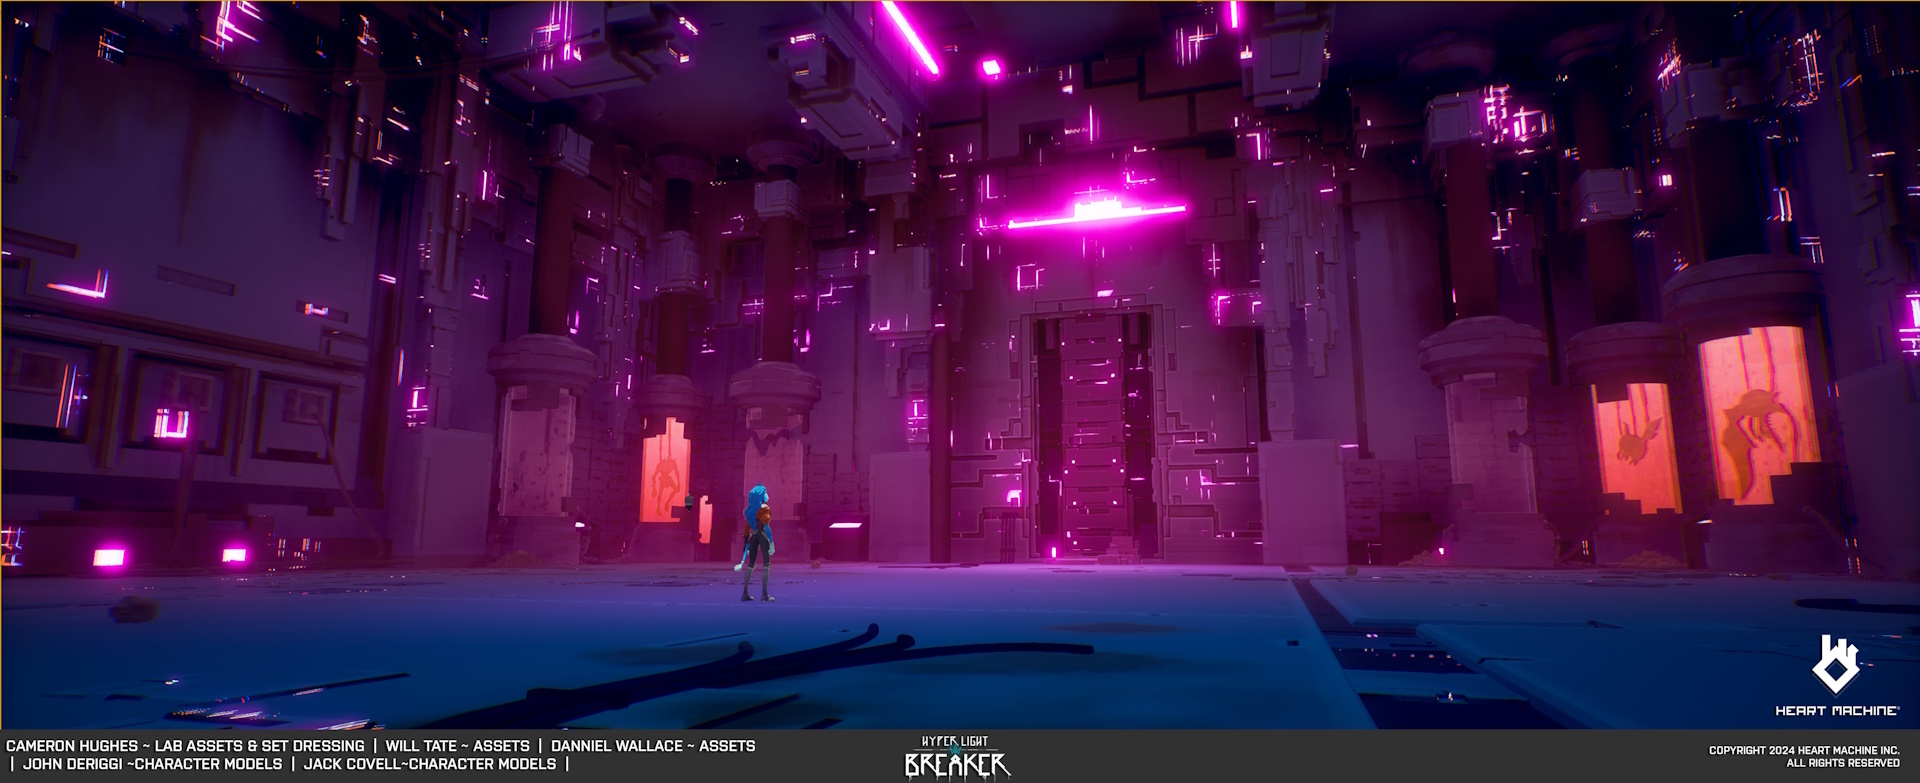
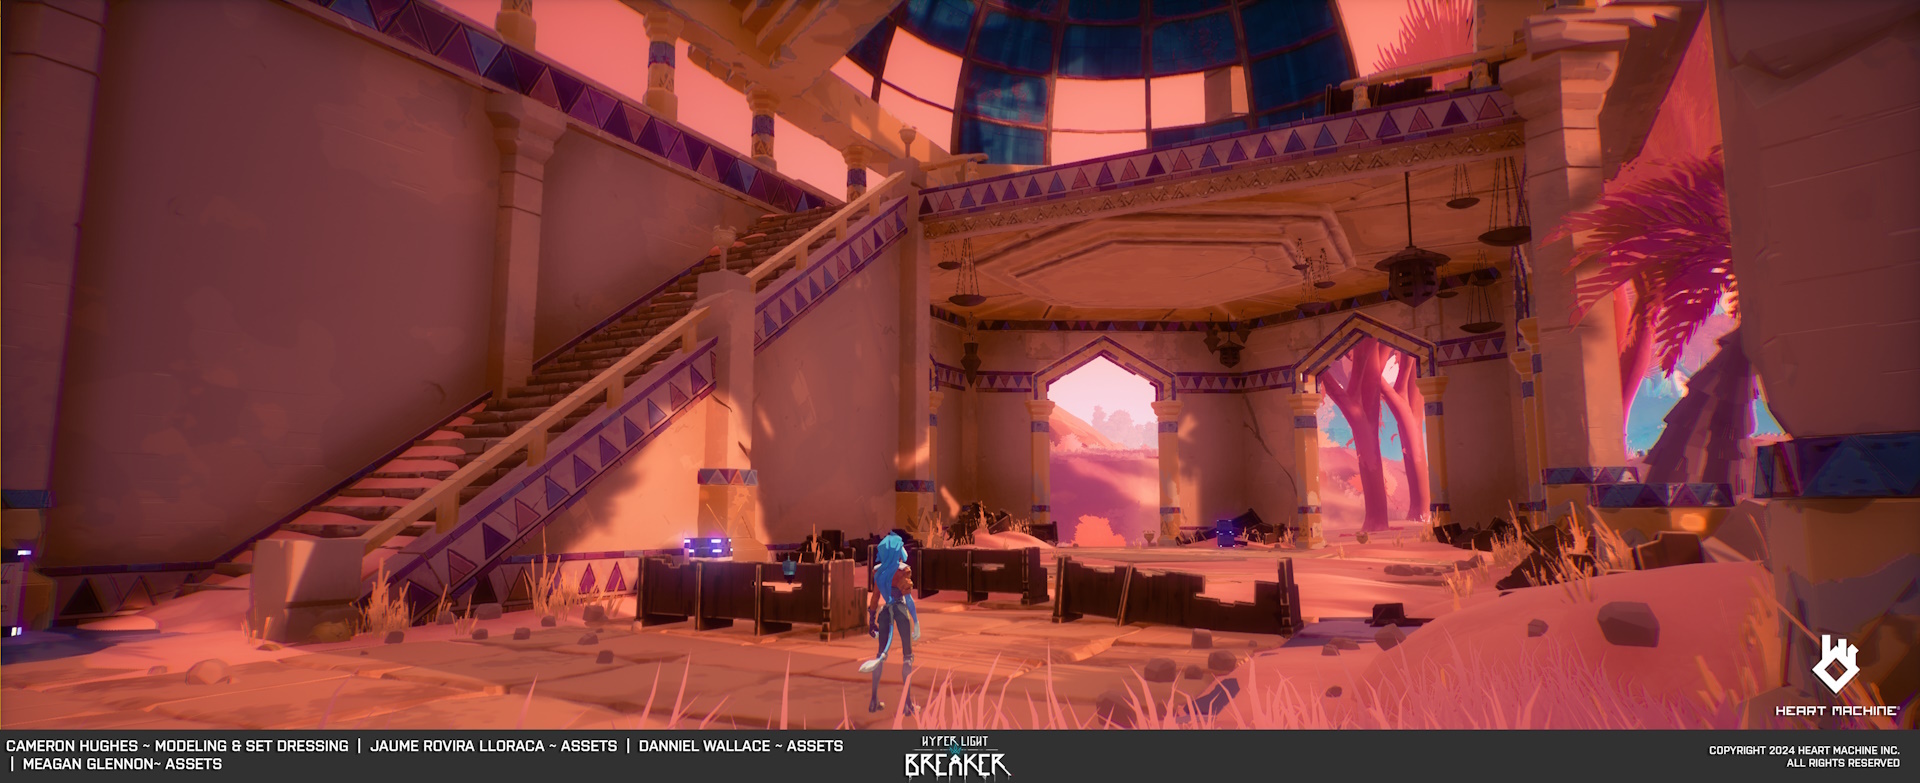
Hyper Light Breaker is the next iteration of our trademark Heart Machine aesthetic of bright neons punctuating vast, striking landscapes. Nowhere are these features more prominent than in the game’s rich 3D environments and the detailed design work that’s gone into Breaker’s set pieces.
As Danny Moll, Art Director, puts it “We’ve put tremendous effort into translating the spirit of Hyper Light Drifter’s impressionistic and painterly pixel aesthetic from 2d into 3d, while simultaneously imagining and bringing to life a host of entirely new settings and set pieces that exist within the alluringly mysterious worldbuilding and forgotten technology of the Hyper Light universe”.
Creating an immersive world for Hyper Light Breaker has been a complex and collaborative process, from the initial nugget of an idea → concept art → in-game assets that the player experiences. The journey involves multiple stages and teams, each contributing their expertise to building our vibrant, immersive world.
From Concept to In-Game
Idea
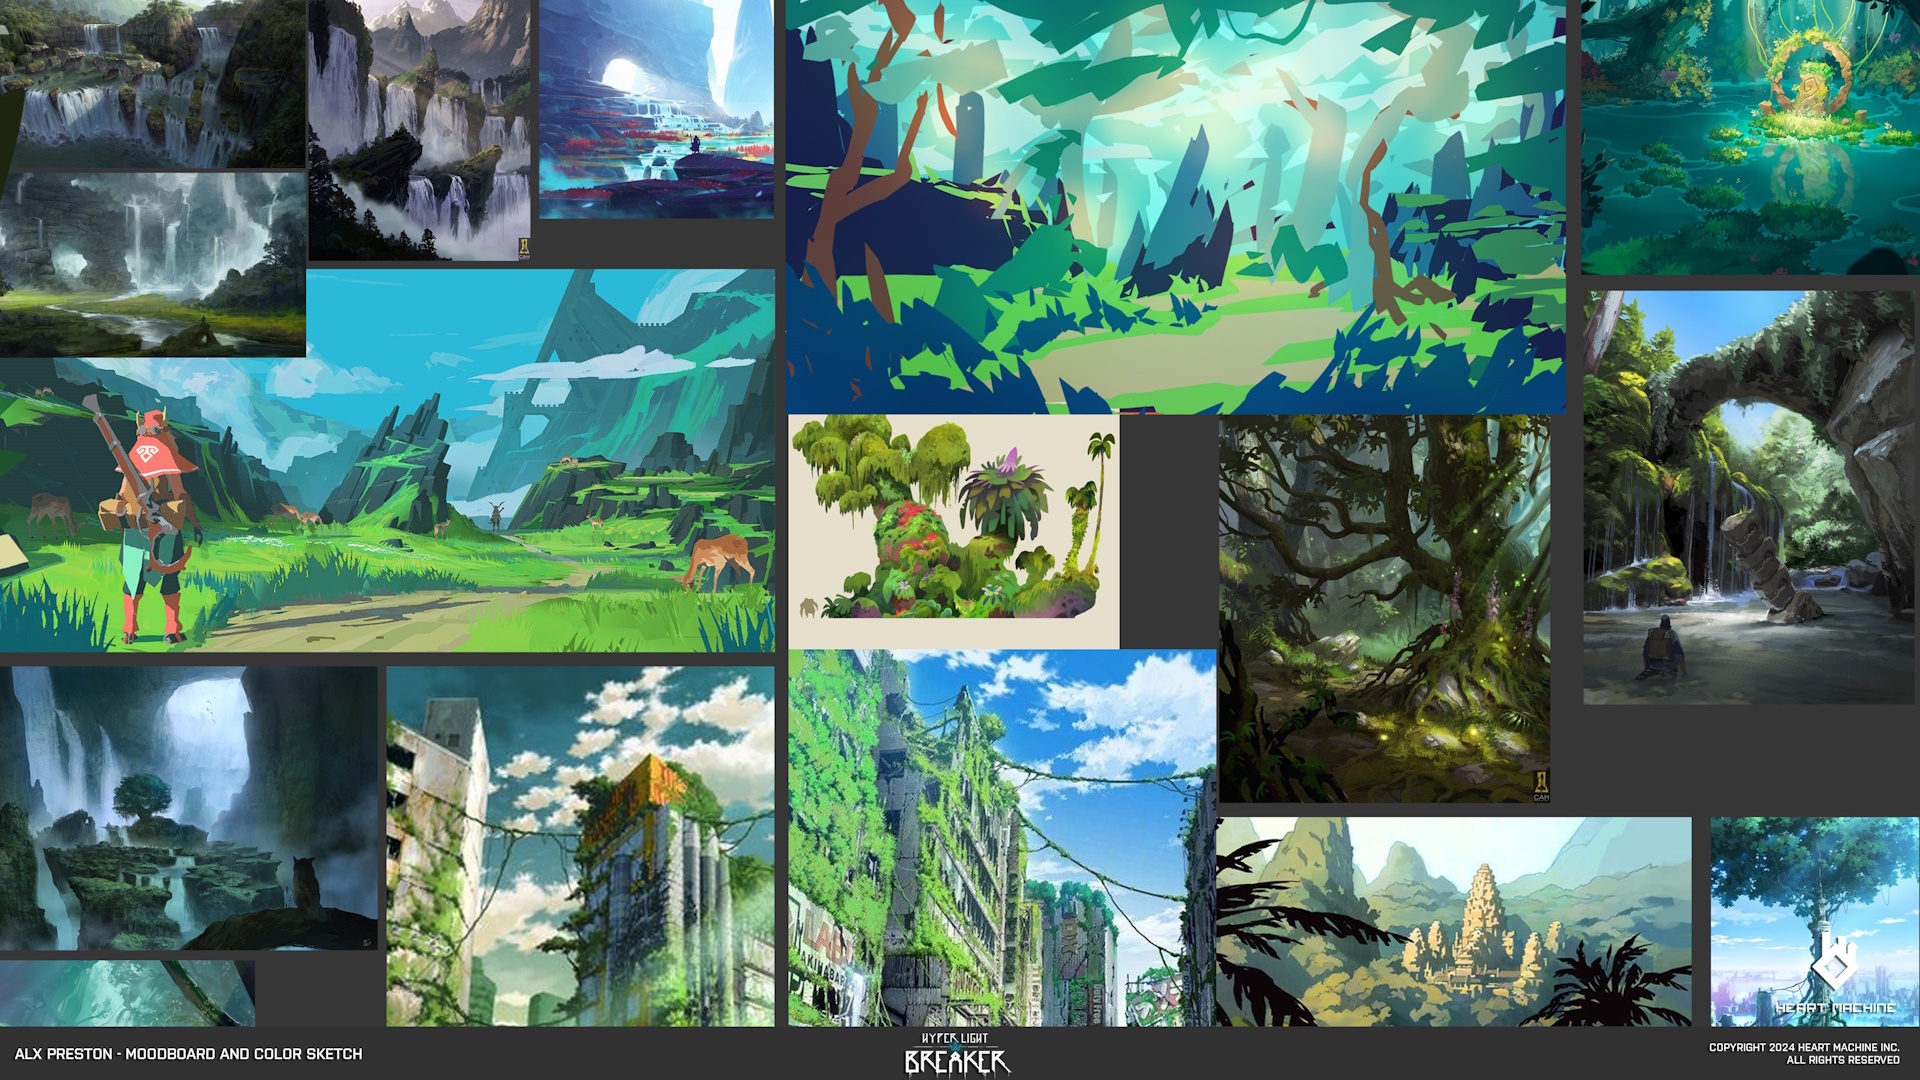
Alx Preston, Creative Director / Founder, is hands-on throughout the entire creative process. When it comes to environment art, Alx kicks off the process with moodboards, references, color sketches, and themes to inspire the team and set the tone.
An example moodboard from the early visual development phase of the Overgrowth by Alx Preston
Concept Art
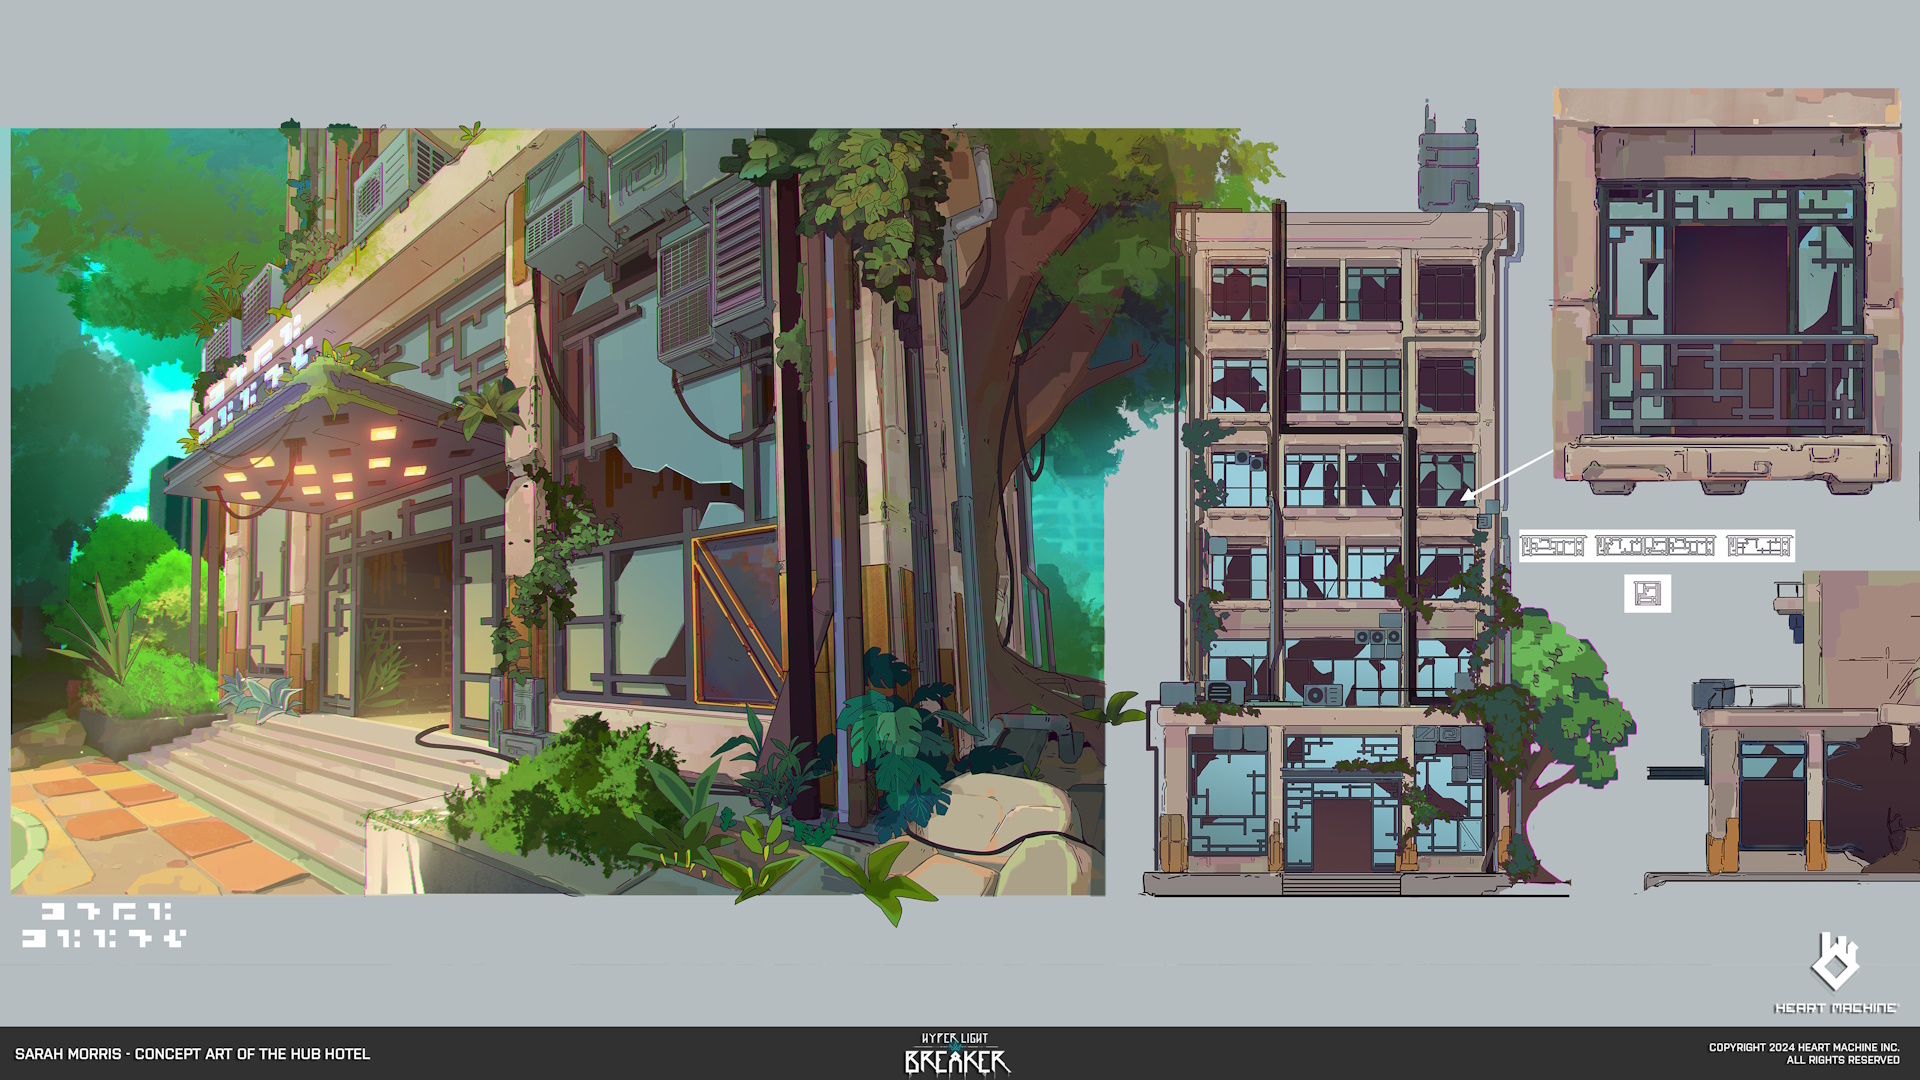
Danny Moll, Art Director, and Sarah Morris, Senior Concept Artist, work closely on concept art, with support from Lilit Beglarian and Nick Carver. Their work defines the style and vision for Breaker’s distinctive environmental features and props.
An Example of Environment Concept Art by Sarah Morris showcasing visual development of the Hub
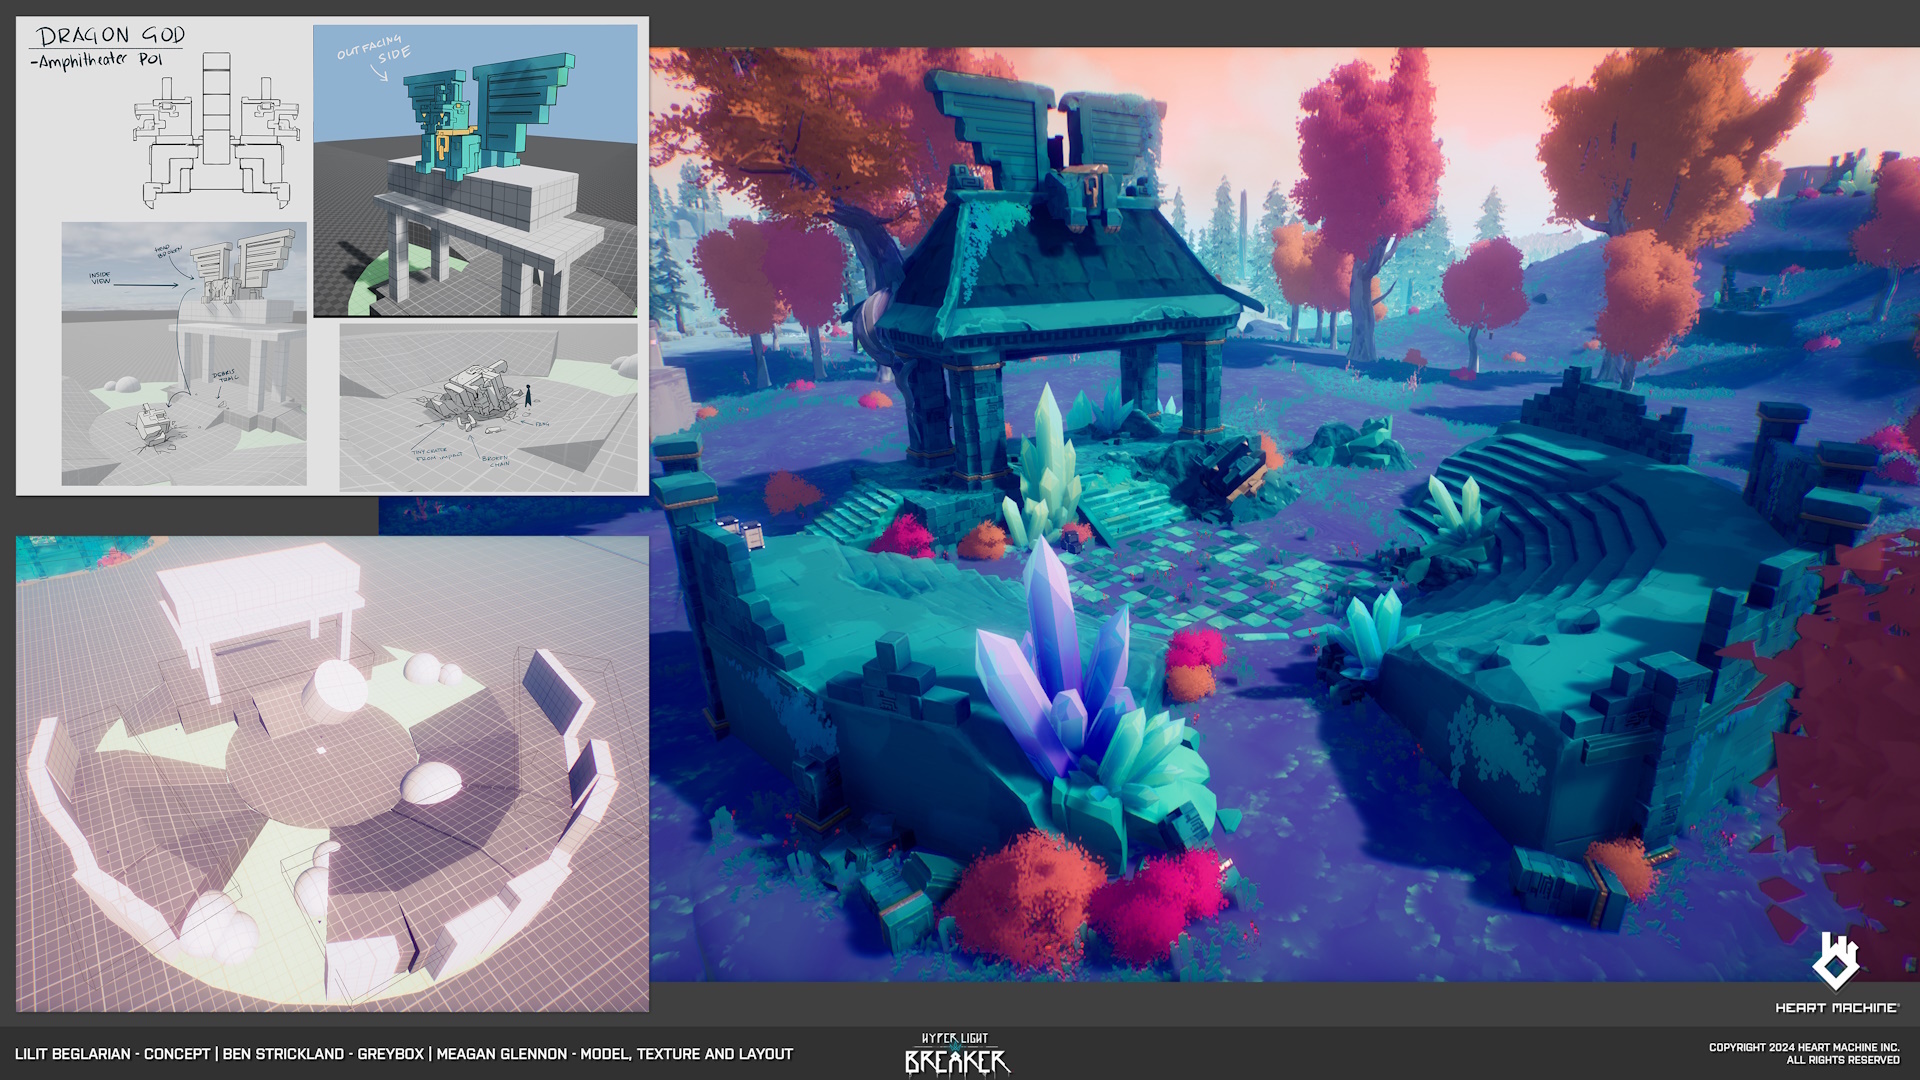
Modeling + Material Creation
Meagan Glennon leads the enviro team. She works closely with Cameron Hughes, Danielle Wallace, and Marissa Borowski, along with additional contributions from Jaume Rovira, Wolfgang Traenkle Will Tate, and Cordell Felix.
From Concept to Blockout to Art Pass
Get (the art) in the Game!
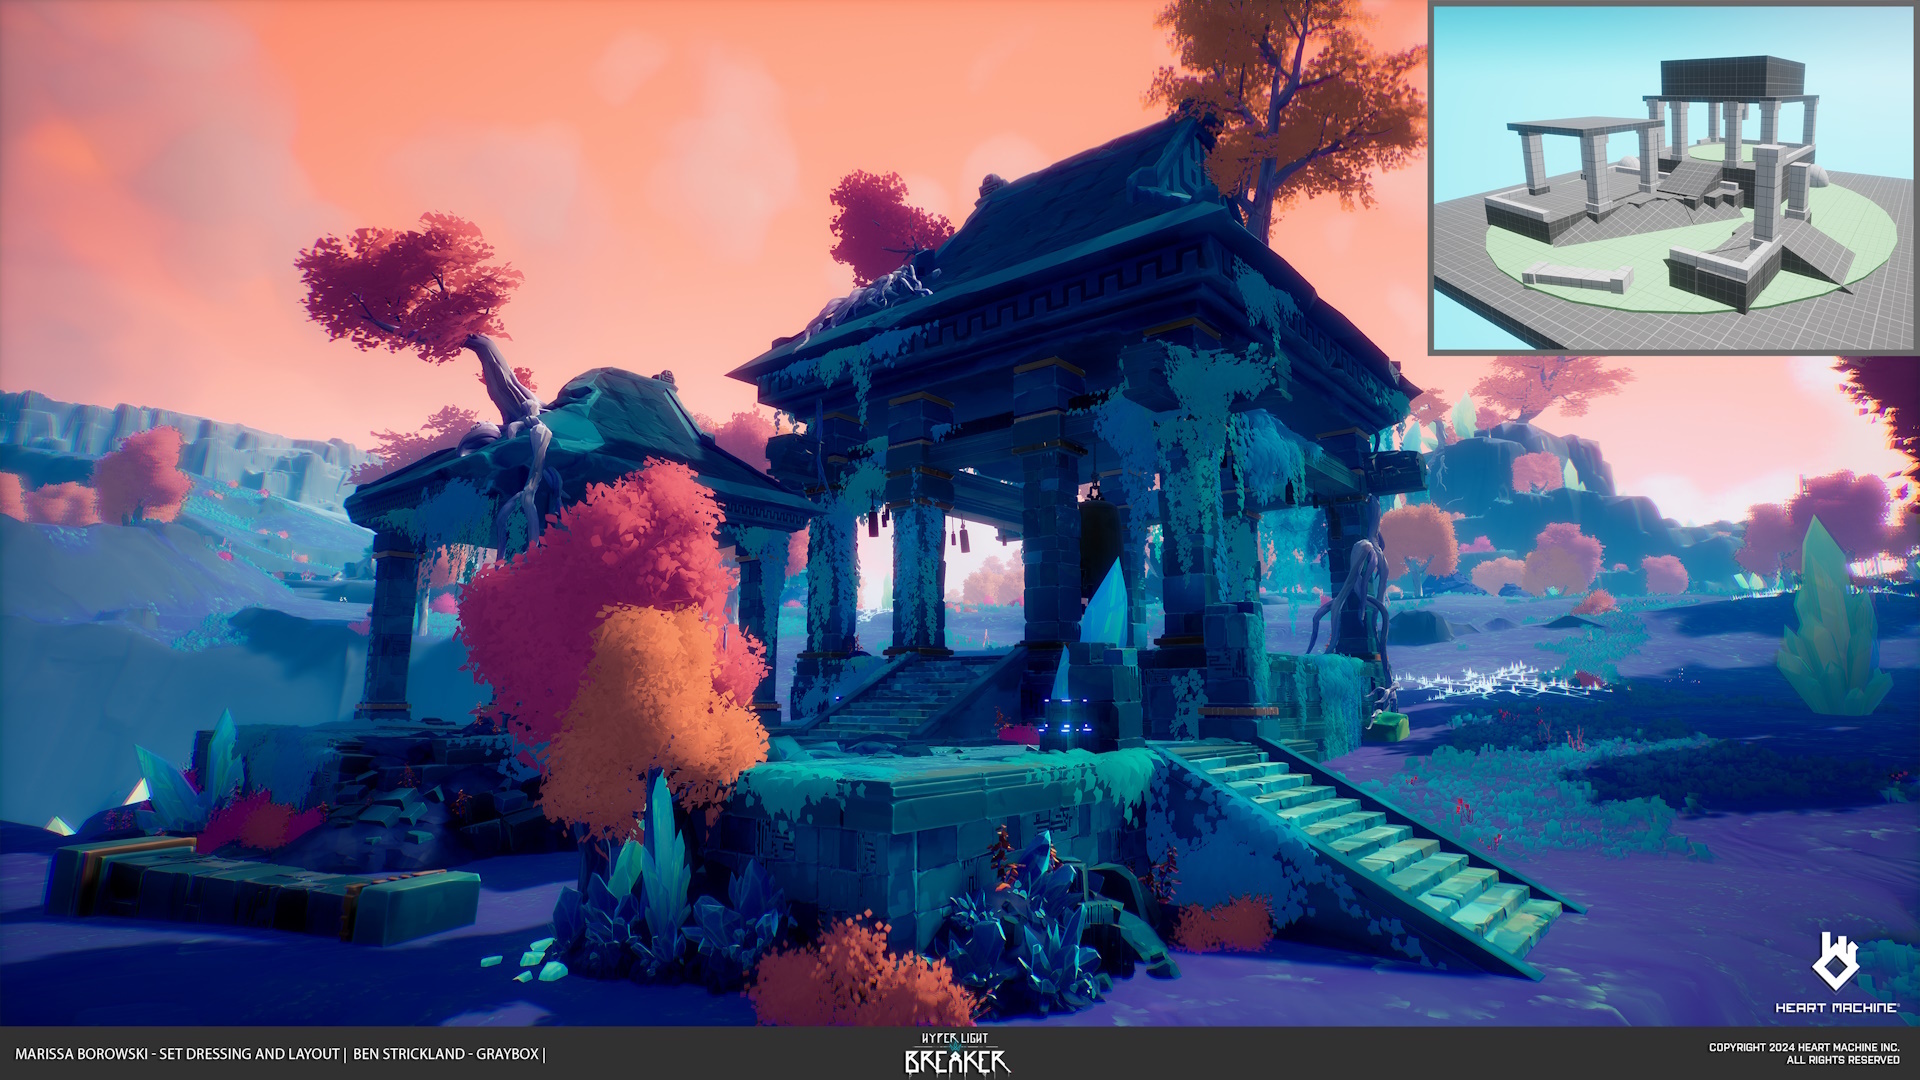
Game levels in Hyper Light Breaker are procedurally generated, which means that instead of using the traditional process of placing set pieces by hand, the assets need to be packaged into flexible dioramas. The vast majority of the Enviro Art goes into the game in the form of Points of Interest (POIs), small slices of the world where we can control the design and composition. Here’s the typical workflow for a POI:
Brainstorming: The art, design, and narrative teams meet to pitch ideas for new set pieces in the game. This is always a fun process where everyone’s ideas are heard, and we can all look forward to making new stuff that we’re excited about!
Concepts: We put pen to tablet and turn our wild ideas into designs that the environment team can run with.
Blockouts: Enviro artists and/or level designers create an initial blockout to evaluate the set piece from a gameplay standpoint. Our collaboration with design is very important to our process.
Replacing Blockouts: This is where the magic happens! Enviro artists take those gray boxes and turn them into trees, buildings, mysterious ruins, and anything we can dream up.
Set-Decking: The new set-pieces then undergo several feedback cycles that focus on details such as tertiary decoration, collision, and the relationship of assets with other objects in the world. Collaboration with tech-art and engineering is essential to making sure these assets blend into the world seamlessly so that everything feels natural.
Final Handoff: Finally, assets are handed off to Randi (Tech-Art) or Ben (Design) for Runtime Placed Assets (RPA) implementation, which means they can now appear in the game world!
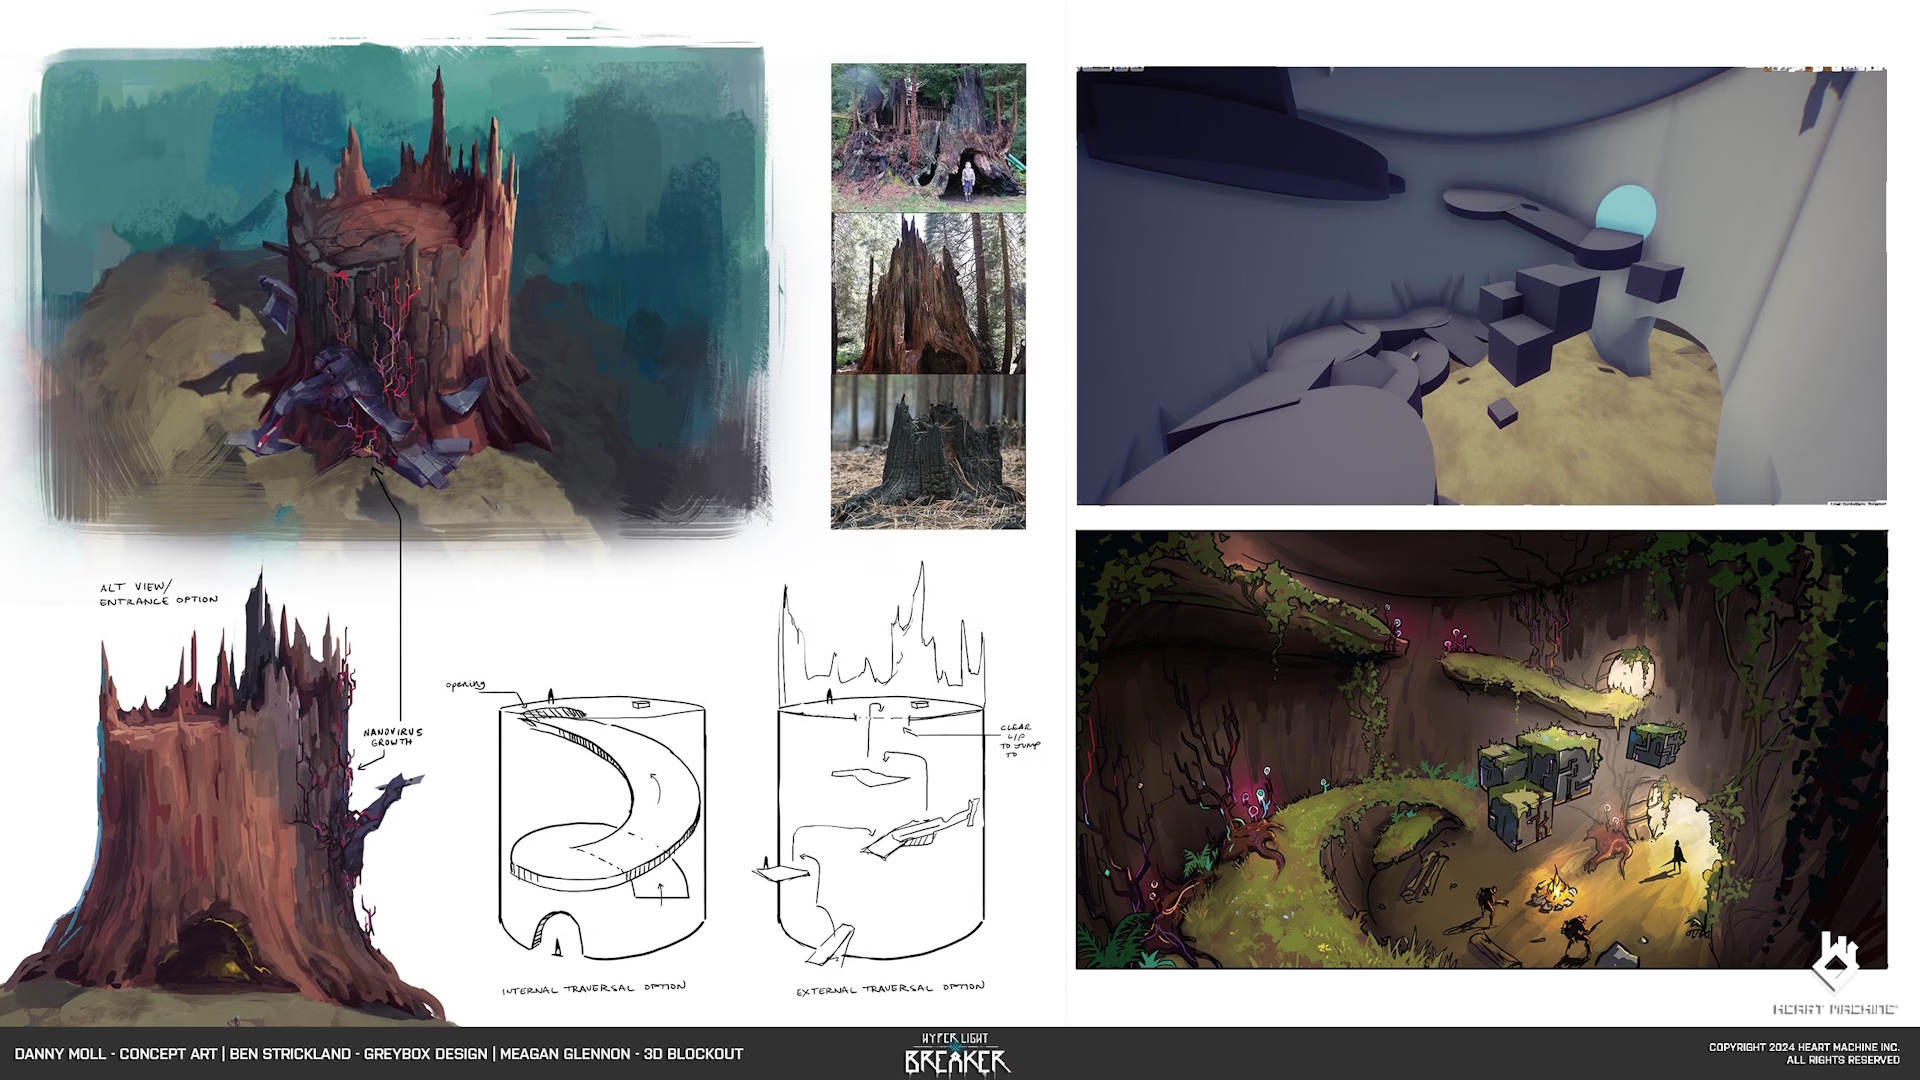
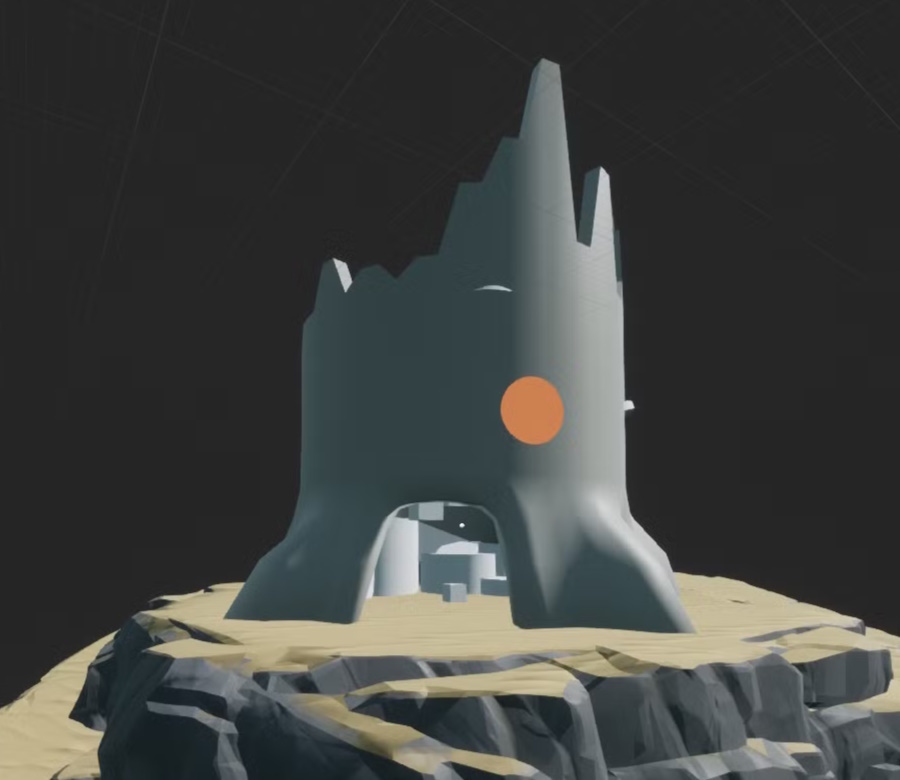
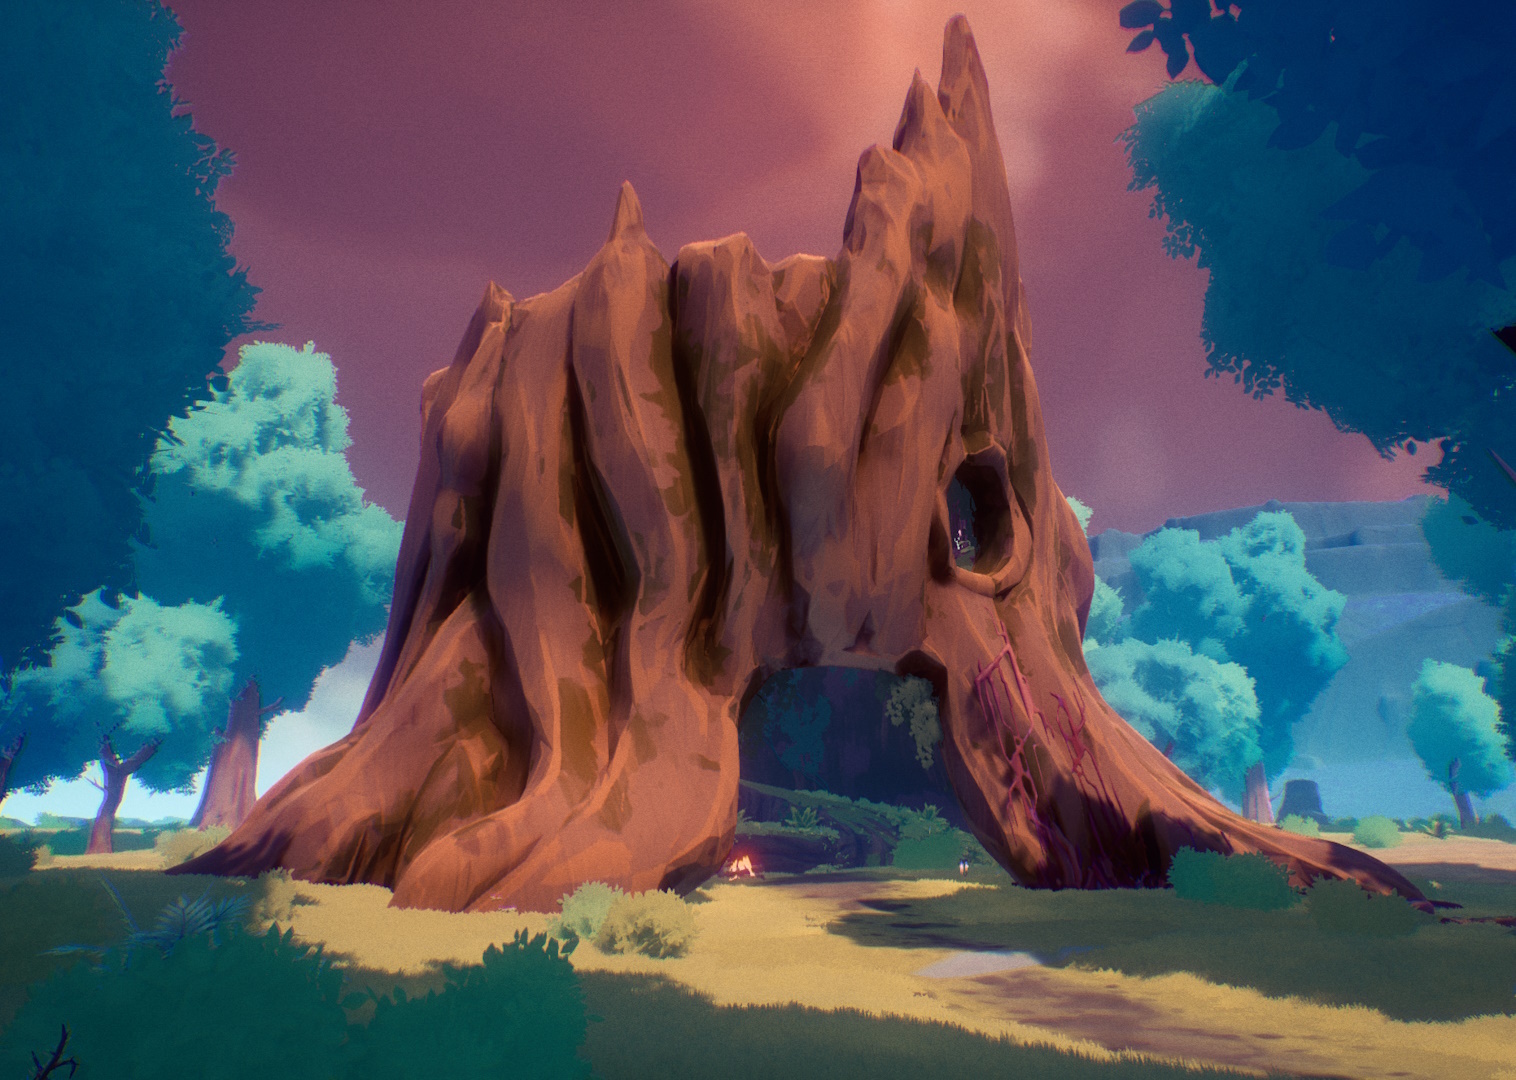
POI Breakdown - Giant Stump:
Concept Art by Danny Moll - Greybox by Ben Strickland - Blockout by Meagan Glennon
Blockout by Meagan Glennon
Interior Set Dressing by Cameron Hughes
Model and Textures by Danielle Wallace
Collaboration with Proc Gen and Tech Art
One of the most complex areas of the environment art pipeline involves procedural generation (procgen) in close collaboration with the tech art team. According to Meagan, “A lot of iteration time has gone into this process, and it requires constant maintenance. We’re extremely lucky to have the Tech Art Wizards that we do and that they are so responsive and flexible to our needs. Together we can make unique, procedurally generated maps that still feel purposefully laid out and full of exciting landmarks for the player to explore.” The main areas of collaboration include:
1. Landscape Creation
Houdini Landscape by Len White
2. Foliage and Grass Wolfgang Traenkle, Senior Environment Artist says “The grass system was a true example of having minds come together. Working with tech art and Engineering, we were able to develop a system that both had a distinct visual look and functionality that could propagate across all our maps. Environment art set up a visual goal using the foliage volume system and then engineering came in to analyze those data tables to create our own custom tool that used the terrain generation data to mimic that style. In the end this left us with a look that has a great natural variation and distinct looks per zone.”
Forest biome grass by Wolfgang Traenkle
3. Scatter Decking - small pieces to fill out the world between POIs
Example of rubble piles to fill in between larger POIs
4. Hyperfabs This is the proprietary tool and system that Enviro Artists use to author POIs
POIs packaged into Hyperfabs by Cameron Hughes
(For more on our Tech Art pipeline, check out this two-part post.)
Design Integration and Implementation
The enviro team collaborates with designers to place NPCs, loot, hazards, and enemy spawners into POIs via locators.
Example of locators and other Designer tags in a POI
“What's interesting about the locator points is that they do not guarantee that x, y or z game object will appear at that spot. A locator is one of maybe hundreds of data points on a map that get fed back into our world generation systems and evaluated to see what should appear there. The world of Hyper Light Breaker is a web of relationships that, fingers crossed, translates into a compelling experience.” - Ben Strickland, Senior Designer.
Proud Moments and Player Experience
Several members of the enviro team shared what they’re most proud of and what they hope players notice in the game:
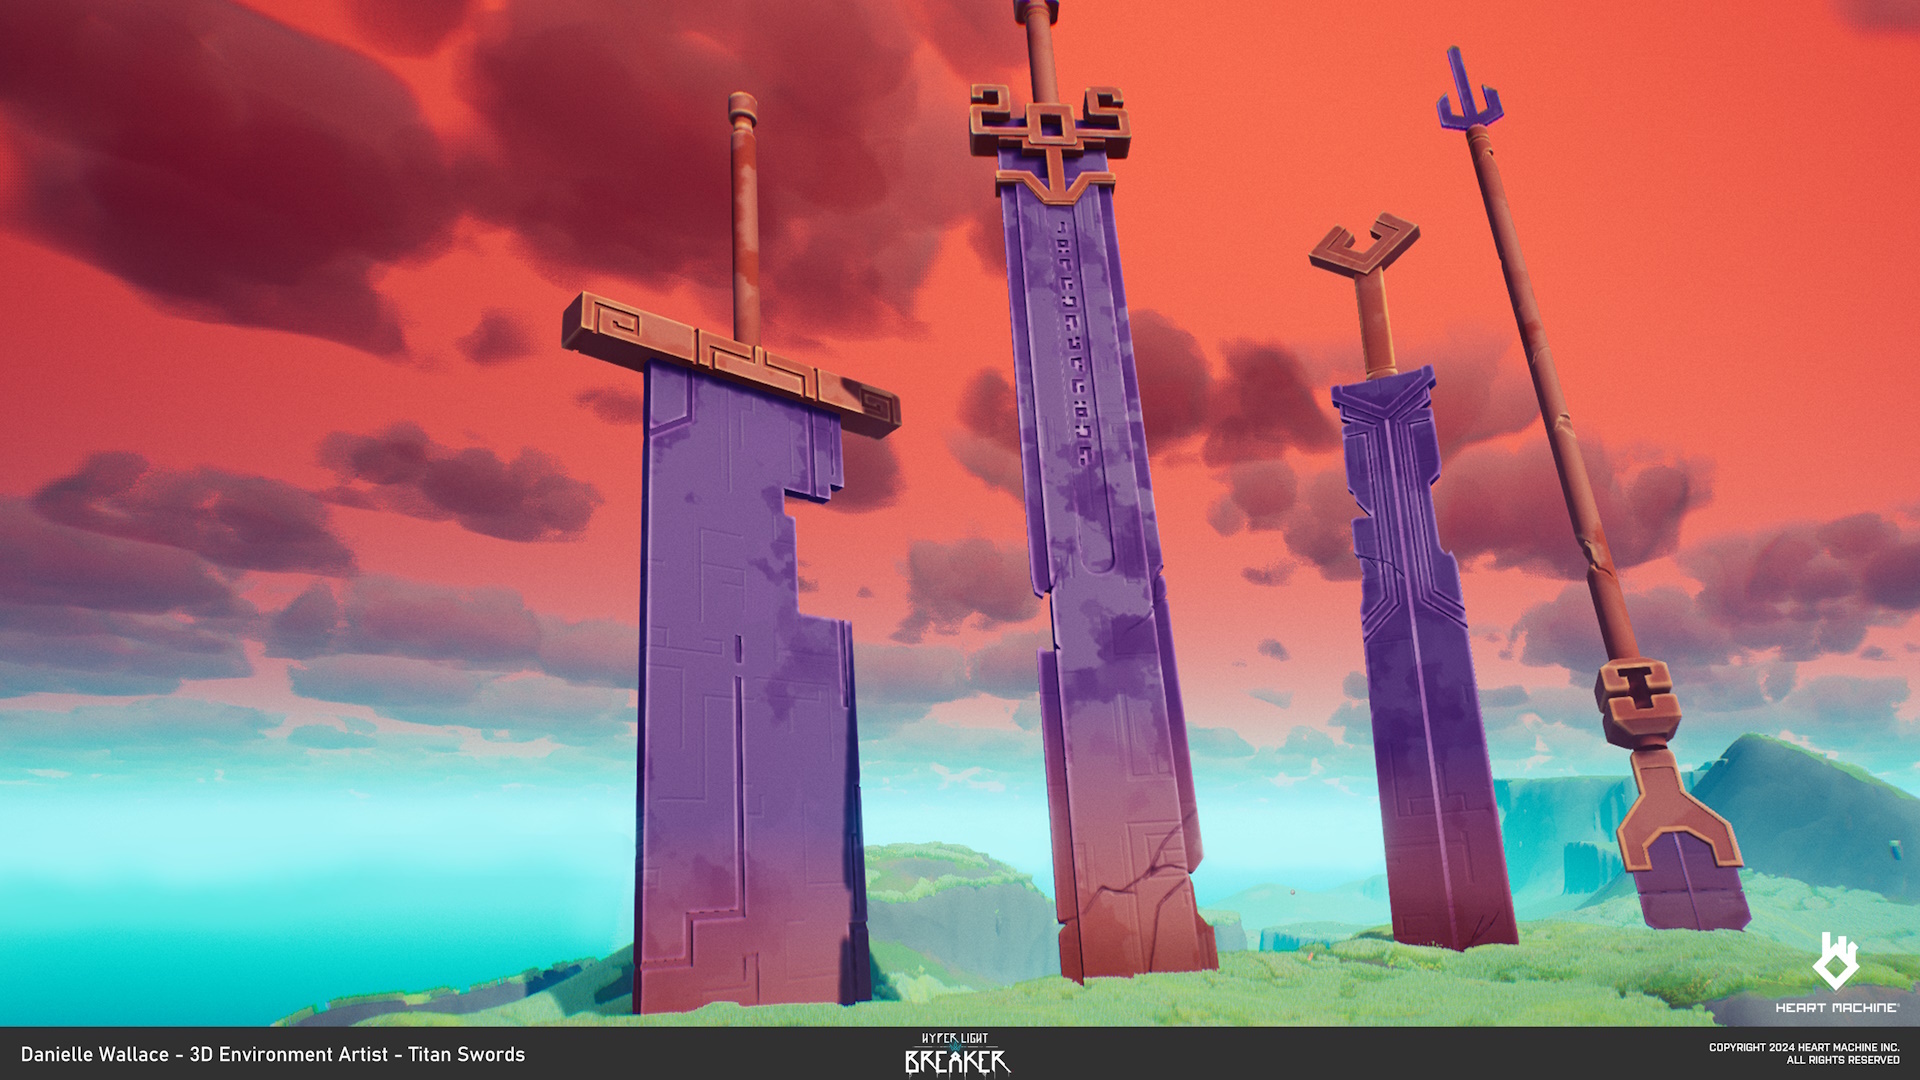
Cameron Hughes, Senior Enviro Artist: “I’m proud of the work we’ve done on the Titans. The scale and grandeur of these elements were inspired by Hyper Light Drifter, and seeing that verticality come together has been a huge win.”
Meagan Glennon, Lead Enviro Artist: “I’m proud of our team! I know it’s cliche to say, but even in the short time I've been here in my role as Lead, I’ve watched each member of this team grow and learn and become better artists and even better collaborators. I’m always drawn to stylized games because it gives the artists a chance to flex their skills in exaggeration, color, and shape language and it’s been so rewarding to see our style come into its own with little pushes and pulls from each artist in their own ways.”
Danielle Wallace, Enviro Artist: “[I’m proud of how] far we've come in our art style, and as a team. I've watched our world transform from what I believed was already a gorgeous art style, to every shot looking like a painting - with our tech artists putting that extra icing on the cake to take it to where it is now. It's rare, now more than ever, to be a part of a team that's so warm, has solid communication, and is driven to make sure the project is the best it can be in all avenues. Amazing projects are created from teams full of amazing people - in heart and talent.”
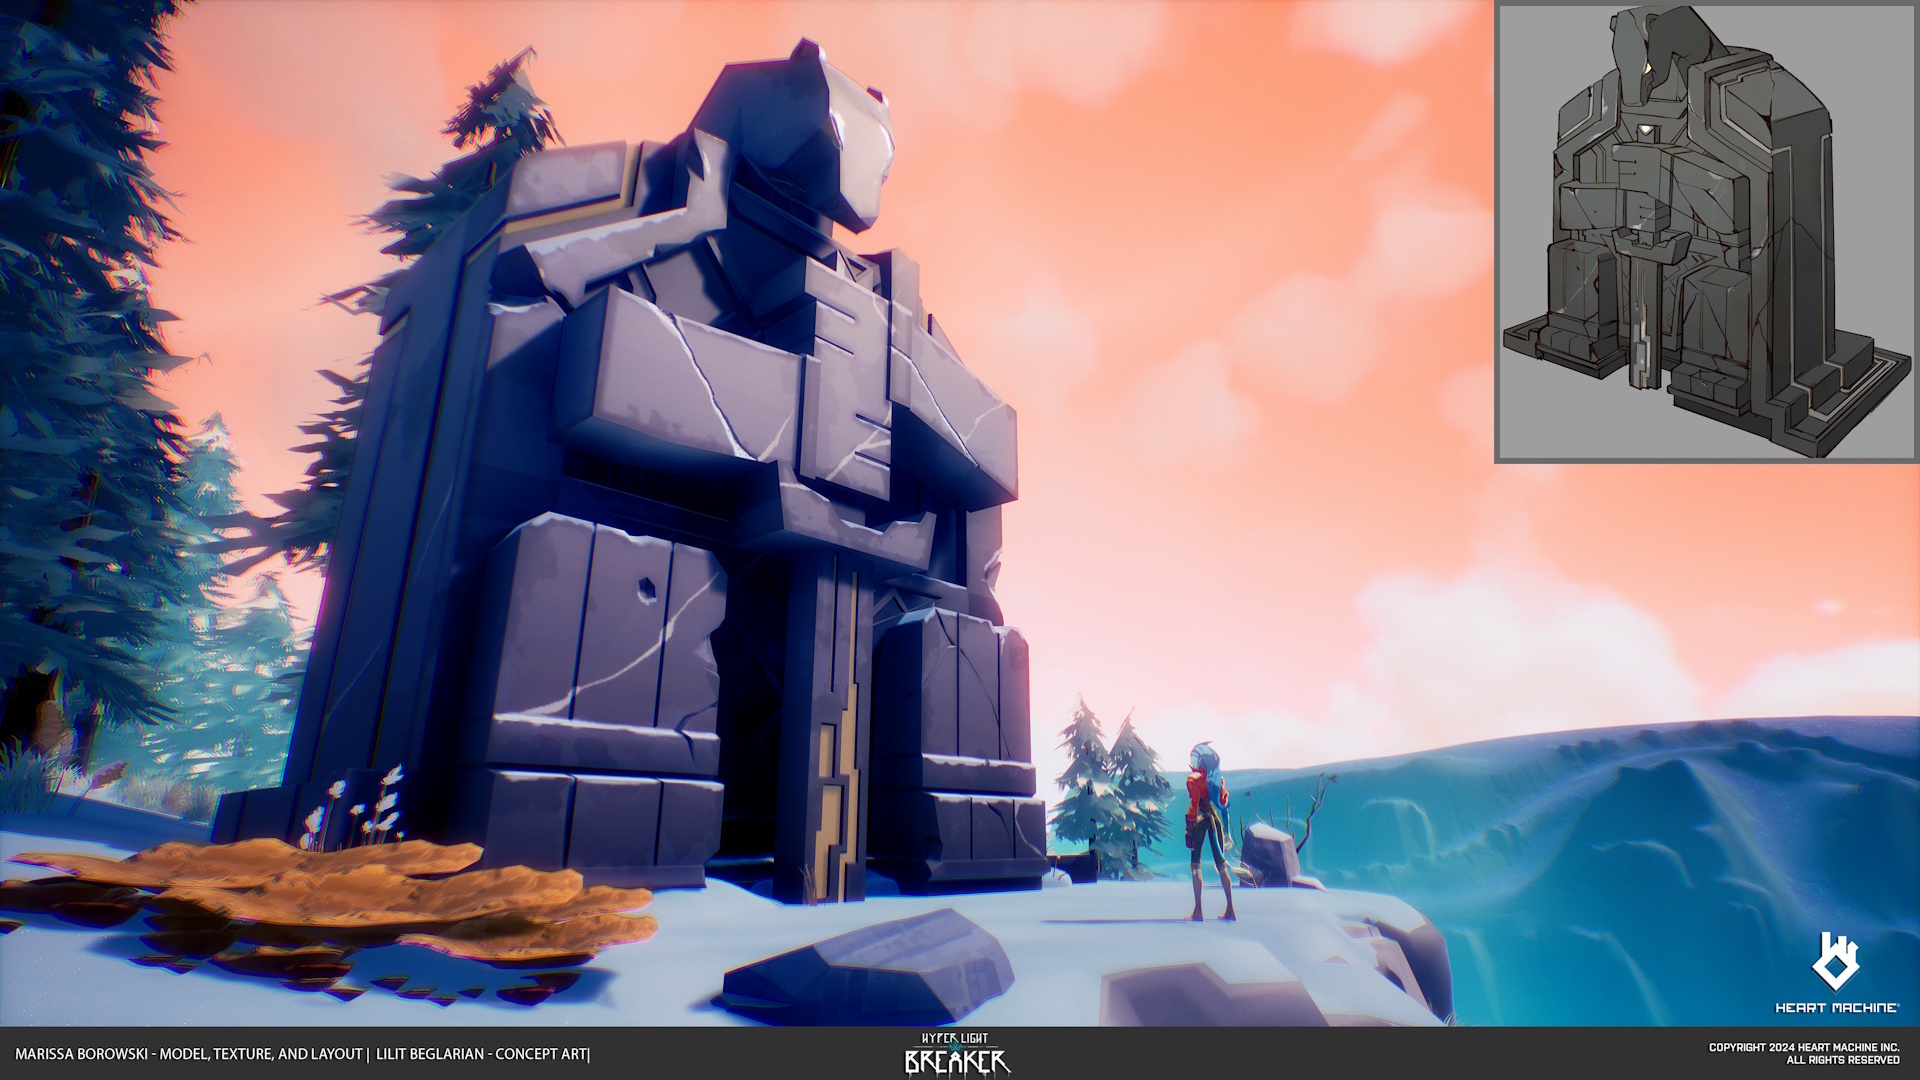
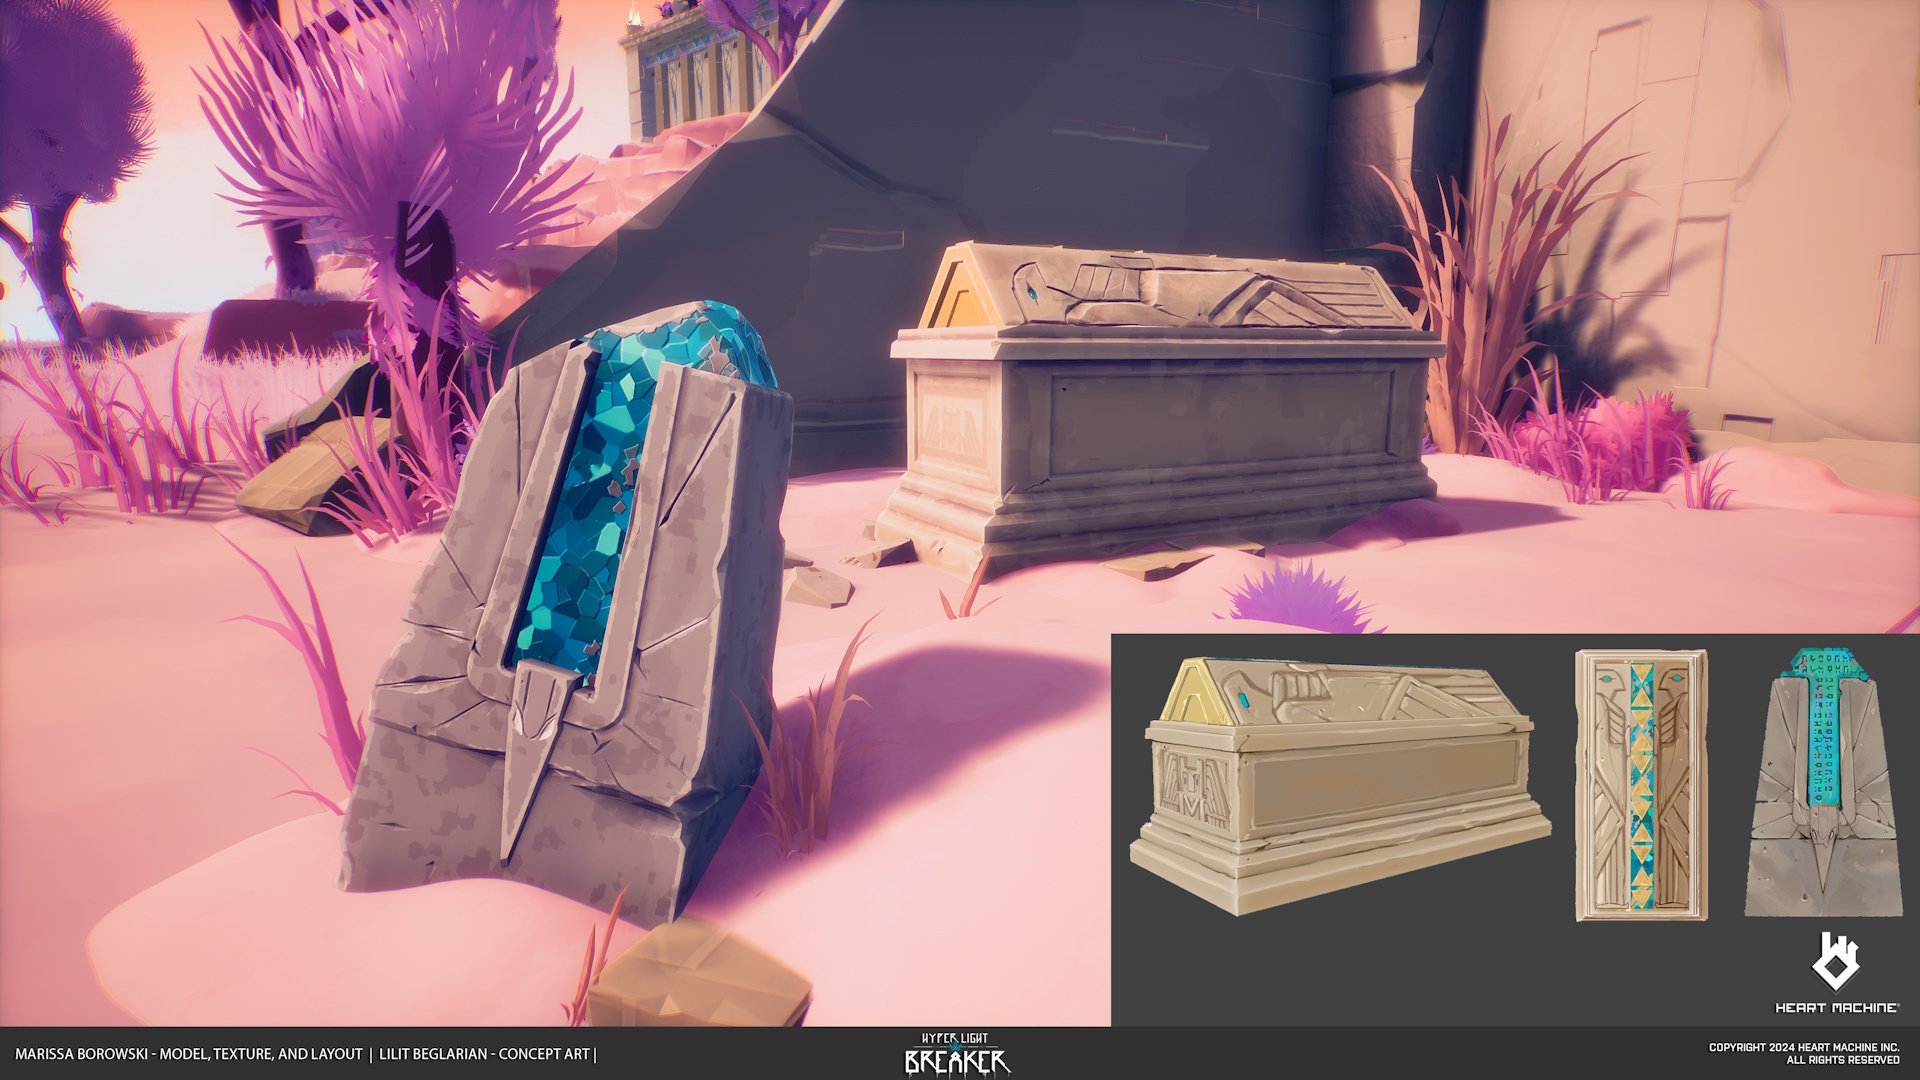
Marissa Borowski, Enviro Artist: “I’m really proud of the assets I’ve worked on, especially the graveyard pieces in the acid bog biome. Lilit was the concept artist for those, and seeing them go from 2D concept to 3D assets in-game was incredibly rewarding.”
Challenges Faced
Of course, no game development process is without its challenges. The ambitions of open world procgen presented some unique hurdles.
Cameron explains, “The Hyperfab workflow has really been distilled technically. We’re now focusing more on how dynamic the terrain can be while maintaining a consistent visual quality. We’ve moved away from overly complex setups to make sure everything looks interesting and cohesive at all times.”
Collision was another tricky area, adds Cameron, “There’s never a right answer when it comes to collision. You get something that feels good, and someone else will say it doesn’t fit. It’s a constant balancing act.”
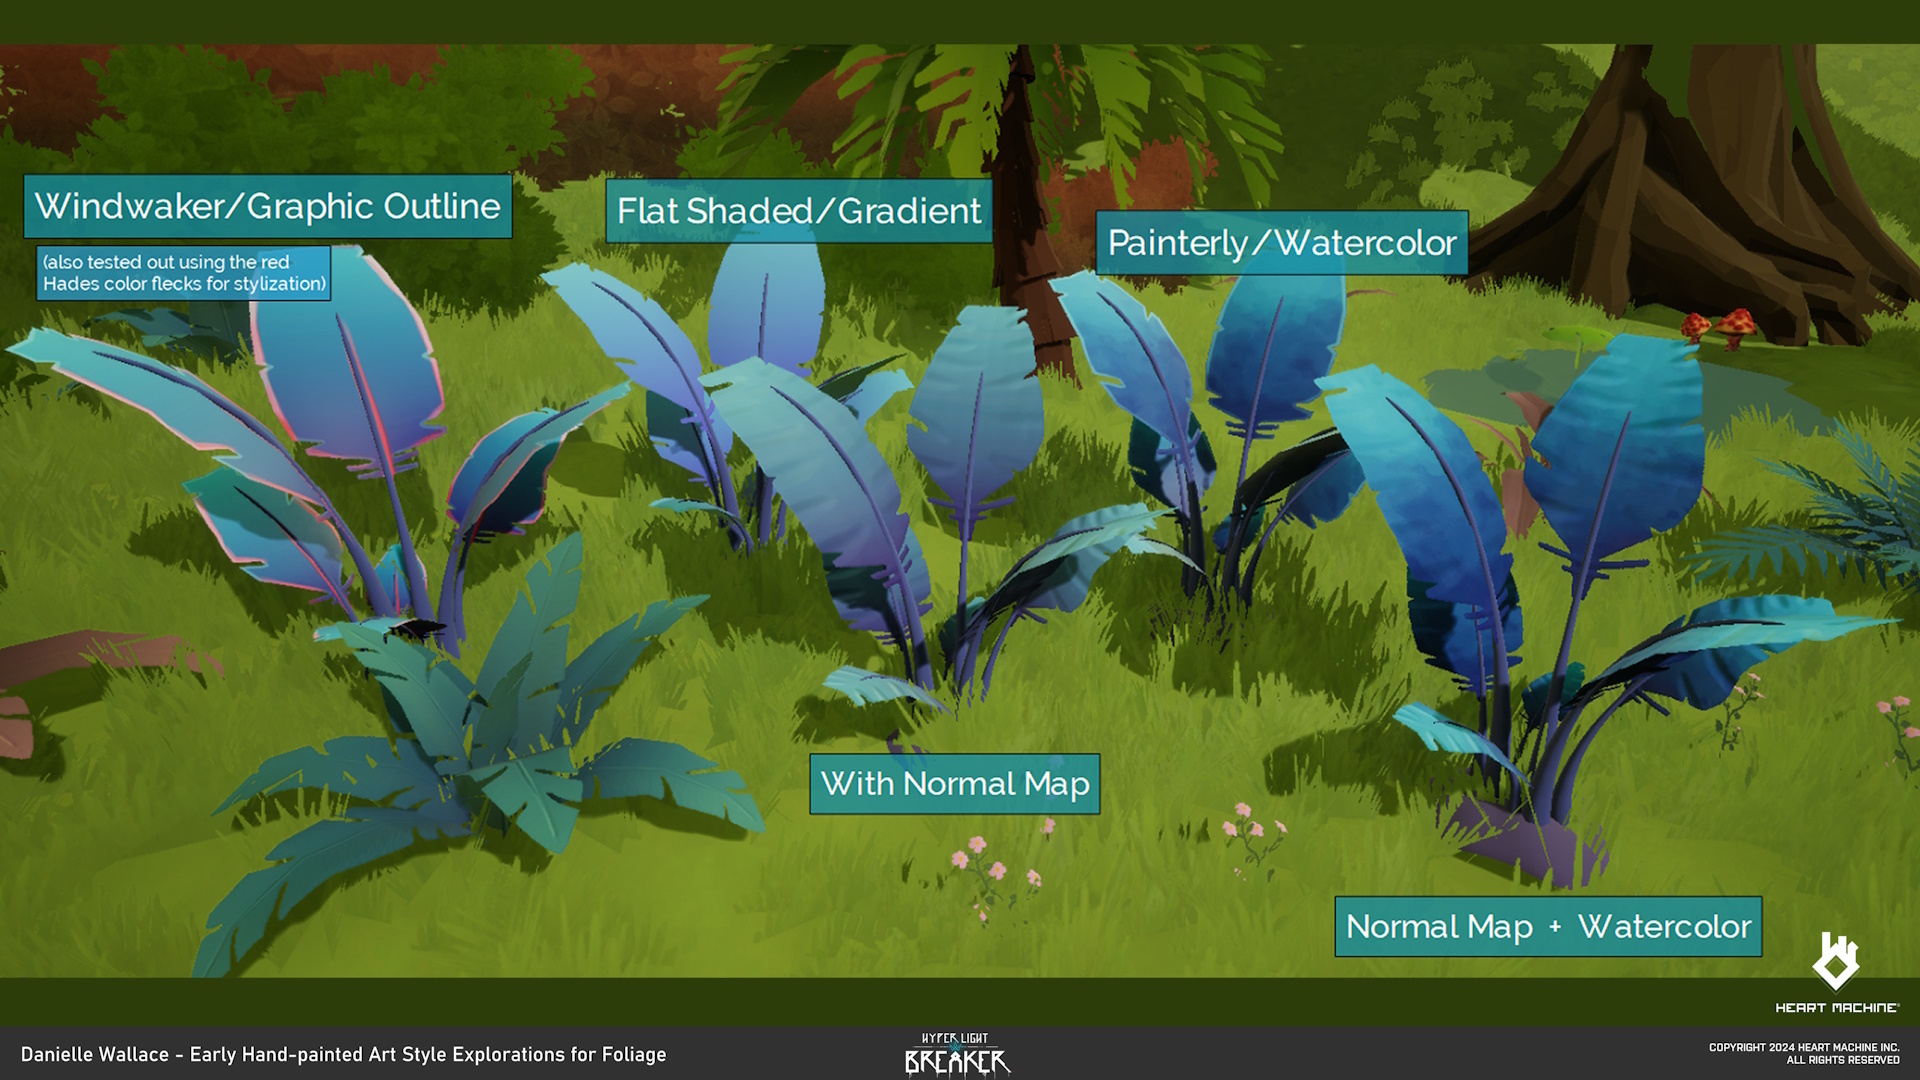
For Danielle, the challenges presented major growing opportunities: “Prior to working on Breaker, I had worked on lowpoly machinery, but nothing near the size or detail of hard surface hero props. I'd say one of my biggest challenges at the beginning of the project was working with detailed hard-surface. It was also around this time that we were deciding whether or not we wanted to incorporate normal maps into our pipeline, as opposed to modeling in those smaller details. We overcame these challenges as a team, and personally, by asking our Art Director, Danny Moll, for help and best approaches for what we wanted to accomplish for these kinds of assets. Hard surface assets, which were previously incredibly intimidating for me, became one of my favorite styles to work with because I was able to have a mentor on the project, learn, and grow with our production.”
The Evolution of the Enviro Art Pipeline
Example Substance Painter set up by Meagan Glennon
While the overall visual direction of Hyper Light Breaker was locked in early, some aspects of the environment art pipeline evolved over time. Marissa, who joined the team later in development, notes, “It’s been interesting to see how the material pipeline has been optimized. Meagan made significant updates that simplified the process, making it smoother and more efficient.”
Cameron was one of the first people on the team, and reflects on the many changes, “We’ve gone through multiple asset pipelines, from basic diffuse to multitexture blends, and now we’ve returned to a more barebones diffuse approach. It’s a much cleaner, more stylized look.”
We’re Excited!
As we barrel toward Early Access, the team is getting excited!
“We’re seeing inklings of what the final product will be, and I’m confident that when we release, fans are going to love it.” - Cameron
“I’m really excited for early access. It’s always been my dream to have a credit on something, and I can’t wait to point out specific rocks and say, ‘I made that!’” - Marissa
“As a developer, you playtest your game with your team and go, ‘That was a nice time. That was fun’ and of course that's how you think your game should feel to play as an absolute minimum. However, I constantly find myself wanting to play more after each session…it's still wildly engaging. Like your favorite song you put on repeat for days on end during your lunch break. The feeling that still, every time I boot up the game and do a new run, it feels brand new. Every department has been absolutely rocking it, and I genuinely believe we have something special.“ - Danielle
“Everything is coming into focus now and the team is working hard on new ideas for POIs and new ways to make our maps looks better and better. I’m so excited to share our little game with the world and for players to experience the impeccable vibes that we have so lovingly crafted for them!” - Meagan
It’s been incredibly rewarding to see the full team’s collaborative and creative efforts come together to create a rich, immersive world for players to explore in Hyper Light Breaker. We can’t wait to share it with you!
Early Access Coming Early 2025
Hey everyone,
We’re so grateful to all the members of the community who have expressed ongoing support and enthusiasm for Hyper Light Breaker’s Steam Early Access launch. After much evaluation and many conversations with our publisher Arc Games, we’ve decided that we need just a little more time to get the gameplay experience polished to our standards.
Therefore, we’re now looking at an Early Access launch date of very early next year.
We don’t want to ship a project, even in Early Access, that we’re not satisfied with on a number of fronts. Especially in the current state of the industry, we need to put as good a foot forward as we can.
As always, we believe in maintaining a sustainable pace of development for our team, which means taking care of the mental and physical health needs of everyone first, rather than burning the team out trying to hit a specific set launch date. This will enable the team to offer better, more responsive support to community feedback during the Early Access period itself.
Trust that we REALLY want to put Breaker out there, and see people engage with a game that we’ve all worked so hard on. However, we also REALLY need to make sure that the core foundational units of the game are as strong as they can be, so that we can build on them during the Early Access period. In the meantime, we are confirmed to be showing Breaker at multiple events to get your feedback as we continue getting Breaker ready for Early Access launch! We’ll have a demo of Breaker at PlayNYC + AnimeNYC in New York City, XOXO in Portland, and Media Indie Exchange in Seattle. We’re also currently planning additional public demos at DreamHack in Atlanta and MAGFest in Maryland. So, if you absolutely can’t wait to get your hands on the game when it launches in Early Access, you can at least catch us out in the wild at these events and give us feedback on how the game is shaping up so far!
Thank you everyone for your continued support of our games and the people who make them.
For the most up-to-date info on Hyper Light Breaker and our other projects, follow us on social media or jump in our Discord.
- Alx Preston, Founder and Creative Director at Heart Machine
Summer Game Fest Trailer
We’re extremely excited to announce that Hyper Light Breaker will launch in Steam Early Access in late summer!
Check out the exclusive Summer Game Fest trailer below to get a glimpse of the Overgrowth, co-op multiplayer gameplay and other never-before-seen footage. We’re counting down the days together with you and can’t wait for you to jump into the game!
Whoever she was, she is now transformed. What does she want? Why is she here?
And what is the pain behind her howl? VIDEO
A glimpse into our wordless storytelling.
Hyper Light Drifter was a game well-known for its wordless storytelling. A quick Google search will yield dozens of videos and articles discussing the art of worldbuilding without words.
As Jake Theriault artfully describes in his analysis of the opening sequence of Drifter: “We discover all we need to know about the world in one wordless sequence. And from there on out, all the discovery made by the player is done visually.”
While Hyper Light Breaker will not be entirely devoid of text (there will be UI and some loadout descriptions), we have made the decision to lean back into our strengths and reveal our world and mysteries therein through illustrated vignettes.
There is so much about the Hyper Light universe to discover. With Breaker, we’re excited to share more about the history of the world that led to the events of Drifter.
Our Character Artist, Isaak Ramos, has established a house style for our studio, inspired by the works of Katsuhiro Otomo.
Some key aspects include:
Clearly defined straights and minimal curves
Shading using a halftone pattern (and/or halftone+flat value)
And reasoning includes:
Effectively receives color blend modes
Meaningfully calls back to our influences and to our past without resorting to pixels
Adds gravity/seriousness
Quickly creates a more finished aesthetic that will support looser lines and different drawing styles
Let us hear from you!
What do you think about this return to wordless storytelling? And our panel art style? And what’s going on with Dro?
Triple-i Initiative Revealed a New Hyper Light Breaker Mini-Boss Trailer!
As part of the Triple-i Initiative (#iiishowcase) today, Arc Games and Heart Machine revealed a new trailer giving you a first look at the Flame Wizard, one of the many powerful mini-bosses in Hyper Light Breaker! Prepare to fight an array of deadly enemies, like this one, in Hyper Light Breaker when the open world rogue-lite adventure set in the Hyper Light universe launches in Steam Early Access this summer.
Check out the new Mini-Boss Reveal Trailer below!
LINK TO TRIPLE-I INTIATIVE YOUTUBE TRAILER LINK WITH OUR TRAILER HERE
To celebrate this new trailer drop and being a part of the Triple-i Initiative, Heart Machine’s previous titles, Hyper Light Drifter and Solar Ash, are on sale NOW! Check out the Triple-i Initiative Steam Sales Page to grab both games on sale via Steam while you have a chance.
More details on Hyper Light Breaker will be revealed in the coming months as the game gets closer to Early Access launch – so stay tuned for updates to come. Be sure to follow Triple-i Initiative’s Twitter/X as well for updates on future showcases.
We are now Arc Games
We're very excited to announce that we are now Arc Games! We're the same team of passionate gamers that brought you many beloved franchises including the Remnant series, Have a Nice Death, Star Trek Online and Neverwinter. And we can’t wait to bring you even more exciting titles like Gigantic: Rampage Edition, Hyper Light Breaker, and more soon-to-be announced games for 2025 and beyond! Follow us @ArcGames and check out the #iiishowcase April 10th, 10am PDT for a new Hyper Light Breaker trailer!
Follow us on Social Media: Facebook.com/ArcGames
Youtube.com/@ArcGames
Hyper Light Breaker at Day of the Devs @ GDC
https://www.youtube.com/watch?v=izqBiM-qzJE
See you at the Midway https://www.dayofthedevs.com/events/
Day of the Devs returns to its roots in San Francisco for the 2024 In-Person Celebration: San Francisco Edition!
All free with no costs either to developers or attendees. Just ask that you PLEASE RSVP.