Welcome to the third installation of the Main Assembly Dev Diary!
Today we’ll be talking about colours and materials! Two of the main ways to tweak the appearance and behaviour of your creation!
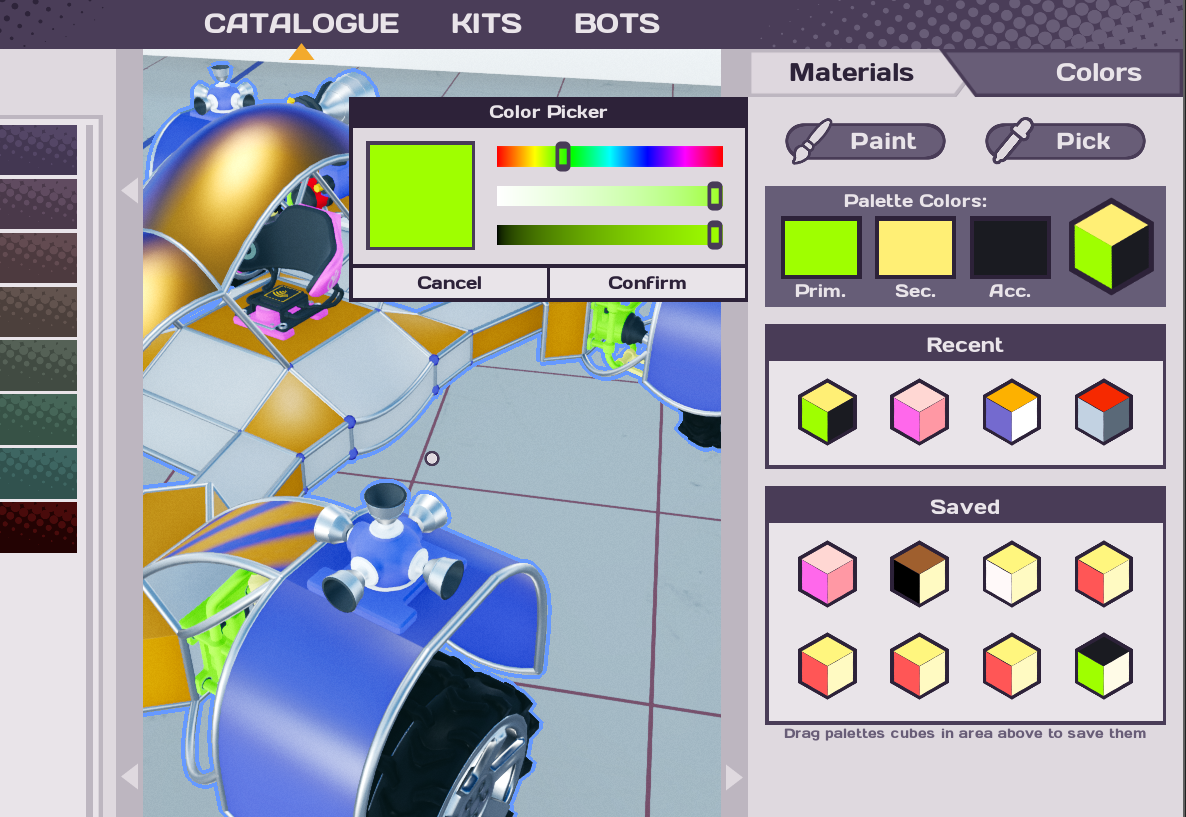
Initially, we decided that each robot would have a palette of three colours. This would provide a consistent theme as all the chassis elements and parts would use some combination of the three, while also allowing for some tweaking via selecting which colour would be the dominant contributor on a piece-by-piece basis. This made it very quick to change the appearance of a bot by swapping out the palette or changing a single colour from the palette.
We also offered a variety of materials from which chassis could be constructed. These offered a wide variety of physical properties and different surface looks.
After the open beta, we received a lot of requests for more colour slots as well as feedback concerning the wide variety of materials and confusion about their purpose, so without further ado, we have new systems and workflows to show you today!
Unleash The Rainbow!
Rather than the entire creation using a fixed palette, you can now use a different combination of any three colours on each individual piece. Want yellow and green motors with a blue body and hot pink seat? We have you covered! In addition to allowing you to save and load from several favourite slots, the most recently used combinations will be there too!
After picking the colours you want to work with, you can now enter Paint Mode! Simply click on parts to paint them with your active colour set, click and drag to apply to multiple pieces in a single stroke, or double-click to perform a fill.
But wait, there’s more! Some parts and materials can use multiple colours! To pick which is the primary, secondary and tertiary active colour, simply scroll with the mouse wheel to cycle through the three active pigments. There’s also a shortcut to swap primary and secondary for quick switching as you paint!
As well as a colour picker tool to sample colours from already painted parts!
Some parts, like the Trail-maker, can even use the primary tint colour in other ways!
Material Woes!
A common complaint about the old colouring system was that too few colours were available, whereas materials suffered from the opposite problem! To combat this, we’re trying out a system where materials are grouped into three main categories: Light, Medium and Heavy. Currently all the materials within a category have identical densities and resilience, leaving you free to pick one based on appearance or the presence of aerodynamic effect boosting.
Having selected the material you want to use, you can then apply it to plates and frames in the same way as the paint tool – click, click and drag, or fill!
That covers the major features of the new paint and material tools! We hope the new approach is easier to use, and we look forward to the arrival of rainbow robots using the expanded colour palettes!
It’s been a while since the last one, but fear not, we're planning on releasing one of these every other week going forward.
Before we get stuck in though, the closed beta is over and we've been busy going through all of your feedback, taking notes and discussing what we've learned from it. We just want to say a big THANK YOU to everyone who participated!
Now, back to the Dev Diary! This week we'll focus on the programming in the game as well as what we've been working on for the last two weeks.
Just remember, this is all work in progress so expect things to keep changing in the future and more things to come - there's also final art missing for some things.
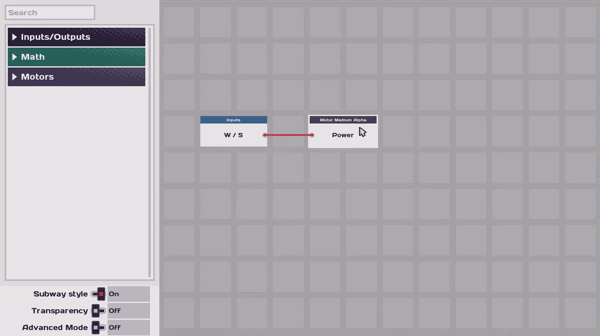
Styling your wires!
First up we now have a new way to render wires! We've called this the 'Subway' map style, bringing with it a cleaner look and simpler user interface. However, if you're a fan of the old way you can simply toggle back to it!
Grouping!
Next up we've added a way to group output nodes of similar kind together so they take less space and make them a bit faster to program.
To do this, simply place the two relevant nodes on top of each and they will be grouped together. Drag them out from the new grouping list to ungroup them.
Renaming
A very popular request during the beta was the ability to rename parts, so here it is!
Awesome feedback here everyone! This feature request quickly became a new favourite here in the office 😊
New node look!
The last change we're showing this week is an update to how the programming nodes look!
We've moved some text around to make the nodes clearer and much easier to read at a quick glance. You'll notice that the constant node now displays its value directly, making it far easier to read and understand full programs.
That wraps up this week's Dev Blog! Thanks for stopping by :)
Help us build something awesome by Wishlisting Main Assembly -
Hey All, We've got a few things added into the game for you to check out and test!
We have some new parts to use, these are: - Road wheels (medium, large) - Dragster wheels (x-large) - Monster truck wheels (xx-large) - Trailmaker - Universal joint
While programming the bot, made the numbers more precise as well as a few more properities on various node types.
During crafting the bot, you should now be able to re-add a frame edge to a plate and after frame edges are deleted, the curvature should still be accessible.
We've also tweaked the driving of your bots to hopefully improve the driving experience, especially on concrete and snow. The Torque and Friction was tweaked for this.
and finally, We've also made the Main menu and the Airstrip region of Tundra all crimble-ified
Closed Beta Signups reopened.
We've just re-opened the closed beta signups, so if you fancy giving it a go, make sure to sign up here.
Get involved with the community:
Sign up to the Team17 Newsletter or keep up to date with all things Main Assembly here:
Today we're incredibly excited to announce our partnership with Bad Yolk Games to bring the sandbox creation game, Main Assembly, to Steam Early Access in 2020!
Take your first steps into Main Assembly's world of ingenious inventions with our new announcement trailer:
It's time for our second Discord competition, but first time we post about it here! It will run from Friday (2019-10-11) till Sunday midnight (2019-10-13), then we will announce the winners on Monday (2019-10-14).
👉https://discord.gg/wGH4gsm👈
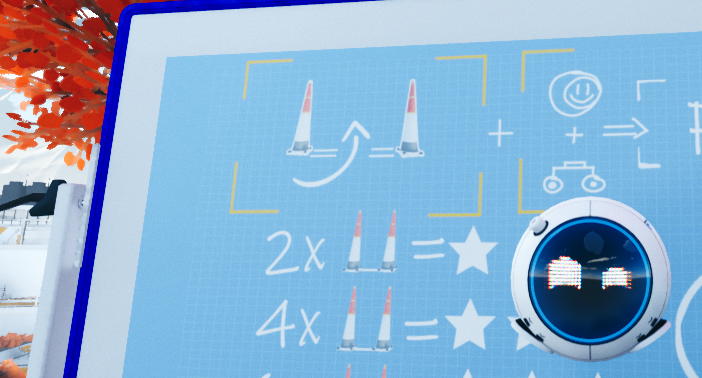
This time we want your ideas for achievements we can add into the game. The achievement can be in any part of the game (challenge level, sandbox or multiplayer) but keep in mind the complexity of the achievement will matter in our decision.
Your suggestion should have a Title and be followed by a short description on how to get it. For example: Star collector - Collect 20 stars.
To participate just post your suggestion in #competition in our Discord channel.
Like last time you can vote on suggestions you like with :heart:
We will decide on who the 2 winners are, we will factor in number of votes, how technically feasible the suggestion is and how well it fits in our game and most importantly how good it is.
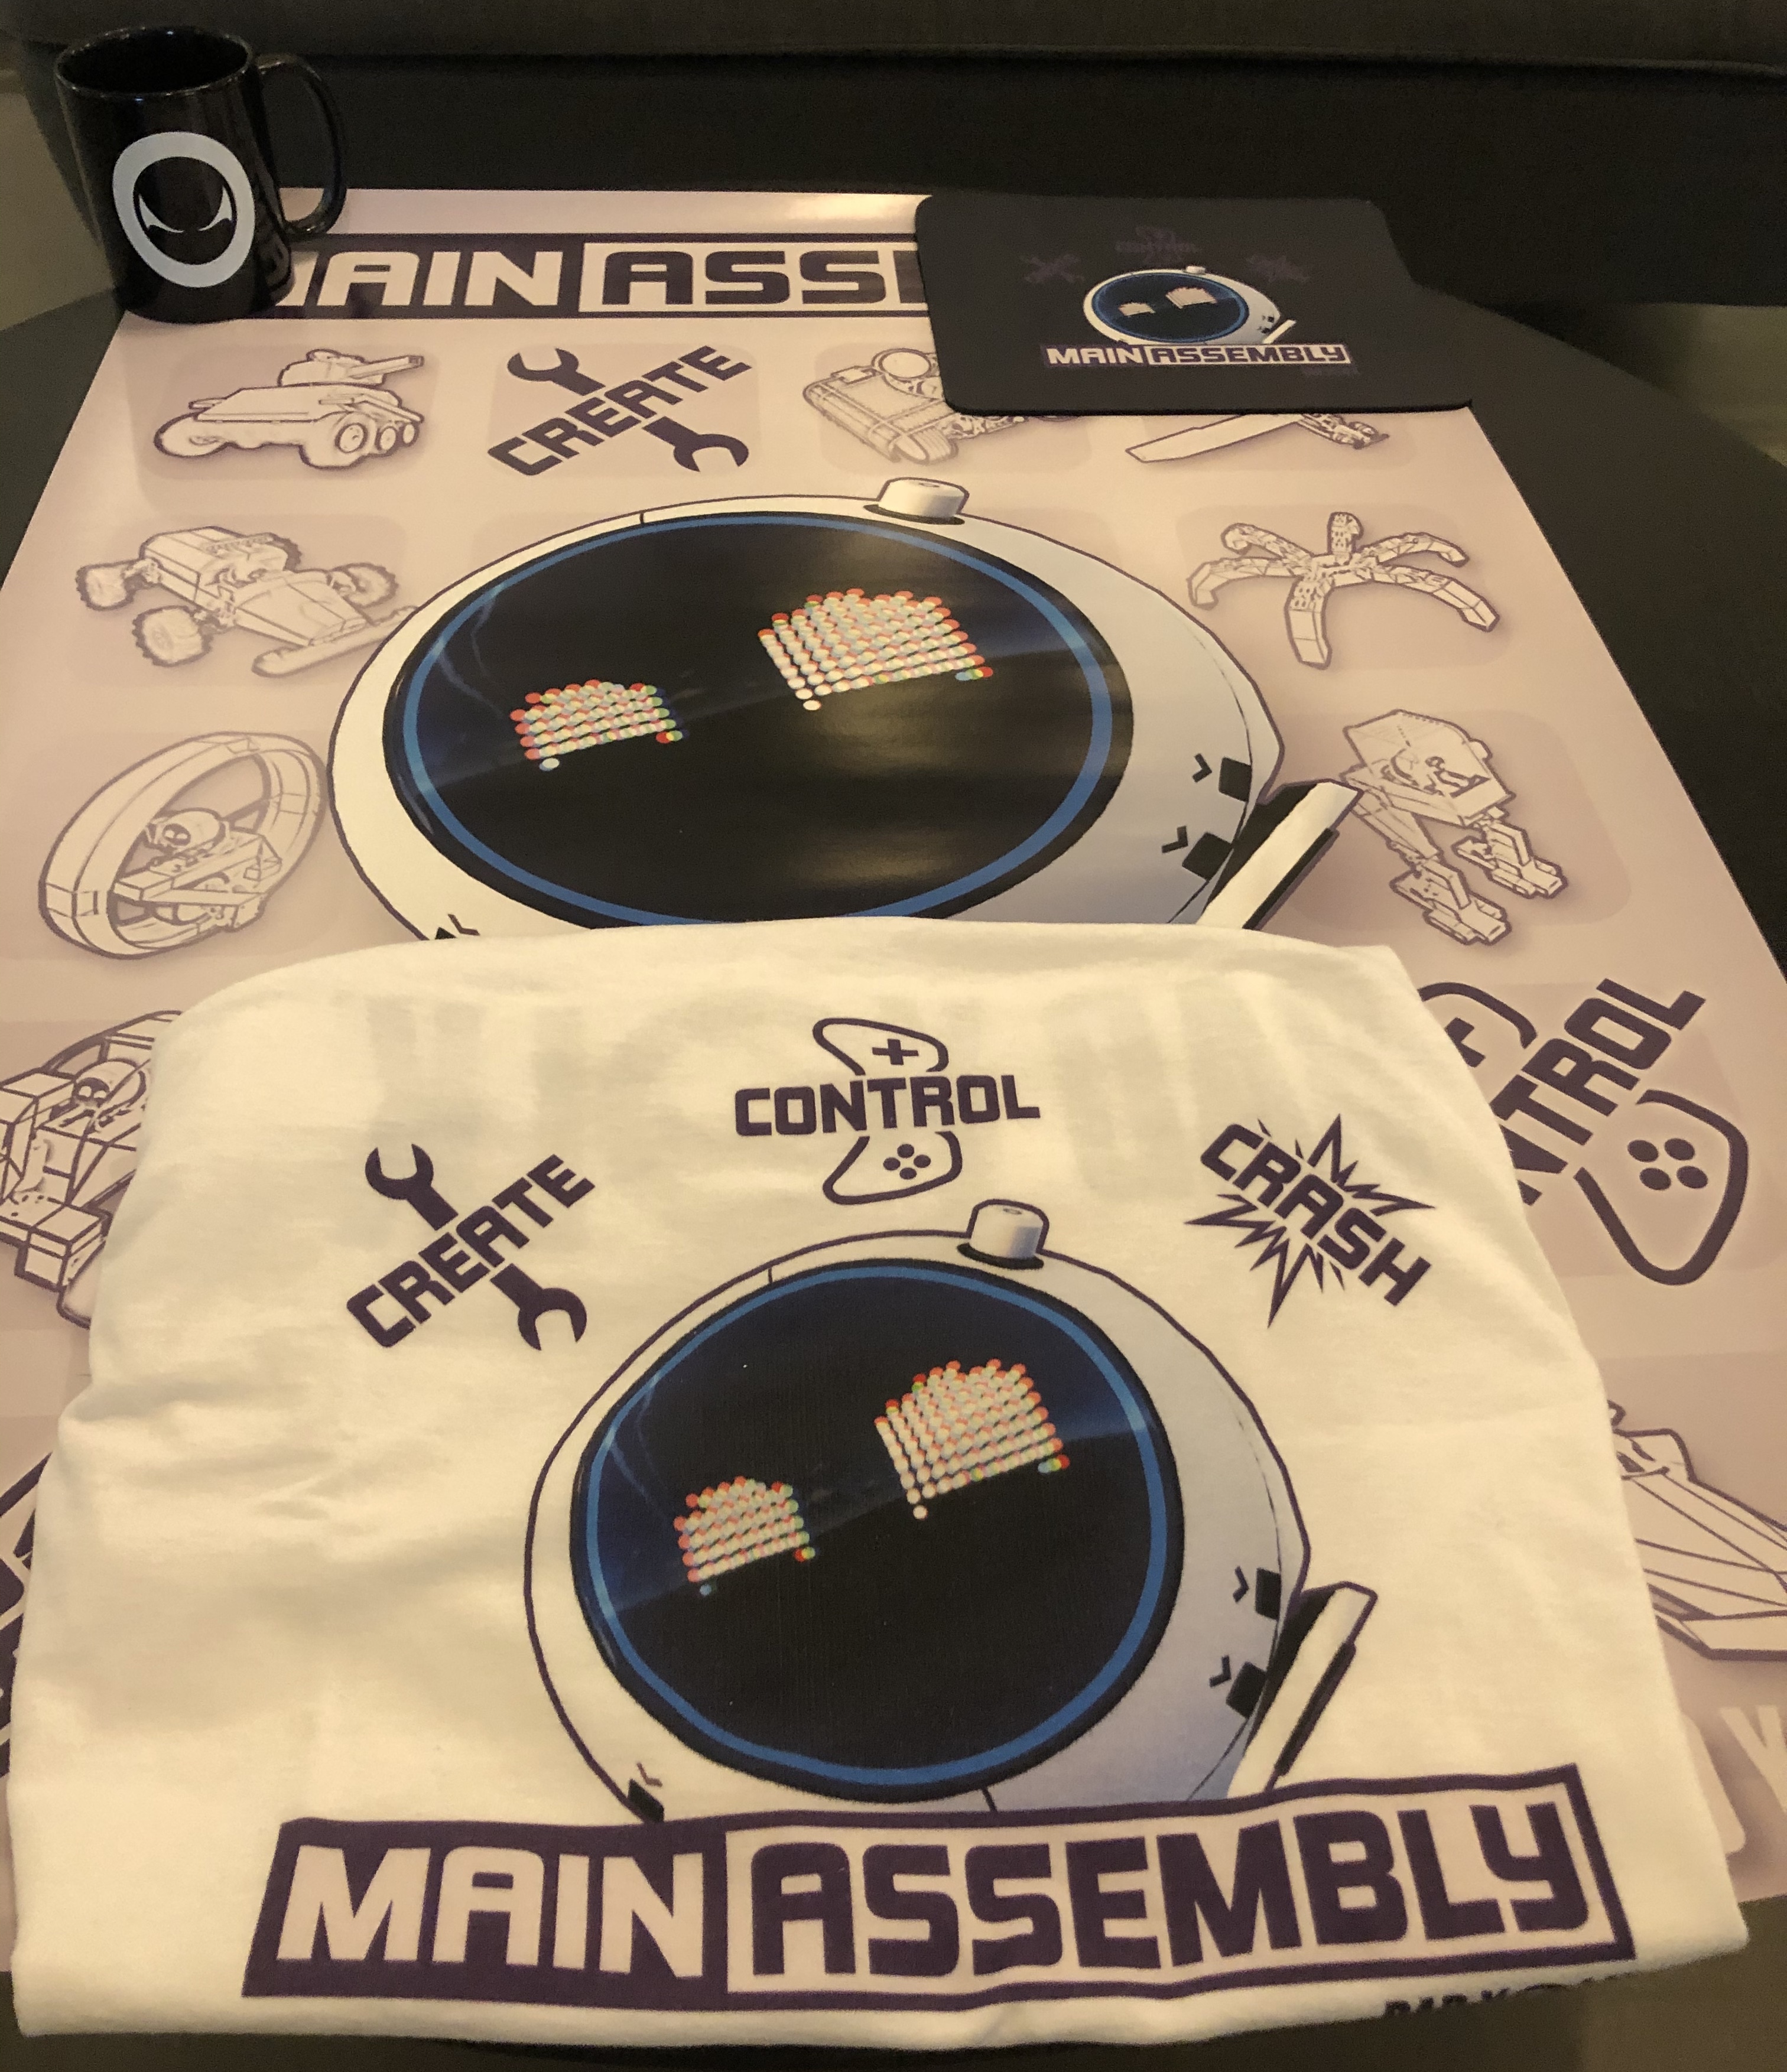
These are the prizes the winners will get to choose from. *Main Assembly mouse pad *Main Assembly poster *Main Assembly t-shirt *Bad Yolk coffee mug
Devblog #1 - Programming Robots
Hi folks, [BYG]Watts here. This is my first devblog and we're going to talk about something near and dear to my heart: programming!
In Main Assembly, we want to allow players to control elaborate contraptions and make cunning devices, but in an approachable and enjoyable fashion. Not everyone enjoys writing code, after all!
The brain of any bot is either a Docking Station where your little drone avatar can directly interface with the robot, or a Processor which is designed to operate without direct control. While your drone is docked, your controller inputs (mouse and keyboard or gamepad) are available for you to use in programming. Both Docking Stations and Processors can also use inputs from sensor parts, such as proximity and orientation sensors, get feedback from powered parts, and generate their own signals such as waves and noise.
As an important aside, Docking Stations are available in two flavours. The Simple Docking Station has reduced capabilities but can automatically program itself to control robots that look a bit like a conventional car. The Advanced Docking Station is, well, much more advanced!
When you have a docking station or processor on a robot, you can use a shortcut to enter Programming Mode at any time during crafting.
The programming itself uses a node- or graph-based representation. Signals carrying fractional values (normally between -1.0 and +1.0) enter the Docking Station or Processor, from inputs or sensors, and can then be combined with simple math operations (addition, multiplication etc.), tested against each other (minimum, maximum, equality etc.), used with very simple memory systems (take the mean value, delay the input for some time, etc.), and finally sent to powered parts!
One of the simplest such parts is a Motor. If the programming sends a value of 1.0 to a motor, it spins at its maximum speed. If it instead receives 0.25, it will spin at quarter speed. And if it is sent -0.5, it will spin backwards at half speed. Most parts accept this kind of continuous input and respond accordingly.
Slightly more complex is the Drive Motor. This combines a simple motor with a mechanism for turning the wheel, a brake and a suspension assembly. Turning and braking are controlled through independent outputs. As the name hopefully suggests, this part is designed to get robots up and driving around with minimum fuss.
Parts such as Servos and Pistons treat the values they receive as a target position, based on their limited range of motion. For example, if a servo can turn from -90° to +90°, a value of 0.5 corresponds to +45°. It will then turn until its actuator is aligned with this target angle, assuming it is not blocked.
Combining all these features allows for a remarkable level of control! Chaining servos, pistons, hinges and motors permits many degrees of freedom, and the programming lets you adjust these parts with as few or many inputs as you need.
You can even make a crab bot with just a handful of servos!