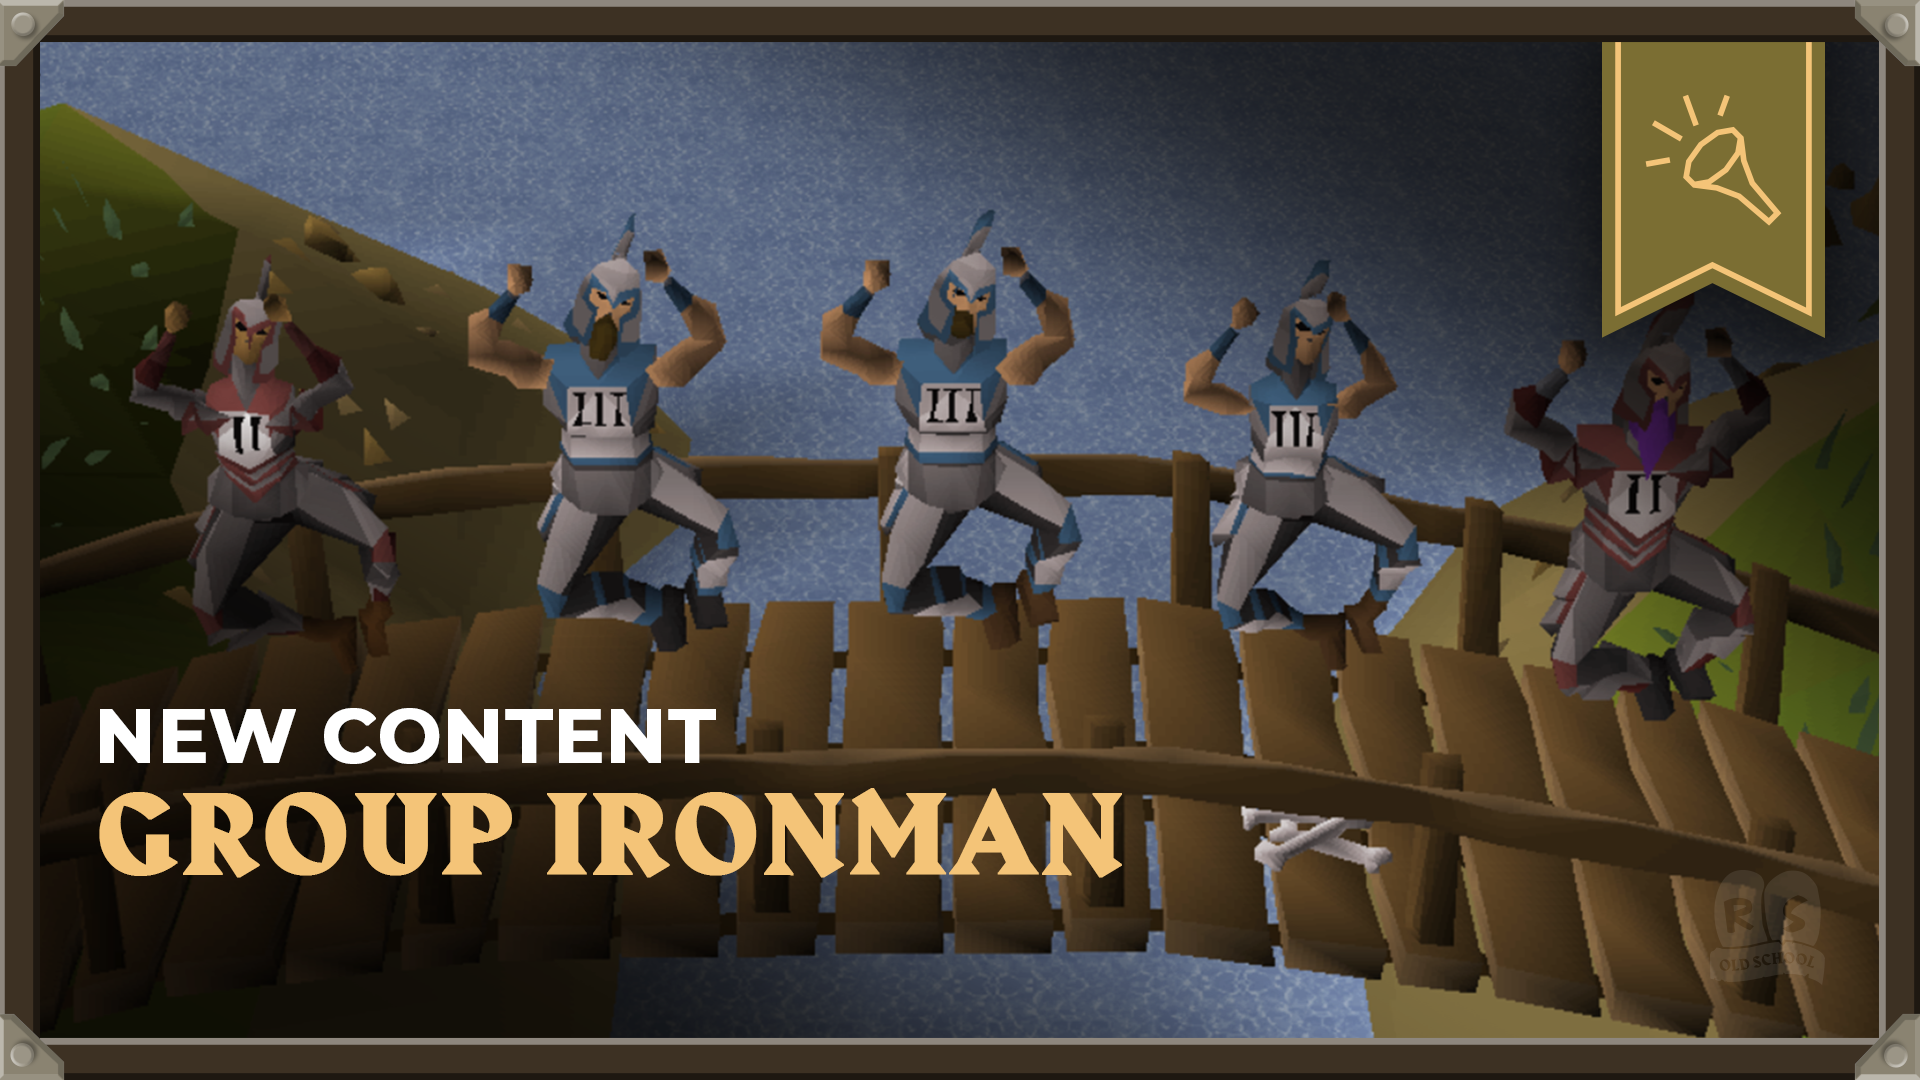
Play and compete on teams of 2 to 5 players and forge your team of Ironmen to become legends in Old School's new & innovative game mode.
Group Ironman: Design Overview
Are you ready to band together and become the stuff of legend? This is your chance to build and grow a team of Ironmen that is greater than the sum of its parts and battle for top spot on the leaderboard. It's a whole new way to play Old School RuneScape!
As launch day approaches, it’s time to dive into the who, what and why of this innovative new mode. Whether you’re an Iron novice or an experienced Ultimate, this is everything you need to know about the newest addition to the Iron family! Let’s take a look…
What?
Group Ironman is a new way for the toughest ‘Scapers to explore Gielinor. Enjoyed Ironman? Hardcore Ironman? Ultimate Ironman? Well now it’s time to bring together your most trusted companions to take on the challenge together.
If you’ve never played Ironman before, here’s a quick summary: imagine Old School RuneScape with no trade, where you have to earn every item yourself. It’s about earning everything with blood, sweat and tears, through gathering, crafting and fighting. Needless to say, it’s a real challenge – and one you would normally have to face alone.
Group Ironman is a little different. Groups of two to five players can join together and take on Gielinor’s nastiest beasts. They can also trade their resources among one another, delve into new Shared Storage, and visit each other’s Player Owned Houses. Groups will even be able to compete for leaderboard positions and prove that their gang is the greatest supergroup of Old School RuneScape. It’s Ironman with a little help from your friends – pushing you to your limits while allowing you to share in the glory with your mates!
Why?
Ironman Mode has been a big success for Old School RuneScape, and we’re always looking for ways to build on popular content. We’re also keen to bring in new adventurers and encourage our current player base to explore the game in new ways.
Group Ironman has been requested by players for a long time. It was promised at RuneFest 2019, and interest hasn’t abated since. Plus, with the events of the past year and a half, there’s more appetite than ever for shared experiences in Old School RuneScape. Group Ironman is another way for us to bring people together and encourage cooperation and community-building in Gielinor.
We know it’s going to be a lot of fun and we can’t wait to see you forming your groups and battling together to break new records!
How?
Keen to hear more about how we're making Group Ironman? Well, that’s lucky because we’ve got plenty:
General Rules
Group Identity
A Group Ironman (GIM) group is made up of two to five players. All normal Iron restrictions apply to them when interacting with the world outside their group: in contrast, interactions within the group are more like regular Old School RuneScape.
Group Ironman players have a unique icon next to their name to distinguish them from other Iron players and regular ‘Scapers. Their outfit also shows off their GIM status.
GIM will get to show other players which group size they're playing with a unique armour set. Roman numerals on their chestplates indicate the size of their group (i.e, II-V).
Players jumping for joy at their awesome new armour!
Combat
In Combat, GIM are pretty much like regular Ironmen to outsiders. This means that if someone outside the group hits an NPC, the drop would either go to the person outside the group or disappear, just like it would with a regular Iron. However, if only group members have been hitting the NPC, the drop would go to the group member who dealt the most damage.
Group content
GIM players can tackle all the group content that regular Irons can. For example, they can kill the Nightmare with other players, and they can team up with other account types outside their group when playing Theatre of Blood, The Chambers of Xeric and Nightmare.
In Chambers of Xeric, GIM will be just like playing Iron, where items would drop to the floor for anyone to take (provided they got the kill credit).
A group of players fighting the Muttadile in CoX
Trading
It goes without saying that GIM can't trade with people outside their group. They can only trade regularly within the group, and some trade restrictions do still apply to new members joining the group (see the gradual wealth transfer system).
GIM can only do this with fellow group members.
De-Ironing
A player must leave their group before they can de-Iron. (See leaving a group.)
Highscores
One of the major draws for GIM is group HiScores: this is your chance to prove your group is the best of the best! There are HiScores for each group size too. This is because a five-player group would have a much easier time than a two-player group, so listing them separately is fairer. HiScores are listed under the group’s name.
Ranks are determined by combined total skill level for your team first, then by combined total experience. Additionally, only XP gained while in the group count towards the group's total level. This means that players leaving a group and joining a new one won't be able to transfer their experience over to the new group.
Player Owned Houses
Currently, your regular Iron accounts can have a Player Owned House of their own, but can’t enter other Player Owned Houses or invite anyone into theirs. GIM is a little different – players can access each other’s houses. Additionally, Ironmen will now be able to let other players into their own house too, although they still can’t enter other players’ houses.
Players partying hard in a Player Owned House
Recruitment
You can form a group of between two and five players. One player will be the leader of the group. You’ll establish your group before you arrive at the mainland – you will need to find players to join your gang on the Node, a recruitment hub off the coast of Tutorial Island, before leaving (see below for more details). You will be able to pick a group name, but please note these share a name space with Clans – so you can’t use a name for your group that already belongs to an existing Clan.
Once your group is formed, you are free to recruit new players as you progress, should you wish.
The Node
This is a new island off the coast of Tutorial Island. It’s a place to learn the core elements of Group Ironman and form groups!
Tutorial Island with The Node
Deadman Reborn: Day 3 Feedback Changes
This week saw the exciting return of Deadman Reborn! We've made multiple changes since the brutal PvP everywhere mode went live, and today we'd like to talk about some additional changes we've made that will help both the DMM die-hards and newcomers to the game.
Deadman Reborn: Day 3 Feedback Changes
Deadman Reborn has exceeded all of our expectations, and we've seen so many great moments happen throughout the last two days. These moments are usually at the expense of an unfortunate player in the wrong place at the wrong time. Today we've made some changes that should help those of you who are unfortunate enough to not have the rebuild potential as others do after losing your last life. Make sure you're up to date with the changes made before today by reading the Deadman Reborn release news post.
The first change we'd like to talk about is how Starter kits will work going forward. These kits provide useful resources to help budding adventurers progress and work towards their final goals. Currently Starter kits work as follows:
Once you begin your journey you will receive a Starter Kit, which will also be given to you upon losing your third life! You'll also be able to claim Starter Kits from the Combat tutors. These can be claimed once per day, are untradeable, and cannot be used in PvP.
Each pack gives you a Staff which comes charged with the equivalent of 500 Fire strikes, a Bow which is charged with the equivalent of 2,000 bronze arrows, and a Scimitar wieldable from level 1 Attack that is equivalent to a Mithril scimitar.
The kit also contains a Combat potion, and 12 cooked Tunas. The once per day limit is reset after losing your final life, allowing you to claim a new starter pack to help with the Combat Experience Rebuild! Supplies contained within the starter packs are untradeable.
We're changing how often Starter kits can be reclaimed.
Going forward, Starter kits can be reclaimed any time you lose a life. You'll get the full contents of the kit as listed above, allowing you to continue rebuilding what was lost.
In addition to a new Starter kit being reclaimed any time you lose a life, we'll also be increasing the amount of protection that is available within the 3-35 combat bracket.
The immunity period offered within the 3-35 combat bracket has been increased from 15 minutes to 60 minutes. This increased protection from other players should help you better prepare yourself for the dangerous road ahead.
One issue we've seen players face during the rebuild stages of Deadman Reborn is how difficult it can be to obtain some of the lower tier Sigil Powerups to help regain skills and generate wealth. We'd like to change this by adding some extra support within the Starter kits that are given out, alongside the other changes listed above.
Going forward, in addition to the other supplies contained within Starter kits, players will also be granted a random Tier 1 Sigil Powerup and 5,000 GP.
Note: The Tier 1 Sigil Powerup and 5,000 GP can only be claimed once per day, even after losing your last life. Players who have already claimed their Starter kit today will be able to obtain a new one with these included.
The last change we'd like to make is in regards to the Three Life System. Our intentions with introducing this was to really emphasise the true risk behind playing Deadman Reborn, whilst also introducing something entirely new to the mode. That being said, we have seen your feedback suggesting that it is simply too punishing for most players, and the rebuild can be overly daunting, putting players off from continuing to play.
Previously, the Three Life System worked as follows:
Each player starts their adventure with three lives. Upon dying in PvP combat, you lose a life along with all items you had equipped, which go to the player who defeated you (plus a Bank Key containing the top 10 most valuable items from your Bank). Using the Protect Item Prayer will not protect any additional items on PvP death.
When dying to another player, untradeable items will act as they do in Wilderness deaths. The items will revert to a broken state and need repairing before they can be used again. The PKer will receive coins as a reward.
Should you lose your final life in PvP, the contents of your Safe Deposit Box, plus the remaining most valuable banked items (up to a total of 28) go to the PKer. Treat those lives carefully! Here's some important info to note once your last life is lost:
You respawn with a fresh supply of lives and 15 minutes of protection.
All attuned and unattuned Sigils are lost.
You must choose a new Tier 2 Sigil.
Combat XP is fully reset (this includes: Attack, Defence, HP, Magic, Prayer, Ranged and Strength).
All items within your Bank and Safe Deposit Box are wiped.
All items within Death's Coffer and any points stored with the Emblem Trader Store are wiped.
10% of all Skilling experience is lost.
Quest progress is not reset (any quests you complete during the qualifiers will stay complete – permanently)!
A non-PvP death won't affect your current lives and the process is exactly the same as in the main game – a gravestone appears at the place you perished, and you must reclaim your items.
We've changed how the Three Life System works. Upon losing your last life, you are now presented with three options:
Lose all your Combat XP This option allows you to prioritise losing your Combat XP in favour of retaining certain items. When selected, a PKer will have still raided your Safety Deposit Box and your bank, but you'll keep anything that would have otherwise been wiped upon losing your final life, such as:
Attuned Sigils
Unattuned Sigils within your bank
Items held within Death's Coffer and any points stored with the Emblem Trader Store
Lose all your items Selecting this option will delete all items in any storage option around Gielinor, including your Sigils. Also, your non-combat skills will still be reduced by 10%.
Lose both Selecting this option will replicate the current three life system as if you had lost your final life. All items in all storage options around Gielinor will be lost and all your combat skills will be set to 0 XP.
That's everything you need to know about Deadman: Reborn! We look forward to seeing you all in game trying out the newest version of Old School's most brutal PvP experience!
We hope that these changes will be a welcome addition to Deadman Reborn. Let us know what you think, and provide any feedback you might have down below!
This week it's all about the exciting return of Deadman Reborn! Whether you’re a DMM die-hard or a newcomer to this punishing PvP mode, today we have all the information you could possibly need, from new rules to riveting rewards. Plus, there’s more 20 Year Anniversary merch and a few extra tweaks to keep things sweet. Let’s go!
Deadman: Reborn
Old School's most intense PvP Tournament is back, and it’s more brutal than ever. Players have three weeks to survive and skill to qualify for the Finals – and one epic day to be crowned the last Deadman standing!
Even if you’re not ready to spend your September slaughtering your fellow players in an epic battle to the finish line, it’s worth getting acquainted with this ruthless game mode, because it really does showcase the best combatants in the RuneScape community. Trust us, you won’t want to miss the nail-biting Finale streaming on Twitch on September 17th!
What is Deadman?
Deadman is an intense PvP (player-vs-player) survival game mode, with high risks and serious rewards. It’s not for the faint-hearted – it's frenetic, frustrating and thrilling in equal measure. Your wits and prowess will be put to the test, and the winner can quite rightly declare themselves the best of the best.
Deadman: Reborn takes place over three weeks, and for the first time, players will have three lives to help them make it to the Finale. Once those lives are gone, though, it’s back to the drawing board (well, Lumbridge).
All you need to take part (apart from nerves of steel) is an existing account with an active Membership. Much like with Leagues, each player starts their journey from scratch on Tutorial Island on a dedicated individual world. From there you can chat to Skippy and he’ll offer you a choice of starting locations. As soon as you’re ready, you can jump straight into the action!
Speaking of action: with a few exceptions, PvP Combat is enabled everywhere, so make sure you’re fully prepared for each adventure before you set out. Trust us - it’s merciless out there.
While progressing in Deadman worlds, you’ll benefit from a few perks, including:
Greatly accelerated XP rates
Certain quests completing automatically upon reaching various milestones
Item drop-rate modifiers
Access to unique drop tables and items not available in the main game
Improved shop restock rates
Sigils (similar to Relics from Leagues – more on that later)
If you make significant progress during the season, you may qualify for the Deadman: Reborn Finale on September 17th – a brutal last stand where the top players hurtle into battle against one another, smashing each other to bits until a victor is crowned in the name of glory... oh, and a $32,000 prize pool!
What You Need To Know
Deadman: Reborn starts at 12:00 BST (30 minutes after our usual game update time.)
As always, we refer to the in-game timings as cycles. Each cycle is equal to 0.6 seconds and is also commonly referred to as a 'tick' by the wider community.
Starting Off
When logging into a Deadman: Reborn world for the first time, you'll spawn in safe, familiar Lumbridge. Ahh, cosy. Don’t get too comfortable though, because all that’s about to change. From here you’ll be presented with a selection of Tier 2 Sigils, and you’ll need to choose one to begin your journey:
Sigil of the Ruthless Ranger: Upon dealing ranged damage, you have a 10% chance of crippling the target's movement. The effect deals 5 damage over the next 6 seconds and drains a total of 30 run energy in that time. The damage is doubled against targets with no energy. A target can only be under the influence of one crippling effect at a time. You also gain an additional 50% XP in the Ranged skill.
Sigil of the Feral Fighter: Upon dealing melee damage, for the next 12 seconds you have a 10% chance of gaining an attack speed with melee of 1.8 seconds for the next 3 attacks. You also have an additional 25% XP on your attack and strength skills.
Sigil of the Menacing Mage: Upon dealing magic damage, you have a 10% chance of cursing the target. The curse deals 12 damage over the next 6 seconds, and heals you for the same amount. A target can only be under the influence of one curse at a time. You also gain an additional 50% XP in the Magic skill.
While the Sigils offered are always the same, you’ll be able to pick a different one to kick-start your journey into the wild each time you die, increasing your overall power level and offering a little variety with each attempt. If you lose all your lives and have to completely start again, you'll be allowed to pick any of the three starting Sigils. These starting sigils cannot be traded on the Grand Exchange until you get to the 71-100 or 101-126 worlds.
Once your first Sigil is chosen, you'll have 15 minutes of protection while you prepare yourself for the dangerous road ahead. Note: you can remove this protection at any time by speaking to the Doomsayer in Lumbridge.
Once you begin your journey you will recieve a Starter Kit, which will also be given to you upon losing your third life! You'll also be able to claim Starter Kits from the Combat tutors. These can be claimed once per day, are untradeable, and cannot be used in PvP.
Each pack gives you a Staff which comes charged with the equivalent of 500 Fire strikes, a Bow which is charged with the equivalent of 2,000 bronze arrows, and a Scimitar wieldable from level 1 Attack that is equivalent to a Mithril scimitar.
Your pack also contains a Combat potion, and 12 cooked Tunas. The once per day limit is reset after losing your final life, allowing you to claim a new starter pack to help with the Combat Rxperience Rebuild! Supplies contained within the starter packs are untradeable.
Safe Zones
Need a breather? Safe zones are scattered throughout Gielinor. PvP Combat is fully disabled in these areas – players cannot attack each other or be attacked. You can take the pressure off at the following locations:
Barbarian Assault (inside the minigame only)
Catherby (Bank area only)
East Ardougne
Falador
Jatizso (town area only)
Kourend Castle
Lumbridge
Neitiznot (town area only)
Port Phasmatys
Rellekka
Seers' Village (Bank area only)
Sophanem
Tree Gnome Stronghold
Tutorial Island
Underwater areas (excluding the Fossil Island underwater area which is restricted)
Varrock
Void Knights' Outpost
Yanille
Skulled players (see below) can’t simply jump into safe zones, by the way. Should a skulled player try, a Deadman guard will appear and attack with Ranged every game cycle, starting at 1/5th of the player’s max hit points, increasing by 2 damage with each attack. Yikes! Fortunately, exiting the safe zone will de-spawn 'em.
Skulling, Bank Keys & Safe Deposit Boxes
Attacking another player will give you a PK skull for five minutes. Should you successfully take down your opponent, you will receive their Bank Key alongside any unprotected items they were carrying at the time – and you’ll be granted one minute of immunity from other players. This is your chance to loot like mad and then make a break for safety!
Note: If you attack another player within this minute then you will lose any remaining immunity you had. The immunity period will also be lost upon logging out.
The Bank Key is a clever little item – you can use it to unlock chests in safe zones, which contain the top 10 most valuable items from your opponent’s Bank. If you have taken your opponent’s last life that's even better, as you will get their 28 most valuable items.
You can only carry a maximum of five Bank Keys at any given time. Should you wish to continue fighting with five Keys, any items that would have been included within a Key will instead drop to the ground.
Note: It is not possible to claim loot from a Bank Key while skulled.
Feeling sentimental about a particular item or items you’re carrying? You can protect up to 10 of your favourite things by chatting to the Financial Wizards, who are found within Banks in any safe zones. They can stow 10 items in a secure Safe Deposit Box. You will not lose these items if killed... unless you lose your last life, of course. Should the worst happen, you’ll lose the entire contents of your Bank and Deposit Box, so don’t let your guard down!
Three Life System
A new feature of Deadman: Reborn is the Three Life System. Which, as you might have guessed, means each player starts their adventure with three lives. Upon dying in PvP combat, you lose a life along with all items you had equipped, which go to the player who defeated you (plus a Bank Key containing the top 10 most valuable items from your Bank). Using the Protect Item Prayer will not protect any additional items on PvP death.
When dying to another player, untradeable items will act as they do in Wilderness deaths. The items will revert to a broken state and need repairing before they can be used again. The PKer will receive coins as a reward.
Should you lose your final life in PvP, the contents of your Safe Deposit Box, plus the remaining most valuable banked items (up to a total of 28) go to the PKer. Treat those lives carefully! Here's some important info to note once your last life is lost:
You respawn with a fresh supply of lives and 15 minutes of protection.
All attuned and unattuned Sigils are lost.
You must choose a new Tier 2 Sigil.
Combat XP is fully reset (this includes: Attack, Defence, HP, Magic, Prayer, Ranged and Strength).
All items within your Bank and Safe Deposit Box are wiped.
All items within Death's Coffer and any points stored with the Emblem Trader Store are wiped.
10% of all Skilling experience is lost.
Quest progress is not reset (any quests you complete during the qualifiers will stay complete – permanently)!
A non-PvP death won't affect your current lives and the process is exactly the same as in the main game – a gravestone appears at the place you perished, and you must reclaim your items.
The Starter Pack restriction will reset after losing your final life, allowing you to claim a new Starter Pack to help with the combat experience rebuild. Items within Death's Coffer and the Emblem Trader Store will be wiped upon losing your last life.
Combat Level Worlds
To keep the combat exciting and give everyone a chance to flourish, Deadman: Reborn also introduces Combat Level worlds. These can only be accessed by players of a certain level, so you’ll only ever meet players with similar battle prowess. When you advance to a new world, you are given 60 minutes of protection.
Worlds are divided into the following Combat Level brackets:
Level 3-35
Level 36-70
Level 71-100
Level 101-126
Having too high or low a level will prevent you from joining a world. This means you’ll need to be smart about trading with other players – while the Grand Exchange will be shared across all worlds, you won’t be able to trade with other players unless they’re able to log into the same Combat Level world as you.
If you manage to gain a level that puts you into a higher bracket whilst you're in combat the following will happen:
You are unable to attack NPC's or players, but both can attack you.
You do not gain any experience from any sources.
You can only use a bank three times before being unable to open the bank again.
Combat Rules
In previous Deadman modes, players could remain relatively safe by attacking NPCs in single-way combat, with little fear of being attack by someone else. As a result, ‘boxing’ NPCs became an easy escape.
This time, the rules are a little different. A PJ timer of 16 game cycles (that's 9.6 seconds) will be running on all Deadman worlds, affording you a grace period where you cannot be attacked by another player while fresh from an encounter. This grace period is wiped upon teleporting.
Anti-boxing measures will prevent players abusing this feature, and boxing is against the rules in Deadman: Reborn.
Imagine Player A is attacking Player B. If Players A and B stop fighting each other, other players could step in to attack Player A instead... but because of the PJ Timer, they would need to wait 16 game cycles before they were able to do so.
We’ll be introducing a PJ timer to all NPCs currently located in single-way combat areas. Once in combat with another player, PvP will always take priority. If a player is in a fight with an NPC, they cannot be attacked by another player until they have defeated the NPC. By the same token, if the player is out of combat with an NPC and gets into a fight with another player, it will not be possible for NPCs to attack either player for 9.6 seconds.
Players must wait 12 game cycles (7.2 seconds) before being able to teleport or log out while in combat.
You won’t be able to teleport immediately after leaving combat with an NPC – you’ll need to wait 11 game cycles (6.6 seconds) first. This does not apply to any NPCs that you attack while concealed in a safespot, though you will be susceptible to another player's attacks in these instances.
Alongside the introduction of an NPC PJ timer, we’ll be changing certain areas of the world that are currently multi-way combat to single-way combat:
Lunar Isle
Bandit Camp
Shadow Dungeon
Barbarian Village
White Wolf Mountain
The only area to feature singles-plus combat will be within the Revenant Caves.
While we’re on the subject, special spear attacks will no longer push players from single-way to multi-way combat zones. No more prodding your way into a multi-way scuffle!
XP Multiplier
We're going to increase the XP rates of all skills by 10x, including any reward XP you would normally receive from quests and/or XP Lamps. This increase applies throughout Gielinor. All XP multipliers from worlds and from Sigils are multiplicative.
Combat XP will increase even further based on which Combat Level world you are playing in:
Level 3-35 = 10x Combat Experience
Level 36-70 = 15x Combat Experience
Level 71-100 = 20x Combat Experience
Level 101-126 = 25x Combat Experience
Please note you will not receive any XP during PvP encounters, though fake XP drops will appear to indicate how much you would have gained.
Quest & Automatic Unlocks
In previous Deadman modes, we unlocked various quests automatically to help speed up player progression. This time our approach is slightly different.
Instead of unlocking a bunch of quests on your first log-in, we’ll be tying unlocks into the Combat Level worlds. By reaching the next tier world, you’ll automatically unlock certain quests and any quest requirements that are relevant to your level of progression. Note: Recipe for Disaster will still require most pre-requisite quests to be completed, regardless of increased access to the Culinaromancer's Chest.
The following automatic unlocks will apply:
Full list of unlocks
[expand type="details"] Upon starting a new account at Level 3:
Ernest the Chicken
Goblin Diplomacy
Rune Mysteries
Shield of Arrav
Druidic Ritual and Level 3 Herblore
Recipe for Disaster Part 1 This gives access to Mithril Gloves by unlocking the following subquests:
Mountain Dwarf subquest
Goblin Generals subquest
Pirate Pete subquest
Lumbridge Guide subquest
Evil Dave subquest
Upon reaching Level 36-70 worlds:
Tree Gnome Village
Restless Ghost
Priest in Peril
Animal Magnetism
100% Zeah favour and completion of Architectural Alliance
The ‘Bigger and Badder’ Slayer perk
Increase the access of the Culinaromancer's Chest to Adamant Gloves This gives access to Adamant Gloves by unlocking the following subquests:
Skrach Uglogwee subquest
Upon reaching Level 71-100 worlds:
Lost City
Merlin's Crystal
Dragon Slayer
Heroes' Quest
The Grand Tree
Monkey Madness I
Increase the access of the Culinaromancer's Chest This gives access to Dragon Gloves by unlocking the following subquests:
Sir Amik Varze subquest
King Awowogei subquest
Upon reaching Level 101-126 worlds:
Increase the access of the Culinaromancer's Chest to Barrows Gloves This completes the Culinaromancer part of the quest
Note: Quests that are completed automatically will not yield the usual rewards. Want to complete one that isn’t on the list and obtain its goodies? Be our guest! Quests can still be manually completed outside of this unlock system at any time. Also, any quest that is a pre-requisite of an automatically completed quest will also be unlocked. [/expand]
Drop-rate Modifier
If you’re in it for the loot, you’ll have lots of fun in Deadman: Reborn because we’re increasing the drop-rates of certain items by 4x their normal rate! Here are the items we're currently expecting to include:
Full list of modifiers
[expand type="details"]
All Abyssal Demon uniques
All Alchemical Hydra uniques
All Barrows uniques
All Chambers of Xeric uniques
All Clue uniques
All Dagannoth Kings uniques
All Demonic/Tortured Gorilla uniques
All Drake uniques
All Gauntlet uniques
All God Wars Dungeon uniques
All Grotesque Guardian uniques
All Kraken uniques
All Nightmare uniques
All Revenant uniques
All Superior Slayer creature uniques
All Theatre of Blood uniques
All Zulrah uniques
Also included are:
Basilisk Jaw
Black Mask
Blood Shard
All Cerberus Crystals (including the Smouldering Stone from Hellhounds)
All Corporeal Beast Sigils
Dark Bow
Dragon Boots
Dragon Defender
Dragon Limbs
Dragon Pickaxe
Dragon Warhammer
Dragonbone Necklace
Elder Chaos Robes
Granite Maul
Leaf Bladed Sword and Lead-Bladed Axe
Occult Necklace and Smoke Battlestaff
Odium/Malediction Shards
Tomes of Fire/Burnt Pages
Unsired from the Abyssal Sire
All Visages
All Wilderness Boss Rings
[/expand] In addition to the modified drop-rates, we've increased the amount of resources you have upon entering the game. Here’s how:
In addition to the normal loot for killing them, Callisto, Venenatis, Vet'ion and the Chaos Elemental have a 1 in 3 chance of dropping a single 4-dose Saradomin brew.
In addition to the normal loot for killing them, Scorpia, Crazy Archaeologist and the Chaos Fanatic also have a 1 in 5 chance of dropping a single 4-dose Saradomin brew.
Dragons now drop double the amount of bones.
All loot from the Giant Mole will be doubled.
All herb drops will be doubled.
Bronze to Rune Defenders droprate will be doubled.
Tuna, Lobster, Swordfish, Shark, Karambwan, Dark Crab, and Anglerfish fishing spots will yield 3x the amount of fish resources.
All random un-noted herb drops from NPCs are now doubled.
The Giant Mole will now drop double the amount of Claws and Hides.
In Barrows there is a chance to obtain potions and potion ingredients. For potions, there is a 1/2 chance of gaining a stack of three 4-dose potions when you would roll on the Barrows armour table. You will receive either Saradomin brews, Super Restores, Ranging potions, or Super Combat potions. There is a small chance of obtaining potion ingredients on the normal Barrows table. Also, due to limitations of the Barrows interface, it's possible that any items gained may instead appear in your Inventory or on the floor. You could receive the following: Crushed Nests, Red Spiders' Eggs, Wine of Zamorak, Limpwurt Roots, White Berries, or Grimy Torstol.
Potion supplies can now drop from Wildy Bosses (including demi-bosses).
Deadman-Only Drop Table
On top of those lovely increased drop rates, we’ll also be implementing a Deadman-only drop table for all NPCs! This means you could snag some extra loot from anyone or anything you defeat within Gielinor. This drop table includes the powerful Ancient Warrior’s weapons, Sigils, and resources such as food, potions, Herblore supplies and Emblems as well as some alchables, Master Wands, Mages Books and more powerful items that are typically obtained through other means.
The odds vary according to the Combat level of the NPC you’re fighting. So, bosses generally have an increased chance – and with Superior Slayer creatures, it’s guaranteed.
Note: The Ancient Warrior's weapons can be obtained by killing any NPCs, but creatures within the Wilderness have the highest chance of dropping them.
Restricted Content & Content Changes
Here's a look at the list of content restrictions for this version of Deadman. Anything not listed above will be available, including within the Finale, so make sure you strategise with this in mind:
Duel Arena, Castle Wars, Trouble Brewing, Fight Pits, Rat Pits, Pest Control and Last Man Standing are all inaccessible.
The Nature Rune Chest in East Ardougne is inaccessible.
Count Check will not be able to teleport players to the Stronghold of Security.
You cannot pickpocket NPCs in a safe zone.
The RPG is disabled and cannot be used.
Turael will not assign Kalphite tasks.
You cannot get Kalphite tasks from Turael.
You cannot get Lava Dragon tasks.
Falo will not offer any Lava Dragon Bone master clues.
The Seedbox cannot be brought from Tithe Farm.
There are some cases where pending combat damage is not cleared.
We’ll also be making the following changes:
You'll have the ability to use the looting bag anywhere (except safe zones).
All Rune Shops, Arrow Shops, and Fletching and Crafting Stores restock at a much faster rate. Lower tier equipment will restock faster than higher tier equipment (for example, an Air Rune will restock faster than a Death Rune).
Items that are placed in shops and not part of their natural shop stock cost 5x more than they normally do. These items sold to the shops give 3x less for selling to them.
Some shops such as Zaff Staves have their own deadman shops. These will have increased restock rates.
Wilderness Slayer task creatures have a chance to drop Emblems.
Pyramid Tops, found at the Agility Pyramid, will turn to cash upon death.
If you die with or drop, a stack of Chinchompas, it will fall to the ground, and be visible to all players.
Measures remain in place to prevent door spamming.
Player Owned House pools are unavailable for three minutes after combat.
Teleblock will now last for 150 seconds, or for 75 seconds with Protect From Magic active.
Protect From Magic does not half the duration of bind spells.
Some items are converted to coins on PvP deaths.
A Safe Deposit Box can be found in both Banks within the Grand Tree.
You'll be able to lock XP by speaking to Nigel in Lumbridge. When XP locking is activated, all XP gain is blocked, including any quest and lamp rewards you would normally receive.
No longer required to complete Dragon Slayer to equip an Antifire Shield.
Players can access the Rune Shop in the Mage's Guild without completing Hand in the Sand.
You'll be allowed to skip the fight with Hammerspike and his gang in One Small Favour.
You can only engage the Black Knight Titan in combat with Excalibur, but you also have the option of talking to him to avoid the fight entirely.
For Clue Scrolls, the number of steps in order to complete one has been reduced:
Beginner: 1 step
Easy: 1-2 steps
Medium: 1-3 steps
Hard: 2-3 steps
Elite: 2-4 steps
Master: 3-4 steps
The Emblem trader also exists within Deadman: Reborn with Emblems being worth twice the main-game value. He is located outside of Edgeville Bank and offers the following items:
Full list of items
[expand type="details"]
Super Attack potion - 1,000 points
Super Strength potion - 1,000 points
Super Defence potion - 1,000 points
Ranging potion - 6,000 points
Magic potion - 8,000 points
Super Combat potion - 30,000 points
Prayer potion - 3,000 points
Super restore potion - 10,000 points
Saradomin brew - 25,000 points
Zamorak brew - 25,000 points
Stamina potion - 8,000 points
Extended Antifire potion - 5,000 points
Antidote++ - 3,000 points
Anti-venom - 35,000 points
Blighted Bind sack - 100 points
Blighted Snare sack - 500 points
Blighted Entangle sack - 1,000 points
Blighted Teleblock sack - 3,000 points
Blighted Vengeance sack - 3,000 points
Blighted Ancient Ice sack - 2,000 points
Ring of Wealth (i) Scroll - 50,000 points
Magic Shortbow (i) Scroll - 100,000 points
Saradomin's Tear - 1,500,000 points
Rune pouch - 1,200,000 points
Looting bag - 10,000 points
Clue box - 100,000 points
Ornate Maul Handle - 1,250,000 points
[/expand] Note: Blighted items are available to be used throughout Gielinor and will not be restricted to just the Wilderness.
Sigils
Much like Relics from Leagues, Sigils are an additional layer of powerful buffs that will enhance your gameplay way beyond anything mere equipment or skill levels can provide!
Unlike Relics, however, Sigils are not a permanent choice. You’ll have the flexibility to swap out and change your Sigils to complement whatever task working on, so long as you’re in a safe zone and not skulled. Simply attune to your chosen Sigil (making it untradeable) and you’ll benefit from its unique properties! When you’re ready to swap Sigils, un-attune from the Sigil and it will become tradeable once more.
There are three tiers, each providing more powerful buffs than the last. The higher tiers of Sigils will only be available on higher Combat Level worlds.
You can find a full list of Sigils from our amazing friends at the Old School Wiki!
As stated earlier, when logging into a Deadman: Reborn world for the first time, or after losing your last life, you’ll be presented with a selection of Tier 2 Sigils. While the Sigils on offer are always the same in subsequent attempts, you’ll be able to pick a different one to kick-start your journey each time, increasing your overall power level.
Additional Sigils can be obtained as drops from NPCs. They can also be bought from, or sold to, other players – although you’ll only be able to do this at the Grand Exchange.
You can have up to three Sigils active at any one time, but only two can be Combat-related.
Upon losing a life that is not your last, any attuned Sigils will remain safe and in your possession, but un-attuned Sigils in your inventory will be deleted. Losing your final life means all Sigils, attuned or not, will be lost forever.
Finale
Check out our full Deadman Reborn newspost for all the details regarding the finale on September 17th!
Rules & Reporting
All existing RuneScape rules apply during the Deadman Finale. Anyone who has been caught cheating in any Jagex event may be suspended from all future events. Jagex staff will review cases and players.
Players found to be abusing game mechanics to gain an advantage in a way considered to be unsporting will be removed from Deadman: Reborn immediately.
Using Combat with an allied player during Deadman: Reborn is considered to be using a game mechanic to gain an unfair advantage. Players found to be abusing any of the above will be met with a three day ban along with disqualification from the Finale.
The act of muling during the Season is prohibited, and is a bannable offence. This refers to the storing of items on another account to prevent them being lost in PvP situations.
Boxing other players is also against the rules in Deadman: Reborn. In addition to this, attempting to ‘x-log’ with an NPC is against the rules and will result in the same punishment as boxing.
In addition to the above, the following rules also apply to Deadman: Reborn:
During the 1v1 stage, should a player experience connectivity issues and log out before a fight begins, that player has until the fight begins to log back in.
During the 1v1 stage, should credible evidence emerge to suggest that an account is maliciously targeting other players, we will take action against them.
We will not, at any point or under any circumstances, restart the Finale.
We will endeavour to announce the results of the Finale on the night of the event, but should more investigation be required, the results will be announced only after the Old School team has met and reviewed all evidence available to us.
We've also added to new reporting options to the Report Abuse screen, which is only available across Deadman worlds and specifically relates to muling and boxing:
16: Boxing in the Deadman Tournament
17: Muling in the Deadman Tournament
If you suspect any of these two new rules have been breached, you can access the Report Abuse screen from the bottom of your Chatbox.
That's everything you need to know about Deadman: Reborn! We look forward to seeing you all in game trying out the newest version of Old School's most brutal PvP experience!
Tombs of Amascut: Rewards Beta (Weekly Game Update - August 12th)
This week it's time to test the new rewards for Raids III! Take them out for a spin on your favourite bosses, or simply bully some poor unsuspecting goblins. Most importantly, let us know what you think! We’ve also got Combat Achievement updates and a spicy summer sale offer on Premier Club Membership!
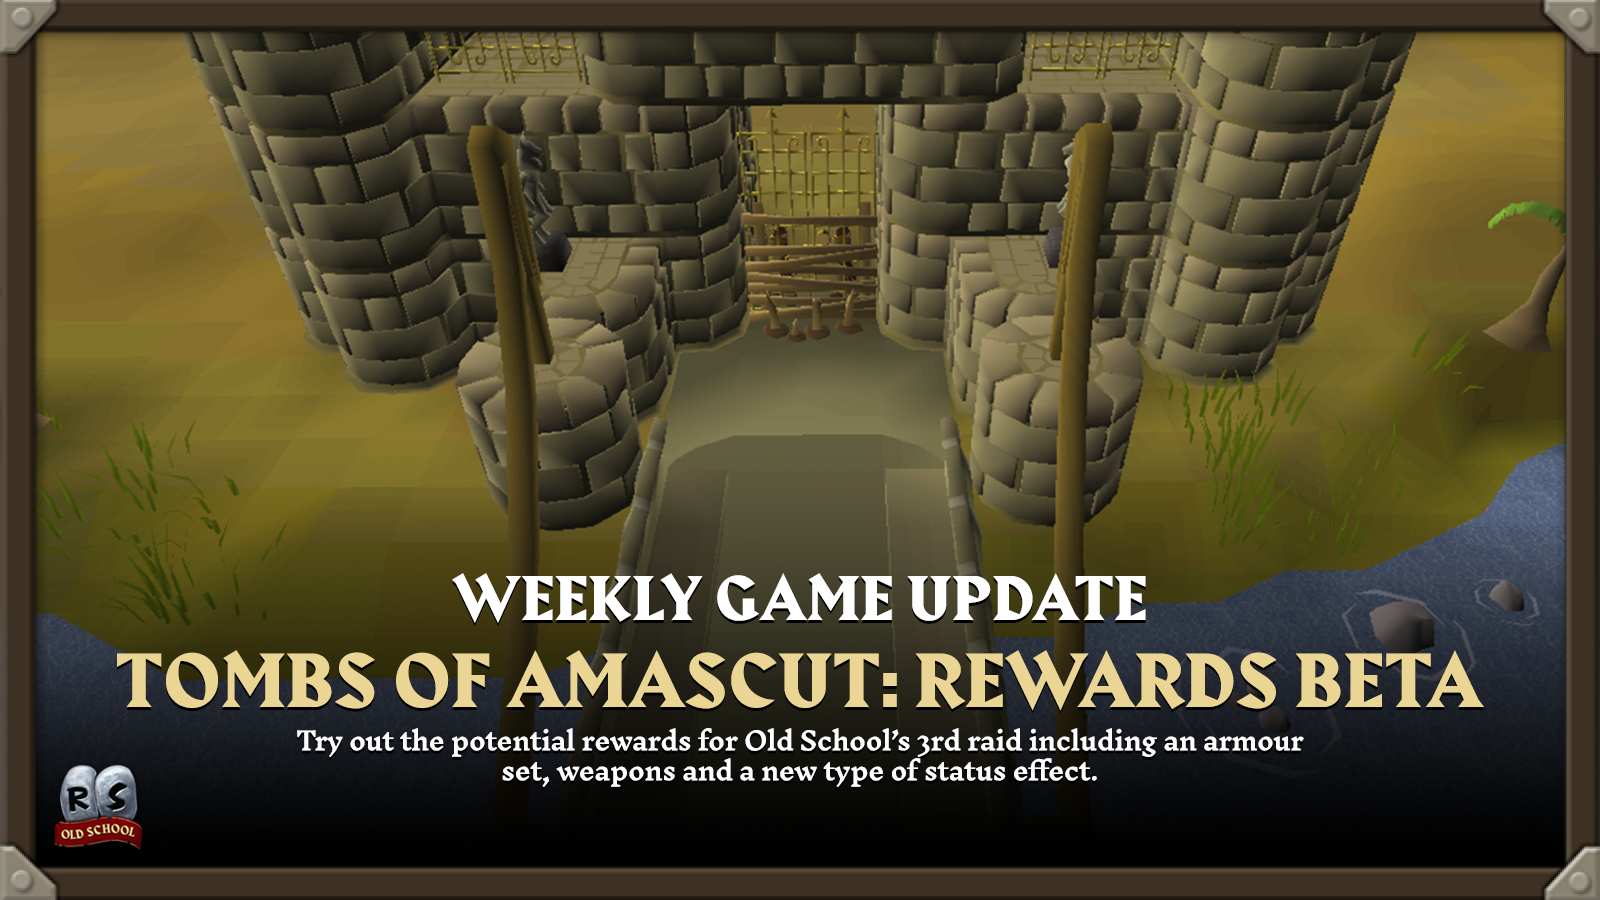
Tombs of Amascut: Rewards Beta
We're so excited to share some of our reward ideas for Raids III with you! Our next Raid launches in early 2022, but we’re already dreaming up cool rewards for our pluckiest players! The Tombs of Amascut will feature some seriously smart gear to make battering the bosses a breeze – and if you log into a Beta World today, you’ll be able to give some of it a try!
These beta worlds will be highlighted in blue on the world selection screen and consist of the following:
401 (US)
407 (UK)
409 (US)
412 (AUS)
Upon logging into a Beta World, all reward items will be added to your inventory and you can also check your bank for some other goodies! We've also enabled access to the Inferno, since we reckon many of the rewards will be utilised in late game PvM!
By the way, we haven’t started designing the artwork for these new rewards yet, so for now we've given them a very gaudy default magenta skin. We won't actually release them in that style...
… or will we?
Err, no. Rest assured they’ll be looking lovely come 2022! Anyway, let's take a look at those shiny new rewards!
Full list of Beta Rewards
[expand type="details"] As always, we refer to the in-game timings as cycles. Each cycle is equal to 0.6 seconds and is also commonly referred to as a 'tick' by the wider community.
Keris Partisan
After completing the quest Beneath Cursed Sands, players will be provided the option to upgrade their Keris into a mighty spear – the Keris Partisan!
This powerful one handed weapon has a socket for inserting various jewels, obtained as rare rewards from the Tombs of Amascut, which will provide some handy effects. Only one jewel can be used at a time, but if you choose to switch jewels, the rejected one can be used again later.
Here are some of the jewel buffs we're toying with. Please note, these ideas haven’t been finalized and could still change:
Eye of the Corrupter Using this jewel adds a damage-over-time effect to any enemies you hit within the Tombs of Amascut (this cannot be stacked on the same NPC multiple times, but can be applied to multiple NPCs at once).
Jewel of the Sun Using this jewel within the Tombs applies a debuff resulting in the NPC taking higher damage for X seconds.
Breach of the Scarab This jewel buffs the Keris Partisan with an additional 33% accuracy against Kalphites/Scarabs/Beetles.
Details, Stats and Requirements:
Requires 80 Attack and completion of Beneath Cursed Sands to wield.
Non-degradable.
Once upgraded, the Keris Spear has a crush option, which makes it particularly useful against Beetles!
The Keris Spear is untradeable, as are the jewels.
It retains the effect of the normal Keris.
Upon death in the Wilderness, it will break.
Heka of Tumeken
Tumeken was the God of the Sun. He jointly led the Menaphite Pantheon with his wife, the Fertility Goddess Elidinis. While Tumeken and Elidinis guided their people spiritually, it was the responsibility of a human Pharaoh to rule over the Kharidian Lands.
The last Pharaoh to rule was Osmumten, and he fought alongside Tumeken against enemy forces in an ancient war. After Tumeken sacrificed himself to end the war, Elidinis gifted his Heka to Osmumten.
Introducing our very first powered Wand: The Heka of Tumeken! This bad boy is a new, fast-attacking wand with its own built-in spell. It will hit three times as fast for low damage followed by a fourth sequential attack that launches a more powerful, slower projectile. Thanks to its variable attack speed, this is a pretty special weapon, offering potential new and effective ways to approach various encounters. We might even be designing some new encounters with this weapon in mind!
Details, Stats and Requirements:
Requires 84 Magic to wield.
Can be charged (untradeable) and uncharged (tradeable). The Heka can be charged with 1 soul rune and 3 chaos runes.
The unique attack effect is new: it will hit three times in quick succession for low damage, and its fourth hit will launch a powerful (but slower) projectile.
It can’t be used in PvP – this is consistent with all powered staves. However, if it is dropped in PvP, any charged versions will drop as uncharged.
The Heka of Tumeken will have +25 Magic Attack, +20 Magic Defence. The standard faster attacks will only benefit from 50% of your Magic strength. The slower fourth hit will be much stronger, benefitting from 150% of your Magic strength bonus. You can find the full formula in our recent Tombs of Amascut: Raid Rewards newspost.
It will also have a slightly shorter attack range than power staves – but not by too much.
Ward of Elidinis
As well as gifting Osmumten with Tumeken’s Heka, the wise Elidinis also bestowed upon the grieving Pharoah her Ward, before disappearing to mourn her husband and daughter.
This powerful best-in-slot Magic Shield is a rare reward from the Tombs of Amascut, but there’s a catch – it’s totally broken. Now, it is tradeable, if you wish to sell it on - but we recommend restoring it to its full power. To do so, you’ll need to combine it with an Arcane Sigil and 10,000 Soul Runes.
Details, Stats and Requirements:
80 Magic, 80 Defence and 80 Prayer are required to wield it.
Players will require 90 Prayer and 90 Smithing to combine the Broken Ward with an Arcane Sigil and 10,000 Soul runes, creating the Ward of Elidinis. If you don't meet this requirement, you may pay Abbot Langley 20,000,000 coins to do it for you (provided you have the right materials).
Should you wish to separate the Arcane Sigil from the Ward of Elidinis, you can do so yourself. You will not need to pay, but any Soul Runes you use will be lost.
The broken Ward will be tradeable, but the fixed Ward of Elidinis will not. It’s pretty awesome though, and you’ll want to hang on to it!
Upon PvP death, the Ward of Elidinis drops as a Broken Ward, and the Arcane Sigil.
Masori Armour and Amulet
During the war, a group of rangers known as the Masori banded together. While they did their fair share of fighting, their primary role was to defend people from the thieves and murderers who would take advantage of the wartime chaos. The group dissolved soon after the war ended, but some of their equipment can still be found in the homes of more wealthy Menaphites… or among the possessions of long dead Pharaohs.
The Masori Armour is a two-piece unique armour set, with a ‘low life’ set effect plugged in that gives you additional accuracy and damage when you’re below 40% HP - making it a powerful piece of offensive gear. When you’re above 40% HP, however, your gear will have decent range but weak defence.
We're also introducing a new Masori Amulet that will help you activate the ‘low life’ effect. When equipped, the Masori Amulet will damage the player for 15% of their current health every three cycles. It will cease damage ticking when your HP hits 40% or below.
We're pretty excited about this new mechanic! It should result in different playstyles that we haven't seen before, and potentially encourage riskier strategies. Let us know what you think!
Details, Stats and Requirements:
Players will require 80 Ranged and 20 Defence to wear any pieces of Masori Armour.
The Masori Armour and Amulet are tradeable.
It will drop in PvP normally.
Lightbearer
As the war drew to a close, many nefarious types attempted to capitalise on the chaos and destruction. One of these individuals was a ruthless warrior known as Ahmek. He crafted a powerful ring imbued with unstable energy left behind from Tumeken's sacrifice. Ahmek hoped to use this ring to forcibly unite the assorted bands of thieves and mercenaries under his command – and to overthrow Osmumten. Fate, however, had other plans. On the very night he created it, he was murdered in his sleep and the ring stolen. Soon after, this dreaded item was snatched from the body of a thief by some Menaphite Guards, who presented it to the Pharaoh.
The Lightbearer is a new ring that doubles the rate at which special attack energy is restored while worn! It's tradeable, does not degrade, and if unequipped resets your special attack restore timer. There are absolutely no requirements to wield the Lightbearer, but there are also no special stats given to it. We think this will have plenty of utility within the game, from PvM, to PvP, and even Skilling!
Osmumten's Khopesh
When he wasn't battling on the frontlines of war, Osmumten was a passionate hunter. He used armour and weapons crafted by the finest artisans in the land to bring down the deadliest beasts. Of particular note was his magnificent Khopesh. While based on a classic Kharidian design, it was modified with a long and sharp end, making it far larger – while remaining more versatile – than the average Khopesh. It was eventually buried with Osmumten.
Osmumten’s Khopesh is a new melee weapon which excels against monsters with very high defence! It’s also fine against low defence monsters, but less optimal, as it’s slower (but very accurate). It also boasts a special attack that increases the max hit of the weapon to its true max hit for one attack – and it boosts accuracy by an additional 50%! Using it in this way costs 50% of the player's special attack energy.
Details, Stats and Requirements:
Requires 82 Attack to wield.
It has a five cycle tick speed and its accuracy is similar to an Elder Maul.
[/expand]
You can also find some more information including concept art, setting and details about the precursor quest by checking out our Tombs of Amascut: Raid Rewards newspost.
So, fancy wielding some of these weapons? Jump into a Beta World, give them a spin and let us know what you think! We’re also happy to answer any questions that aren’t addressed here – just get in touch at the links below.
Premier Club - Summer 2021
What better way to follow up the Summer Summit than with a juicy Summer Sale? You can enjoy all the forthcoming content we just announced by joining our Premier Club, on sale from the 16th August!
If you didn't know already, Premier Club offers our best-value yearly Membership package, giving you access to Deadman Mode, Leagues, Group Ironman and more. You can purchase the bumper Gold package until September 14th, so grab it will you can.
Did you know you can purchase Premier Club via your mobile device now, too? However, be warned that you may run into eligibility issues if you have recurring Membership already enabled. If this is the case for you, quickly swap to your PC to complete the purchase and you'll be good to go!
Mini Poll Improvements
We’ve made some more changes from the recent Mini Poll. Here's what’s new:
Players may now trade in their duplicate Enhanced Crystal Weapon Seeds for 1,500 Crystal Shards each.
Ultimate Ironmen can now store the Bow of Faerdhinen in a STASH unit, similar to other account types.
We've changed the weighting and number of Sourhogs that can be assigned by a Slayer Master. You'll now receive between 15-25 Sourhogs per task and you're less likely to receive the task in the first place.
And finally, players will now receive 100% Prayer XP from the Ash Sanctifier upon completion of the Elite Kourend and Kebos Diary!
We know you're eagerly awaiting the remaining changes from the mini poll, and we'll make sure to implement them as soon as possible. If you'd like a refresher on the proposed tweaks, check out our Mini Poll blog!
Combat Achievements
Adventurers – we’re so proud of the challenges you've completed so far. So proud, in fact, that we've gone ahead and fixed the Adventurers' Log! You'll now be able to see your Combat Achievements displayed in all their glory within your Player Owned House. Engage smug mode!
This week, we're raising the stakes by adding brand new Combat Achievement tasks within Phosani's Nightmare! When you check your Combat Achievement interface, you'll see 10 new tasks, ranging from Elite and Master to Grandmaster. As mentioned in our original blog, you'll need to complete each tier in order to regain access to any associated rewards. Speed and Kill Count tasks will apply retroactively, taking into account your current progress and completion times.
The race begins! Complete the new tasks and let us know how you get on…
Poll 75 Improvements
There's now less variation in where the Maiden Blood Spawns appear in the theatre, making your survival a little less dependent on the whims of the RNG Gods! Additionally, if you successfully dodge the blood, a maximum of one Blood Spawn only will appear.
Additionally, we've improved the area where Killerwatts are found, as it was visually uncomfortable for some players.
We only have a few changes left to get through from Poll 75. Expect to see them soon!
PvP World Rota
The PvP rota has moved to Period A:
539 - (US) - PvP World
548 - (Germany) - High-Risk PvP World
577 - (US) - Free-to-Play PvP World
559 - (UK) - LMS Competitive
390 - (AUS) - LMS Competitive - This world has been activated with this rota.
Extras
On the recommended Castle Wars Worlds, players now need a skill total of 500 or more if they want to set up barricades. Players without that level are welcome to use the barricades on other worlds.
Rings of Suffering no longer vanish if their charges are discarded on free-to-play Worlds.
Random events are no longer permitted to bother you while you're dodging elementals in the Sorceress' Garden.
That's everything for this week's game update. We'd love to hear your feedback so please let us know what you think via our official forums, on the 2007Scape Reddit, the Steam forums or the community-led OSRS Discord in the #gameupdate channel.
The Summer Summit saw us share information about Deadman: Reborn, Group Ironman, Leagues III - and the announcement of Old School's third raid, the Tombs of Amascut. With Thursday's game update you'll get your hands on the new Raid rewards in a beta!
PSA: This week's game update will go live on Thursday instead of the usual Wednesday release.
In this blog we wanted to briefly recap what was announced at the Summit and, most importantly, begin the discussion about potential rewards before it goes to the polls!
[previewyoutube="bNoXgf87a4c;full"] Click the above video to watch the Summer Summit Raids announcement!
The Tombs of Amascut
Long ago, the citizens of the Kharidian Desert lived prosperous and luxurious lives thanks to the benevolence of the Gods of the Menaphite Pantheon. However, that all changed when Amascut, the Goddess of Rebirth, was corrupted. Warped into the Devourer, she became intent on devouring every soul in existence.
Her brother, Icthlarin, along with her former High Priestesses have since been fighting tirelessly against Amascut, in a bid to negate her destructive efforts.
After years of plotting, Amascut has finally find a way to overcome the efforts of Icthalarin and his allies.
Deep within the desert, an ancient pharaoh called Osmumten lies buried. His tomb has long hidden a great power. It is this great power that Amascut seeks, and if she can lay her hands on it she will become unstoppable.
You must take the fight to Amascut before it's too late.
Sketches and references for the Tombs of Amascut. Click to see it in more detail. This is concept art and may not be representative of the final appearance of the Tombs!
The Raid
Let's dig in to what you need to know about the Tombs of Amascut:
Groups of up to eight participants.
Four initial challenges, followed by two final bosses to be fought in a twin boss encounter.
Invocations will allow for customisable difficulty, which will also impact your loot potential!
Invocations will replace standard difficulty systems, like the ones used in other raids.
Each Invocation will affect the raid or your group in different ways.
Some Invocations can affect the health, defence, or damage modifiers for the enemies within the Raid.
Other Invocations might impose group restrictions, like reducing the amount you can heal or prohibiting certain spells.
We intend to be quite creative with these modifiers. The above examples are fairly simple and safe, with the intention to provide early insight into their impact for this blog, but we'd like to experiment with different ideas that might drastically change things.
On entering the Tombs of Amascut you will encounter four paths:
The upper level of the Tombs will consist of four paths, each ending in a boss.
Each path is comprised of its own series of challenges to be overcome.
These challenges are more akin to puzzles rather than killing a single entity, like a boss.
These can range from things like traps with Sepulchre-like dodging, or defeating new foes in unconventional ways.
Once you reach the end of a path, you'll then fight the boss of that path in a more conventional combat encounter.
The raid will be altered in some way with the death of each boss, changing the remaining boss encounters.
This means that the path order you choose will matter!
Defeat the four bosses to descend to the lower levels:
Once you defeat the first four bosses you'll unlock the lower level.
You'll enter a chamber containing the two ancient guardians of the Tombs.
These guardians need to be fought at the same time.
Defeat the guardians to drive Amascut from the tomb and claim your rewards!
We'll discuss the rewards a bit later, but first let's talk about how you might access the Tombs of Amascut.
Beneath Cursed Sands
The Tombs of Amascut will be our most narratively-driven Raid yet, and no narrative is complete without a quest!
When Sophanem was beset by a series of plagues, the gates to the golden city of Menaphos quickly closed. The city has been locked down ever since, with no one allowed to leave or enter. However, rumours have escaped of strange happenings inside Menaphos and there are stories of citizens mysteriously disappearing.
These odd happenings need to be investigated, but few are willing to do so. Maisa, a spy from Al Kharid, has grown tired of inaction. She is determined to solve this mystery herself, but she won't be able to do it alone...
Beneath Cursed Sands is a Master-level quest which will advance the desert storyline.
In this sequel to Contact! You'll find yourself investigating mysterious disappearances from Menaphos, the city of gold. Note: Menaphos will not be opening its gates just yet, and will instead be coming at a later date.
Solving this mystery will grant you access to the Raid itself.
We're aiming to release the quest before the Raid to give you ample time to ready yourself!
Requirements & Rewards (SPOILER WARNING!)
[expand type="details"] Being a Master-level quest, there are naturally some mid-level requirements to meet:
Completion of Contact!
62 Agility
55 Firemaking
55 Smithing
Upon completion you'll be rewarded with:
1 Quest Point
Access to the Tombs of Amascut
The ability to upgrade the Keris to the Keris Partisan
15,000 Agility XP
[/expand]
Tombs of Amascut: Rewards
Here's where we'd love to get your feedback. As with any rewards proposals, it should go without saying that nothing here is set in stone. Your feedback is going to be key in shaping what we're offering, and we really want to see what suggestions you have too! To make sure we see what you have to say, we'd invite you to do one of the following:
The Masori were a clan of powerful ranged users active during an ancient war which embroiled much of the Kharidian forces. They focused primarily on defending ordinary people from the violent thieves and murderers who sought to take advantage of the chaos caused by the war. The group has been long since disbanded, but their equipment can still be found amongst the palaces of wealthy Menaphites or among the treasures of long dead Pharaohs.
Before we discuss the Masori equipment, we'd like to introduce a new status effect, Low Life. A player is considered to be Low Life when below 40% of their maximum health.
The Masori equipment consists of a chestpiece, legs, and amulet. Equipping the Masori items requires 80 Ranged and 20 Defence. The armour set will be the very first pieces of equipment in the game to utilise Low Life. When the player is in a state of Low Life and has the chestpiece and legs equipped, the equipment set will gain additional stats. This set effect provides additional accuracy and ranged strength for as long as you remain in Low Life (whenever you remain below 40% of your maximum health). The amulet shares this effect and it also has an additional passive effect. When equipped, and not influenced by Low Life, you'll take damage equivalent to 15% of your current health at a rate of every three game cycles.
Let's take a look at the stats:
The Masori equipment. A potential reward from the Tombs of Amascut, introducing 'Low Life' to Old School. And for how that compares to other existing equipment and what the set effects mean:
When Low Life is active, the accuracy and strength bonus surpasses Armadyl (Chestplate and Chainskirt) by 11 and 6 respectively.
The amulet base offensive stats are similar to the Amulet of Fury, with it slightly surpassing its Zenyte equivalents when Low Life is active.
We think this new equipment could lead to the emergence of innovative and interesting playstyles. The set effect offers a way to balance the introduction of new, powerful equipment without devaluing existing equipment which boasts defensive bonuses. Its Low Life effect will mean that it is extremely useful in some cases, but will fall short in other areas because of the need to maintain specific Hitpoints. Let's use Vorkath as an example. If you're 99 Hitpoints, you'd need to stay below 40 Hitpoints to keep its effect active. Whilst Vorkath's unavoidable damage doesn't hit as high as 40, you'll need to eat fairly often to keep above the highest possible hit to ensure you stay alive, making it both extremely difficult to maintain the Low Life effect.
Heka of Tumeken and the Ward of Elidinis
Tumeken was the God of Sun and Elidinis was the Goddess of Fertility. As husband and wife, they led the Menaphite Pantheon. Whilst Tumeken and Elidinis steered the people of the Kharidian Desert spiritually, it was the responsibility of the human Pharoah to rule the Desert. Osmumten was the last Pharoah to rule before the end of the ancient war. Osmumten fought alongside Tumeken against enemy forces. Tumeken sacrificed himself to end the war, and before Elidinis disappeared to mourn the loss of her family she gifted Osmumten with Tumeken's Heka and her own broken Ward.
The Heka of Tumeken is a wand-like magical weapon. Equipping the Heka will require 84 Magic. It has a built-in spell with charges which will need to be replenished, using one Soul Rune and three Chaos Runes per charge. The Heka has an attack rate of two ticks. Every fourth hit the Heka will fire a stronger attack which deals significantly more damage, albeit with a longer delay after the attack. We know that weapons with fast attack speeds scale harder with additional bonuses, like the Toxic Blowpipe. To offset this and to help make the Heka scale more similarly to other magic weapons, the standard faster attacks will only benefit from 50% of your Magic strength. The slower fourth hit will be much stronger, benefitting from 150% of your Magic strength bonus. Its attack range will be shorter than other staves too, with it being six rather than seven (casting with the long range setting will boost it to eight).
For the min-max savvy players out there who like calculations, the following formulas should help with any theorycrafting you'd like to put together:
Standard fast attacks scale based on '(Magic Level / 6) + 1' for the base max hit.
The slower fourth attack scales based on '(Magic Level - 25) / 2' for the base max hit.
After this is calculated, any Magic strength from other sources is then applied.
Let's take a look at the stats:
The Heka of Tumeken, a wand-like magical weapon.
The Ward of Elidinis will be the new best-in-slot magical shield. Players will get the broken Ward as a rare reward from the Tombs of Amascut. With 90 Prayer and 90 Smithing you'll be able to combine the broken ward with an Arcane Sigil and 10,000 Soul Runes to repair the Ward. Players without those stats will be able to pay Abbot Langley 20,000,000 GP to create it for them.
Equipping the Ward will require 80 Magic, 80 Defence, and 80 Prayer. The broken Ward will be tradeable, whilst the fixed Ward will be untradeable. Players can dismantle the Ward to recover the Sigil and the Ward, but the runes will be lost. Dying in PvP will result in the Sigil and the broken Ward being dropped.
Let's take a look at the stats:
The Ward of Elidinis, a new best-in-slot magical shield.
Lightbearer
Ahmek was a powerful warrior who sought to capitalise on the chaos caused by the end of the ancient war. Ahmek crafted a powerful ring which he imbued with the unstable energy left behind from Tumekin's sacrifice. He hoped to use this ring to emerge as a new power in the region. By forcibly uniting thieves and mercenaries under his command, he planned to overthrow Osmumten. His plans proved fruitless, however, when the ring was stolen and he was murdered in his sleep. The Menaphite Guards claimed the ring from the body of the murderous thief, and dutifully presented it to the Pharoah.
The Lightbearer is a ring with no Attack, Defence, or Other bonuses. It does, however, have a very unique effect. When equipped, your special attack energy will regenerate 100% faster (approximately 15 seconds per 10%/150 seconds per 100%). Unequipping the ring will cause the timer to reset.
We think that for the most part, you'll want to continue using rings like the Berserker ring. But there'll be some situations where the additional special attack rate will warrants its use. We think this ring will shine in places where kill times are longer, or where you'll want to use a special attack per kill (like Graardor, K'ril, Abyssal Sire etc) - or maybe even use it whilst Woodcutting or Fishing!
Osmumten's Khopesh
Known to his people as Osmumten the Hunter, he was renowned for bringing down many of the land's deadliest beasts. During his hunts he wore armour and weapons crafted by the region's finest artisans. One such weapon was his Khopesh. Though based on a traditional Kharidian design, Osmumten's Khopesh was modified to give it a long and sharp end to make it more versatile than other weapons of its kind. The Khopesh would eventually be buried with Osmumten.
Osmumten's Khopesh is primarily a Stab melee weapon which boasts accuracy comparable to the Elder Maul, and an Attack Speed of five. Equipping the Khopesh will require 82 Attack. We expect its damage-per-second output to be comparable to Rapier-tier weapons on opponents with low Defence, with much greater damage-per-second output on opponents with higher Defence.
We'd like to introduce a new unique mechanic for the Khopesh. Other weapons will roll '0 - max hit'. The Khopesh will roll '(max hit * 0.15) - (max hit - (max hit * 0.15))'. This means that if the max hit is 60, its attack would roll between 9-51. This makes it a very consistent weapon which excels against high Defence targets.
The Khopesh would also have a special attack which increases its max hit to its true max hit for one attack, as well as boosting its accuracy by an additional 50%. This means that if its max hit was 60, it would roll 9-60. This special attack will cost 50% special attack energy to use.
Let's take a look at the stats:
Osmumten's Khopesh, a Stab melee weapon which boasts accuracy comparable to the Elder Maul.
Keris Partisan
Upon helping to [redacted] during the Beneath Cursed Sands quest, [redacted] will reluctantly reward you with an enhanced version of Keris, the spear-like Keris Partisan.
In addition to its Stab attack styles, the Partisan will have a Crush attack style, which should prove useful during the Tombs of Amascut and against other beetle-like enemies, like the Kalphite Queen. Equipping the Partisan will require 80 Attack.
We'd like to try something slightly different with this weapon. The Partisan has a socket in which players can insert special jewels. These jewels are obtained as rare rewards from the Tombs of Amascut, and inserting these jewels into the Partisan will bestow different effects onto the weapon. You'll only be able to use on jewel at a time. These jewels will not be tradeable.
We're still considering how we'd like to reward players with these jewels. They could be unlocked as a random drop, or given upon a certain number of Raid completions, or as a reward for killing bosses using specific methods. We're also considering whether they should be permanent one-time unlocks, or whether they should have charges. Naturally this would effect the rarity of the drop. We'd love to hear your thoughts on how they should be implemented!
Let's take a look at the stats:
Keris Partisan, a spear-like enhanced version of Keris. And here's a look at a few jewel buffs we're considering. Note that the effects apply only during the Tombs of Amascut.
The Eye of the Corrupter adds a damage-over-time effect to attacked enemies. You won't be able to stack this effect multiple times onto a single NPC but you will be able to apply it to multiple NPCs at any one time.
The Jewel of the Sun applies a debuff to attacked NPCs which causes them to take higher damage for a sustained period of time.
In addition to effects that only apply within the Tombs, we're also considering how jewels can provide benefits throughout the whole of Geilinor. For example:
The Breach of the Scarab adds a 33% accuracy buff against Kalphites, Scarabs and Beetles.
We think that the Partisan's upgrade system will allow for a strong sense of progression within the Raid itself, making it very useful in that encounter without encroaching on other gear elsewhere.
Concept Art
During the Summer Summit announcement (scroll to the top of this blog to watch it!) our artists discussed their approach to designing this content, and also teased you with sketches and concept art. Here are some of those sketches, helpfully unlabelled to keep you all guessing. And again, please note that this is concept art and may not be representative of the final appearance of the Tombs, anything within, or its rewards!
Click here to see the sketches.
[expand type="details"] Concept art for Tombs of Amascut. These images may not be representative of the final appearance of the Tombs, anything within, or its rewards! [/expand]
That's everything for this blog. We'd love to hear your feedback so please do...
New Client Features: Milestone 2 (Weekly Game Update - August 4th)
Issues and Hotfixes (August 4th)
[expand type="details"] [table] [tr][th]Issue Raised[/th][th]Current Progress[/th][/tr][tr][td]11:45 BST: We've received reports of some KC tasks aren't autocompleting..[/td][td]12:13 BST: [FIXED] KC tasks should now complete correctly upon opening the Combat Achievements Log.[/td][/tr] [/table] [/expand]
The second batch of new client features arrive this week, bringing enhancements to core gameplay elements such as minimap management and, excitingly, improved draw distances! Combat Achievers and patrons of the Theatre of Blood have plenty to get their teeth into, too, and some lovely new merch hits the store!
New Client Features: Milestone Two
We hope you’ve been enjoying the new client features introduced in back in June . Today we’re delighted to announce a number of new features heading to the game as part of our second milestone for this ongoing project!
This week’s batch focuses on priority helpers and indicators, and we're confident these new additions will really improve your core Old School experience.
As a reminder, these features can currently only be used on the C++ client through Steam – we are still working on bringing them to mobile. Stay tuned to our socials for updates as the project develops.
Here’s what we've got for you:
Settings Menu Re-organisation
Your main Settings menu sits at the heart of your gaming experience. It’s where you make the essential tweaks and nudges that shape the gameplay to your liking. As such, we want the process for toggling between options to be as smooth as possible.
With that in mind, we've added three new categories in the form of 'Activities', 'Interfaces' and 'Warnings', which should make some of these key settings easier to find.
Left: Previous Settings Menu, Right: New Settings Menu.
Additionally, the 'Keybinds' section has been removed – you'll now find those settings within the 'Controls' section.
Finally, 'Collection Log Popup' and 'Chat Notification Functionality' have been separated, and you now have options to turn them on individually. You can find them in 'Interfaces' and 'Chat' respectively.
Agility Helpers
Training Agility has just gotten that little bit smoother with this update! We've included visual identifiers for obstacle courses across Gielinor, including the new Shayzien course. Along with your path through a course, any Marks of Grace will also be highlighted. This setting will be OFF as default, so remember to switch it on for the extra assistance.
Marks for the Marks!
Full List of Courses
[expand type="details"]
Gnome Stronghold
Draynor
Al Kharid
Varrock
Canifis
Falador
Seers Village
Pollnivneach
Rellekka
Ardougne
Prifddinas
Wilderness
Skullball
Werewolf
Agility Pyramid
Ape Atoll
Barbarian Outpost
Brimhaven Agility Arena
Penguin Course
Shayzien
[/expand]
If you’re in a hurry, you also have the option to highlight the many shortcuts within the Agility skill guide. Again, this is OFF by default.
Shortcuts are little more obvious now!
We’ve also included a nifty little Infobox that will display the name of the course, track the number of laps you've completed, your laps per hour and the number of laps needed for your next Agility level. Courses with their own unique twist like the Brimhaven Agility Arena will have additional course-specific information.
The Infobox is ON by default.
Draw Distance
Like Gielinor itself, we're very old and can barely recall the days when we enjoyed 2020 vision… but now you can see further than ever before with this update! You'll now be able to increase the draw distance of objects around the player using a bar within the Display tab in Settings. By default this will be on its lowest setting. Note that changing this will not affect the distance at which you can see other players or NPCs.
Image 1: Minimal Draw Distance, Image 2: Maximum Draw Distance.
Minimap Improvements
Eagle-eyed players would have spotted this new feature with last week's update. Yup, you can now zoom in and out of the Minimap! Hover your mouse over it and get scrolling to increase or decrease the size - it’s perfect for scoping out your next destination.
Left: Completely Zoomed In, Right: Completely Zoomed Out
But what if you don't like the Minimap? What if you think it simply gets in the way of all that beautiful scenery?! OK, fine. In the resizeable mode you can now right-click on the globe icon and minimise it. Just don’t blame us if you get lost.
Putting the 'Mini' in Minimap!
Tile Indicators
We're also bringing you three new types of tile indicators, which can be found within the new Activities section of the Settings menu. You now have indicators for your current position, your destination tile and any tiles you mouseover.
Each of these new indicators can be given different colours. Their default setting is OFF.
Blue = Current Tile, Green = Target Tile, Red = Hovered-Over Tile.
Buff Bar: Ammo Display
Check what ammo you’ve equipped and how much you have left on your Buff Bar! When you have more than one type of ammo equipped (e.g. darts and arrows), the ammo in the weapons slot will take priority.
Image 1: With Blowpipe & Ammo, Image 2: Without Blowpipe.
Extras
Stat boost timers will now appear instantly if any boosts are active when logging into the game.
We’ve also made the text colour for stat boost timers more readable.
It's the smaller details that makes the biggest difference.
UI scaling has become more flexible, too - you can now choose between nearest-neighbour, linear and bicubic filtering.
Smooth out those zoomed in edges!
Certain elements such as stat boosts, helpers, opponent information and more will be hidden during cutscenes, leaning into a more cinematic experience.
Your Feedback
We've also created a new set of channels in the Official Old School Discord so you can give us your feedback and suggestions on the latest Steam Client drops. So jump into Discord and let us know your thoughts on the second client milestone!
Combat Achievements
We're continuing to refine the Combat Achievements experience. Here are the latest tweaks:
As long as it's bounced to another player, the ‘Perfect Verzik’ task will no longer fail if you take damage from Verzik's green ball attack.
The RPG will now count as a melee weapon for completing Combat Achievement tasks.
The Fight Caves will now save progress correctly in relation to complete Combat Achievements tasks.
The counter page of your Player Owned House Achievement Log will now display on a different scroll, ensuring that high achievers can see their stats too.
Nightmare tasks should now be working as intended.
Performing the Scythe + Serp combo will once again have 100% chance to poison the Purple Crab in Theatre of Blood.
We've adjusted some of the tasks’ difficulty tiers:
‘Sleep Tight’: Moved from Master tier to Elite tier
‘Nightmare (Solo) Speed-Trialist’: Moved from Elite tier to Master tier
Following your feedback, we've tweaked some of the kill count tasks:
Kill Bryophyta 10 times -> 5 times (Medium)
Kill Obor 10 times -> 5 times (Medium)
Kill Callisto 150 times -> 100 times (Elite)
Kill Venenatis 150 times -> 100 times (Elite)
Kill Vet'ion 150 times -> 100 times (Elite)
Kill Cerberus 250 times -> 150 times (Elite)
Kill Cerberus 500 times -> 250 times (Master)
Kill Alchemical Hydra 250 times -> 150 times (Elite)
Kill Alchemical Hydra 500 times -> 250 times (Master)
Kill Corporeal Beast 100 times -> 50 times (Elite)
Kill Corporeal Beast 250 times -> 150 times (Master)
Kill Zulrah 250 times -> 150 times (Elite)
Kill Zulrah 500 times -> 250 times (Master)
Defeat the Corrupted Gauntlet 50 times -> 10 times (Elite)
Defeat the Corrupted Gauntlet 100 times -> 50 times (Master)
Defeat the Corrupted Gauntlet 200 times -> 150 times (Grandmaster)
Defeat the Gauntlet 50 times -> 100 times (Master)
Theatre of Blood - Poll 75 Changes
A filter has been added to the Theatre of Blood Party Board to help you find their friends and Clanmates.
<*>Players can now use Verzik's crystal shards on their party members to activate them. To enable this, right-click a crystal and select ‘Toggle’. Both players must have a crystal for this to work, and both crystals will be consumed in the process. Hopefully that’s as clear as a transparent precious mineral.
PvP World Rota
The PvP rota has moved to Period B:
560 - (UK) - PvP World
579 - (US) - High-Risk PvP World
561 - (UK) - Free-to-play PvP World
580 - (US) - LMS Competitive
Merch
Check out the new Limited Edition pins from Angels Scapes, available now on the Official Merch Store! Dazzle your friends with the Lunar Pin, a shiny set of ceremonial Moon Clan armour on coloured enamel with 2.5D anodized rainbow metal detailing, or stand out from the crowd with the Berty Pin – the craziest house you ever did see, now in pin form!
By popular demand, we have also added Cooking and Farming to the Skillcape keyring range.
Visit the store to grab your pins while stocks last!
Other News
The Sinister Offering spell can now be performed without interrupting your actions.
Story Mode has been renamed Entry Mode in the Combat Achievements menu, Collection Log and Theatre of Blood scoreboard.
A typo within the A Night at the Theatre dialogue has been fixed.
A grammatical error in the description for the Combat Achievement ‘Shayzien Protector’ has been fixed.
That's everything for this week's game update. We'd love to hear your feedback so please let us know what you think via our official forums, on the 2007Scape Reddit, the Steam forums or the community-led OSRS Discord in the #gameupdate channel.
A Night At The Theatre Rework (Weekly Game Update - July 28th)
It’s curtain up for a rework of A Night at the Theatre, and this time we hope the performance will earn a hearty round of applause! We’ve also tweaked Combat Achievements and we’d love your feedback on some possible boss task changes. All that and more in this week’s update!
Issues and Hotfixes (July 28th)
[expand type="details"] [table] [tr][th]Issue Raised[/th][th]Current Progress[/th][/tr][tr][td]11:55 BST: We are receiving reports of the Steam Client not loading properly.[/td][td]12:05 BST: [FIXED] The Steam Client should now be working as intended.[/td][/tr][tr][td]12:40 BST: Following player feedback we've made a small change to A Night at the Theatre.[/td][td]12:40 BST: Players who have already completed the Theatre of Blood raid, including Story Mode, will no longer be required to complete the raid again in order to fully finish the quest.[/td][/tr][tr][td]12:48 BST: We're seeing reports from players in Phosani's Nightmare about their items being sent to the wrong NPC.[/td][td]15:20 BST: We have deployed a hotfix to resolve this issue. 17:50 BST: There are a small number of players still experiencing this issue and we are continuing to investigate.[/td][/tr][tr][td]13:35 BST: Access to the different Wiki options aren't showing.[/td][td]13:35 BST: [FIXED] We've released a hotfix to resolve this issue.[/td][/tr][tr][td]14:21 BST:We're also seeing some bug reports related to issues in Phosani's Nightmare. These include not being able to hit parasites with a Crush Weapon effectively, and Phosani's Nightmare not being able to be woken up after the regular version of the Nightmare has been killed.[/td][td]17:50 BST: We have deployed several hotfixes in an attempt to resolve this issue, however we are aware of reports from a small number of players still experiencing issues. We would like to thank you for your patience as we continue to investigate.[/td][/tr][tr][td]15:02 BST:Hespori from A Night At The Theatre can be damaged while flowers are active.[/td][td]15:55 BST: [FIXED] We have deployed a hotfix to resolve this issue.[/td][/tr][tr][td]15:20 BST: Phosani's Nightmare: It was not possible to one hit parasites with a Crush weapon.[/td][td]16:20 BST: Any fights that have started from 16:20 BST should no longer see this issue. 17:50 BST: We've been made aware that there are small number of players are reporting that this issue is still ocurring, so we're launching another investigation on this issue.[/td][/tr][/table][/expand][tr][td]17:54 BST: The Shayzien Protector task is failing if the player gets hit by poison, even for null damage.[/td][td]19:02 BST: [FIXED] We've deployed a hotfix to resolve this issue.[/td][/tr]
A Night At The Theatre
It’s fair to say that A Night at the Theatre has been a bit of a poor show. The quest we released didn’t match what was originally polled, and let’s be honest, it wasn’t up to the standards of an Old School escapade. We completely agree with your feedback, and we’ve taken your suggestions on board.
Today we’re launching a reworked version that should deliver a proper Old School questing experience while still providing a satisfying introduction to the Theatre of Blood. With this change, Story Mode has been renamed Entry Mode.
You'll start the quest the same way as before; by speaking to the Mysterious Stranger lurking outside the Theatre. You still have to take on the challenges of said Theatre at some point during the quest, at a difficulty setting of your choosing.
If you’ve already played it through, there's a couple of things you should know:
Players who completed the previous version of the quest will still need to complete this version but won't need to complete the raid itself again.
Players who completed the previous version of the quest will lose the two quest points they gained, but will get them back when they complete the rework.
Quest Capes will be lost as normal for players who have not completed every quest.
Players who have already used Combat XP Lamps in the previous version will not receive them again.
With the original version of A Night at the Theatre, you made it clear that you weren't happy about the quest autocompleting as it meant you missed out on the new dialogue. Not only that, but just like with the original version, this reworked quest will be a requirement for the Myreque finale and has elements that will be very important to that quest (most of which were not present in the original version). As such, you'll need to complete this version of A Night at the Theatre even if you completed the original version.
In addition, the quest requirements have changed slightly and there's now an additional XP lamp:
Requirements & Rewards (SPOILER WARNING!)
[expand type="spoiler"] The following quest is required to start A Night at the Theatre:
A Taste of Hope
The following levels are recommended:
90 Combat
Upon completion you'll get:
2 x 20,000 XP Combat Lamps
2 Quest Points
[/expand]
We hope you enjoy this fresh approach to A Night at the Theatre!
Quest Icon Improvements
While we were in reworking mode we thought – hey, why not enhance how quests appear on the world map?
Hovering over a quest icon will now show the name and status of the quest (started, not started, completed, members-only).
Additionally, every quest in the list now has a ‘show on map’ right-click option. This will open the world map and move to the quest’s icon, which will also flash so it’s easy to spot! Miniquests have this option too, but because they don’t have icons it will just open the map and show the rough starting area.
Combat Achievements
You’ll only fail the task ‘Squashing The Giant’ if you are damaged by a melee or ranged attack and don't have the appropriate prayer activated. We’ve updated the description to reflect this.
The task ‘Prepared for Battle’ has been renamed ‘Shayzien Protector’ and you’ll need to kill a Lizardman Shaman in Molch without being damaged by any of its attacks (except for those pesky purple spawns).
You can now use any demonbane weapons on Easy Tier tasks – not just Arclight.
Other Changes include:
Phosani's Nightmare and Nightmare kill counts are now combined into one big kill count. Or one small kill count, if you suck at the Nightmare.
Corrupted Gauntlet completions count for Regular Gauntlet KC tasks. Similar to how Phosani KC counts towards the Nightmare tasks.
‘Fighting As Intended’ and ‘Fighting As Intended II’ can now be completed on Deadman worlds.
Perfect tasks will no longer fail once the NPC starts it death animation.
The mysterious Anim Offhand is no longer for sale at the Grand Exchange. This item was an error, sorry!
Typos have been fixed in the ‘Dagannoth Supreme Adept’ and ‘Playing With Lasers’ tasks.
We've been aware of tasks sometimes not completing in the Theatre of Blood and we've attempted a fix and added extra tracking which is something we'll keep montioring with today's update.
Potential Changes
We’ve received a lot of feedback about some of the boss tasks being much higher and more tedious to grind out than the others. We’d love to hear your thoughts on possible changes to these tasks. If you’re keen, we’d like to make alterations in next week's update:
Kill Bryophyta 10 times -> 5 times (Medium)
Kill Obor 10 times -> 5 times (Medium)
Kill Callisto 150 times -> 100 times (Elite)
Kill Venenatis 150 times -> 100 times (Elite)
Kill Vet'ion 150 times -> 100 times (Elite)
Kill Cerberus 250 times -> 150 times (Elite)
Kill Cerberus 500 times -> 250 times (Master)
Kill Alchemical Hydra 250 times -> 150 times (Elite)
Kill Alchemical Hydra 500 times -> 250 times (Master)
Kill Corporeal Beast 100 times -> 50 times (Elite)
Kill Corporeal Beast 250 times -> 150 times (Master)
Kill Zulrah 250 times -> 150 times (Elite)
Kill Zulrah 500 times -> 250 times (Master)
Defeat the Corrupted Gauntlet 50 times -> 10 times (Elite)
Defeat the Corrupted Gauntlet 100 times -> 50 times (Master)
Defeat the Corrupted Gauntlet 200 times -> 150 times (Grandmaster)
Defeat the Gauntlet 50 times -> 100 times (Master)
Summer Summit
On Saturday July 31st we’re going live with Old School’s Summer Summit! This whole lockdown/pandemic thing has got us thinking about how we usually talk about the cool stuff we’re doing. Previously we always went nuts at RuneFest and gave you a year’s worth of content, which was always super exciting – until we’d miss the deadlines we set for ourselves.
This year we’re changing our approach: the Summer Summit will focus on big stuff coming in the next six months. If it goes well, we’ll do the same in another six months’ time, looking at the next half year. Obviously, this second event won’t be called the Summer Summit. Unless we do it in Australia…
Anyway, we reckon this is the best way to keep you updated with a more accurate picture of the adventures to come. We look forward to you joining us on Saturday July 31st on Twitch at 20:00 BST!
To make sure that very first Summer Summit goes as smoothly as possible there will be no Q&A this week as the team prepares for Saturday's steam.
PvP World Rota
The PvP rota has moved to Period A:
539 - (US) - PvP World
548 - (Germany) - High-Risk PvP World
577 - (US) - Free-to-Play PvP World
559 - (UK) - LMS Competitive
As we continue to improve the world rota system, we are aware that the Australian LMS world is often the only one available to get a competitive game. So, from next week, LMS competitive worlds will alternate between US-only, and then Australia and UK, alongside the rest of the usual rota changes.
Other News
There’s now a shadow indicator before Dawn's white orb stun lands, giving you more of a chance to scarper.
In the Player Attack Options menu you can now allow clanmates to be attacked via left-click, for those who are that way inclined.
Crossing the root by the peekhole near the top of the DKs' ladder will no longer clear any pending damage. We really got to the root of the problem on this one…
The Ammonite Crabs are no longer obstructed by their little scuttling siblings.
Unferth has finally realised that Bob has been coming home for food a day earlier than he used to, so hopefully the information he gives is now.... purr-fectly accurate.
That's everything for this week's game update. We'd love to hear your feedback so please let us know what you think via our official forums, on the 2007Scape Reddit, the Steam forums or the community-led OSRS Discord in the #gameupdate channel.
On Saturday July 31st we’re going live with the Old School Summer Summit! This whole lockdown thing has got us thinking about how we usually talk about the cool stuff we’re doing. Previously we always went nuts at RuneFest and gave you an entire year’s worth of content, which was always super exciting – until we’d miss the deadlines we set for ourselves.
This year we’re changing our approach: the Summer Summit will focus on big stuff coming in the next six months. This approach is something of an experiment for us, and if it goes well, we’ll try to do the same in another six months’ time, looking at the next half year. Obviously, that second event won’t be called the Summer Summit. Unless we do it in Australia…
Anyway, in lieu of RuneFest (which we miss immensely!) we reckon this is the best way to keep you updated with a more accurate picture of the adventures to come. We look forward to you joining us on Saturday July 31st on the Old School RuneScape Twitch channel at 20:00 BST!
The Old School Team
Combat Achievements Feedback and Changes
We're thrilled to see so many of you try your hand at the new Combat Achievements! Really, Ghommal won't stop raving about it! If you haven't heard yet, Combat Achievements are a brand new task system designed to inject a little more spice and challenge into your PvM experience. It rewards those brave enough to complete some of Gielinor's toughest challenges!
We've been closely monitoring your response to Combat Achievements so far, and and these are our initial thoughts. This isn't an exhaustive list of everything that we've heard, but here's what we're currently looking at for next week.
First off, you've said that some of the tasks feel too difficult in comparison to the rewards on offer. It's absolutely true that the 'Easy' and 'Medium' tier rewards aren't the most noteworthy. Rewards at the higher tiers are better, but are also not considerably game-changing. When we originally pitched the idea of Combat Achievements, feedback suggested that we should focus on promoting players' sense of personal achievement, rather than offer something that players would feel obliged to complete. And while we think that's the right approach, we do however recognise that this design can feel somewhat demotivating to some.
The solution? We think there's scope to increase the rewards, but we'd like to consider this at a later date pending more feedback after the dust has settled. If you still feel we should introduce more rewards later down the line, we'll consider addressing this in a future Poll.
Next, let's talk about the range of difficulty for tasks. Why do some tasks within the same tier have wildly varying levels of difficulty? This is intentional. It's virtually impossible to create tasks that are all equal in difficulty whilst also providing variation for players AND spanning multiple areas of the game. The tier of task provides a ballpark estimate of difficulty for all of the tasks collectively rather than individually. Think of it like this: how do all of the tasks within the 'Easy' tier feel compared to all of the tasks in the 'Medium' tier as a whole? Is there a reasonable and appropriate jump in skill compared to the leap players needed from 'Medium' to 'Hard'? If there are individual tasks which are overly challenging for their tier, that's something we can address on a case by case basis.
Tasks should be challenging, but no task should feel impossible to complete or dependant solely on luck rather than skill. For this reason, we're going to reduce the RNG element of 'Squashing the Giant'. Currently, Obor's ranged and melee attacks do not provide full protection from protection prayers, which means that your success depends on his failure. We plan to change this so that the task will only fail if you aren't using protection prayers against his attacks.
We're also aware that Arclight is required for a couple of 'Easy' and 'Medium' tier tasks, specifically 'Not So Great After All' and 'Demonbane Weaponry'. That's despite our recommendation in the Combat Achievements Blog that players would only need base 60 or base 70 stats respectively to attempt these. So, we'll be changing the tasks to instead require any Demonbane Weapon rather than Arclight specifically, meaning you'll be able to choose between using Silverlight, Darklight, or Arclight to complete them.
We'll also be changing the 'Prepared for Battle' task in the 'Easy' tier so that accounts with low Defence levels can still complete it. We originally promised that these accounts would be able to complete up to and including the 'Hard' task tier, and we'd like to stay true to our word.
Last but not least, the tasks 'Fighting as Intended' and 'Fighting as Intended Il' will be tweaked so that they can be completed on World 45, as there is currently no F2P Permanent DMM World.
We can confirm that if you've already completed any of the tasks being changed, your hard earned completion will not be affected!
You can still expect some additional smaller tweaks and changes, which we'll let you know about in next week's game update newspost. For now, please continue to enjoy the release of Combat Achievements and share your progress with us! Thanks for your patience whilst we address any issues and congratulations to those of you who have been getting stuck in with the new challenges!
The Old School Team
Combat Achievements (Weekly Game Update - July 21st)
Issues & Our Actions - July 21st
[expand type="details"] [table] [tr][th]Issue Raised[/th][th]Current Progress[/th][/tr][tr][td]11:35 BST: We promised Limited Account Builds the ability to complete Combat Achievements until the Hard tier, however the task "Prepared for Battle" as it requires full Shayzien Armour equipped.[/td][td]11:35 BST: This was an oversight on our end which we will be able to resolve next week. We can change the task to something that Limited Accounts can complete or remove it altogether. We apologize for the inconvenience caused.[/td][/tr][tr][td]11:45 BST: We've received reports of Cannons always hitting 0s.[/td][td]11:55 BST: [FIXED] We've deployed a hotfix, Cannons should now be working as normal.[/td][/tr][tr][td]11:50 BST: Scorpia tasks aren't retroactively completing.[/td][td]12:00 BST: [FIXED] Scorpia tasks will now retroactively complete as intended.[/td][/tr][tr][td]12:00 BST: Completing Phosani's Nightmare is unlocking tasks for regular Nightmare when it shouldn't be.[/td][td]12:10 BST: [FIXED] We've deployed a hotfix to resolve this issue.[/td][/tr][tr][td]12:20 BST: We've received reports of players being unable to purchase normal teleport crystals within The Gauntlet.[/td][td]12:20 BST: The team is currently investigating this issue.[/td][/tr][tr][td]12:35 BST: We've recevied reports of certain items are failing the "Face Jad Head-On" task. [/td][td]13:25 BST: [FIXED] We've deployed a hotfix to resolve this issue. [/td][/tr][tr][td]12:45 BST: We've received reports of inconsistencies with Bird houses[/td][td]13:34 BST: [FIXED] We've deployed a hotfix to resolve this issue.[/td][/tr][tr][td]12:45 BST: The task, "Back in my Day", within the Theatre of Blood was not recognising Scythes as intended.[/td][td]12:57 BST: [FIXED] We've deployed a hotfix to resolve this issue.[/td][/tr][tr][td]13:15 BST: The Chaos Elemental gives no damage XP when hit.[/td][td]13:23 BST: [FIXED] Players should now receive XP as intended.[/td][/tr][tr][td]13:19 BST: Barrow's Brothers Medium Task "Can't Touch Me" is nearly impossible to complete due to the Barrow's brothers having a very high chance of hitting the player as they are spawned[/td][td]13:23 BST: We've temporarily added a small delay between when a Barrow's brother spawns and does their first attack. This should help provide enough time to move away before getting hit!
We're considering changing this task next week to "Kill a Barrow's brother while they're bound/frozen." so the delay can be removed.
Let us know what you think. Should the delay stay or would you rather the task be changed?[/td][/tr][tr][td]13:20 BST: We've received reports of the Adventurer's Log Counters Tab not showing anything at all.[/td][td]13:42 BST: [FIXED] We've deployed a hotfix to resolve this issue.[/td][/tr][tr][td]13:39 BST: The task "A Timely Snack" is not being completed when tanking 3 balls on solo.[/td][td]15:02 BST: [FIXED] We've deployed a hotfix to resolve this issue.[/td][/tr][tr][td]13:39 BST:The task "Wolf Puncher II" is failing if the player makes one attuned weapon.[/td][td]13:52 BST: [FIXED] We've deployed a hotfix to resolve this issue.[/td][/tr][tr][td]13:56 BST: The task "Facing Jad Head-On" III and IV tasks are being failed by equipping items that aren't weapons.[/td][td]15:02 BST: [FIXED] We've deployed a hotfix to resolve this issue.[/td][/tr][tr][td]14:05 BST: The Collection Log Counter is showing increasingly bigger numbers.[/td][td]15:25 BST: [FIXED] We've deployed a hotfix to resolve this issue.[/td][/tr][tr][td]14:05 BST: The task "Denying the Healers II" completes even when healers clearly heal Jad.[/td][td]15:11 BST: [FIXED] We've deployed a hotfix to resolve this issue.[/td][/tr][tr][td]14:55 BST: The "Demonic Weakling" task is not working as intended because the Altars become active after Skotizo's long death animation.[/td][td]15:25 BST: [FIXED] We've deployed a hotfix to resolve this issue.[/td][/tr][tr][td]16:11 BST: The "Demonic Evasion" task is not completing as players are considered to take damage, even when correctly praying against Magic.[/td][td]16:25 BST: [FIXED] We've deployed a hotfix to resolve this issue.[/td][/tr][tr][td]16:30 BST:The "Fire in the Hole!" task was difficult for some players as the task would not complete if a Cannon was already full..[/td][td]16:40 BST: [FIXED] Players must load all four Cannons (both Cannons on both ships) to complete this task. However, when a Cannon is already full it will prevent players from completing their task.
We are implementing a hotfix which will allow players to gain progress on the task when using the fish on a Cannon, even if it's full. No points will be given and the fish will not be removed from the player inventory - it will just count towards progress on the task.[/td][/tr][tr][td]17:15 BST: Completion of the "Morytania Only" challenge was instead completing the "Back in My Day" task instead.[/td][td]17:25 BST: [FIXED] We've deployed a hotfix to resolve this issue.[/td][/tr] [/table] [/expand]
Welcome! The big news this week is the arrival of Combat Achievements – a sweet new way to measure how tough you are and score some juicy rewards for said toughness. Plus, we’ve made a couple of changes to the Gauntlet. So, find yourself a spot in the shade (or a seat by an air conditioner) and let's get stuck in!
Combat Achievements
Have you smashed your way through the many bosses of Gielinor in a dozen different ways? Want some recognition for your mad skills? Well, you’re in luck, because Combat Achievements is designed for precisely that!
This new system will have you completing tasks of steadily increasing difficulty as you bash those bosses. Similar to Achievement Diaries, Combat Achievements are split into different tiers, steadily increasing in difficulty. There are a lot of bosses and monsters within Old School, so unlike Achievement Diaries' four tiers, Combat Achievements will have a whopping six – Easy, Medium, Hard, Elite, Master and Grandmaster.
It's worth mentioning that all kill count tasks and Gauntlet speed tasks are retroactive, meaning that these tasks will include your previous amount of kills or your previous recorded times within The Gauntlet, as this was the only area completely unaffected by the Equipment Rebalance. All other speed tasks will have to be completed after the update goes live.
Recommendations & Requirements - click here for more details
[expand type="details"] The 'Recommended Stats' aren't a strict requirement, but do reflect the level of a typical account that's suitably progressed for these achievement levels.
Easy
For the first tier, take on the Barrows, Sarachnis, The King Black Dragon, The Mole, the free-to-play giants and various other non-boss creatures around the game.
Recommended:
Base 60 Combat stats
Mandatory requirements:
Access to Morytania
Access to Wintertodt/Tempoross
62 Slayer
Medium
This tier covers demi-bosses, and other slightly trickier bosses such as the Dagannoth Kings and Skotizo.
Recommended:
Base 70 Combat stats
Mandatory requirements:
The ability to summon Thralls
77 Slayer
Hard
Now it’s getting tough. At this tier, you’ll be defeating bosses in the God Wars Dungeon or such as the Abyssal Sire, Grotesque Guardians and Wilderness bosses.
Recommended:
Base 80 Combat stats
Mandatory requirements:
85 Slayer
Access to Zulrah
Completion of A Night at the Theatre
Elite
Here's where things really start to get heated! The Elite tier covers tasks including Raids-related challenges, The Gauntlet and the Fight Caves. At this tier you are expected to have access to most areas in the game.
Recommended:
Base 90 Combat stats
Mandatory requirements:
95 Slayer
Song of the Elves
Dragon Slayer II
Fremennik Exiles
Master
A tier for the seriously battle-worn. You'll face off against the clock for some challenges, and tackle content equivalent in difficulty to the Inferno.
Recommended:
Base 95+ Combat stats
A good understanding and proficiency with most PvM activities within the game.
Grandmaster
This final tier is for the best of the best! You'll be expected to face the toughest challenges Gielinor has to offer. If you thought the Inferno was difficult, this will blow your mind.
Recommended:
Maxed Combat stats
Experienced across all PvM activities
[/expand]
Getting Started
Ghommal is your go-to NPC for Combat Achievements. He hangs around outside the Warriors' Guild in Burthorpe, and will be your one-stop shop for information and hard-earned rewards (more on that shortly).
To implement a new Combat Achievements interface, we’ve changed a few things around on the Hub. Open the Quest Panel and you'll see the Minigame Interface is no longer there (it’s now in the Clan/Social Panel instead).
In its place, a new coloured star symbol has appeared. This is effectively your portfolio of accomplishments, from the number of quests you’ve completed to your time in-game. You can also view the Collection Log and access all of its features by clicking the relevant info box.
This is where you’ll track your progress and Combat Achievements. Click on the 'Combat Tasks Completed' info box for an overview of how many tasks you’ve nailed in each category, plus fun extra stats like your top bosses and how many times you've sent them packing!
By clicking each box on the left, or using the three-lined icon in the top left corner and selecting Tasks, you can see a detailed list of what each Combat Achievements tier has to offer. Click the plus icon next to a task to see what you need to do.
We’ve also provided a handy filter bar to help you refine your task lists and choose relevant goals to suit your current mood. You can filter tiers, types of task and specific monsters or areas. You can also exclude your complete or incomplete tasks.
If you want a full list of tasks available with the launch of Combat Achievements, our wonderful friends at the OSRS Wiki have got a complete list here. Check it out!
From the three-lined icon previously mentioned, there are also two additional screens you can access: Bosses and Rewards. The Bosses screen will let you view your task progress on each monster individually, so you can keep track of your ongoing feud with a particular nasty.
Clicking on each boss gives you a detailed overview, including:
Boss info
Recommended requirements/difficulty
Combat level
Your kill count
Links to the Collection Log, its location on the map and the Wiki entry.
You can also reset your times on this screen. This can be done at any time, but will require your PIN.
Rewards
The final section of the Combat Achievements screen is all about those hard-earned rewards! You’ll unlock this section when you’ve completed every task in a single tier. As previously mentioned, rewards are claimed by speaking to Ghommal.
Every tier comes with an upgraded Ghommal's Hilt. At the final tier (Ghommal's Hilt 6), this equippable off-hand item will give you unlimited teleports to Trollheim and Mor Ul Rek. Much like the Quest Cape, if we add new tasks to a Combat Achievements tier with future content, you'll have to complete these new tasks to regain access to that tier Hilt and any above it.
Each tier also gives you an XP Lamp (which increase in value as you climb through the ranks) and a set of bonuses that will make taking out Slayer monsters a bit more enjoyable. Some tiers also feature recolours for the Dragon Hunter Crossbow and Slayer Helmets, so be sure to keep checking this panel!
As a bonus, Clans will now have the option to broadcast Combat Achievement tier completions, so you can share your successes with your Clan mates!
Full Rewards List (SPOILERS) - click here for more details
[expand type="details"] Easy
Ghommal's Hilt 1
Daily Trollheim teleports - 3
5k XP Lamp (minimum skill requirement: 20)
The drop chance of a Clue Scroll (Easy) from all sources is increased by 5%
The maximum quantity assigned from the Like A Boss Slayer reward increases by 2
Medium
Ghommal's Hilt 2
Daily Trollheim teleports - 5
10k XP Lamp (minimum skill requirement: 30)
The drop chance of a Clue Scroll (Medium) from all sources is increased by 5%
The maximum quantity assigned from the Like A Boss Slayer reward increases by 4
Hard
Ghommal's Hilt 3
Daily Trollheim teleports - Unlimited
15k XP Lamp (minimum skill requirement: 40)
The drop chance of a Clue Scroll (Hard) from all sources increases by 5%
The maximum quantity assigned from the Like A Boss Slayer reward increases by 6
The drop chance of an Ecumenical Key increases by 8%
The killcount required to access a God Wars boss is reduced to 38
You can access a privately rented God Wars boss instance for a fee of 150k coins
You can combine King Black Dragon Heads with a Dragon Hunter Crossbow to recolour it
Elite
Ghommal's Hilt 4
Daily Trollheim teleports - Unlimited
Daily Mor Ul Rek teleports - 3
25k XP Lamp (minimum skill requirement: 50)
The drop chance of a Clue Scroll (Elite) from all sources increases by 5%
The maximum quantity assigned from the Like A Boss Slayer reward increases by 8
The drop chance of an Ecumenical Key increases by 16%
The killcount required to access a God Wars boss is reduced to 36
You can access a privately rented God Wars boss instance for a fee of 125k coins
You can combine Vorkath's Head with a Dragon Hunter Crossbow to recolour it
Ghommal can make you a TzTok Slayer Helmet
Master
Ghommal's Hilt 5
Daily Trollheim teleports - Unlimited
Daily Mor Ul Rek teleports - 5
35k XP Lamp (minimum skill requirement: 60)
The maximum quantity assigned from the Like A Boss Slayer reward increases by 11
When you are assigned a TzTok-Jad or TzKal-Zuk Slayer task you will have to kill two of either
The drop chance of an Ecumenical Key increases by 25%
The killcount required to access a God Wars boss is reduced to 33
You can access a privately rented God Wars boss instance for a fee of 100k coins
Ghommal can make you a Vampyric Slayer Helmet
Grandmaster
Ghommal's Hilt 6
Daily Trollheim teleports - Unlimited
Daily Mor Ul Rek teleports - Unlimited
50k XP Lamp (minimum skill requirement: 70)
The maximum quantity assigned from the Like A Boss Slayer reward increases by 15
When you are assigned a TzTok-Jad or TzKal-Zuk Slayer task you will have to kill three of either
The drop chance of an Ecumenical Key is increased by 33%
The killcount required to access a God Wars boss is reduced to 30
You can access a private God Wars boss instance for a fee of 75k coins
Ghommal can make you a Tzkal Slayer Helmet
[/expand]
Clue Scrolls
As part of the Combat Achievements update, one of the rewards unlocked is an increase to certain clue drop rates. Clues obtained from skilling were particularly tricky to apply this to.
Previously, there would be one roll per skilling action to determine if you would get any clue. If that roll was successful then a secondary roll was made to determine what clue you should receive. This was fine in itself, but if we wanted to only buff one specific tier of clue it would quickly become troublesome.
For example: if you rolled for a Medium Clue, but you already had one, then it would try and give you the next tier of clue. This meant that your chance of receiving, let's say, an Easy Clue, could vary from a 40% chance to a 100% chance depending on what clues you already owned, assuming you pass the initial skilling clue roll.
So attempting to increase the drop rate of Easy Clues would directly affect your chances of obtaining other tiers of clues, which was undesirable.
We've now reworked the system as two independent rolls, so in our example above, your Easy Clue will no longer have its drop rate affected by the other clues in your possession. Theoretically, this also means you can receive multiple different clues in one skilling action.
Because this inherently nerfs the potential best drop rate of Easy to Hard Clues, they have been made more common to compensate. They should now be closer to the 'best' drop rate pre-update.
Combat Achievements Competition
To kick off the release of Combat Achievements, we're throwing in some extra thrills with six competitions and some fantastic prizes!
There are six tiers to Combat Achievements, and we'll be awarding the first players to complete each tier. Here's what you could win:
First To Complete Easy Tier The first player to complete the Easy tier of Combat Achievements will receive a year's membership!
First To Complete Medium Tier The first player to complete the Medium tier of Combat Achievements will receive a year's membership!
First To Complete Hard Tier The first player to complete the Hard tier of Combat Achievements will receive a year's membership!
First To Complete Elite Tier The first player to complete the Elite tier of Combat Achievements will receive a year's membership and a King Black Dragon building set!
First To Complete Master Tier The first player to complete the Master tier of Combat Achievements will receive a year's membership and a King Black Dragon building set!
First To Complete Grandmaster Tier The first player to complete the Grandmaster tier of Combat Achievements will receive a year's membership and a King Black Dragon building set!
Both start today and will run until completion of the competitions. View all the Ts&Cs by visiting our forum thread.
Good luck!
Gauntlet Changes
Need a way out, sharpish? Players can now create Escape Crystals, which are a one-way ticket out of the Gauntlet! They cost 200 shards each and can be made at the Singing Bowl in the first room. Left-click a Crystal to get the hell outta there.
You can also make the Crystal Paddlefish, a new combo food, by combining a Paddlefish with 10 Crystal Shards at the Singing Bowl. You score 5 XP in Crafting and Smithing for making them, and eating them will heal 16 HP. Bon appétit!
A Last Message From Mod MikeD
Hey everyone,
After a couple of very exciting years, the time has come for me to leave Old School Runescape. I wanted to take the opportunity to let you all know how much I appreciated getting to work on such a legendary title.
I’ve learned an invaluable lesson about community and what it means to be a part of such a passionate development team. I wouldn’t trade this experience for anything.
I know we leave something of ourselves behind when we go, I just hope I left something good.
Thanks,
Mike Donatelli
Product Director
PvP World Rota
The PvP rota has moved to Period B:
560 - (UK) - PvP World
579 - (US) - High-Risk PvP World
561 - (UK) - Free-to-play PvP World
580 - (US) - LMS Competitive
Other News
Petrified Pete’s Reward Shop now has PIN protection.
Piscarilius patrolmen no longer teleport innocent players who happen to be standing on the same tile as a burglary suspect. It’s not a fair cop!
Cannons are once again permitted in the Giants' Den under Shayzien.
The Demonic Offering spell, and similar spells, no longer have a walk-stalling effect.
Some typos have been fixed in the Rum Deal quest.
That's everything for this week's game update. We'd love to hear your feedback so please let us know what you think via our official forums, on the 2007Scape Reddit, the Steam forums or the community-led OSRS Discord in the #gameupdate channel.