Hello. This is Victoria, and today I will be covering much of the Great Game-themed narrative content which is coming in Sphere of Influence. This will be the first dev diary covering narrative content, with the second covering minor nations in the Great Game and other related content.
The Great Game
Throughout the nineteenth century, Russia and Britain competed with one another for influence in Asia. This period of rivalry was known colloquially as the Great Game, beginning in the Caucasus and Central Asia, and expanding over time to include struggles for influence in areas as far away as Korea and China.
The new Great Game objective diverges from the more sandbox-oriented objectives by serving as a guided tour of this period in history. Whilst much of the content involved in the Great Game is available to owners of Sphere of Influence during every playthrough, the Great Game objective contains objective subgoals designed to guide the player through this content and represent the progress of the Great Game as a whole.
To ensure the best experience, the Great Game objective is only available for the six historical participants specified below—Russia, Britain, Persia, Kabul, Herat, and Kandahar.
Upon launching the Great Game, the first thing one will see is a list of objective subgoals, along with the subgoal which represents the core of the Great Game. The Great Game objective mixes country-specific and generic objectives—whilst both Britain and Russia have the objective of securing influence over Persia or creating an Afghan protectorate, they also have country-specific objectives which will be covered later in the diary.
The Great Game core subgoal is where the progress of each nation in the Great Game is tracked. Completing each subgoal will benefit the nation that completes it, pushing the bar to the right or the left. The bar will also drift in one direction or another each year, according to differences in national prestige and market GDP.
As can be seen here, there are three currently unopened questions in the Great Game—the fate of the Caucasian states, and the struggle for influence over Afghanistan and Persia. These are victories to be had. Both Britain and Russia have made advances before the game’s start, with Britain benefiting from their successful expedition through the Hindu Kush and into Bukhara in 1831, and Russia benefiting from enforcing the Treaty of Turkmenchay in 1828. In the Great Game, Victories represent conflicts within which both powers vie against one another, and advances represent more technical, military, or diplomatic achievements.
When the journal entry concludes, the position of the bar will determine whether the Great Game has a victor, or whether neither power was able to gain supremacy. The power that wins the Great Game will receive a prestige and Power Bloc cohesion bonus, and the nation which is defeated will be humiliated in the eyes of the world.
Of course, the Great Game does not always have a winner. Contrary to the views of the imperial administrators vying over the territories of Central Asia, the people which reside there have agendas of their own. If, whilst playing as a Central Asian or Persian power, one pushes both Britain and Russia out of the region, the Great Game will be forced to a close with both Great Powers being humbled.
Generic Content
Whilst both Britain and Russia have their unique national priorities, the core of the Great Game lies in the battle for leverage over Central Asia. Both Great Powers have generic subgoals for acquiring influence in this region.
Afghanistan
In Afghanistan, for example, one may establish a protectorate over all the nations in the region—but the process does not stop there. The power which successfully establishes a protectorate over Afghanistan must keep it for ten years, without any Afghan states slipping out of their grasp.
At the game’s start, Afghanistan’s borders are quite different from what they were at the end of the period. This is owed to the Anglo-Russian Agreement of 1895, in which Russia and Britain jointly decided upon the borders of the Afghan state. Once Afghanistan unifies, a journal entry modelling this will appear for both Britain and Russia, along with an objective subgoal for those playing the Great Game.
The Pamir Delimitation journal entry represents the negotiations between Britain and Russia to determine the borders of Afghanistan. Depending on the borders of Afghanistan at the beginning of the process, the journal entry will present a variety of different proposals, permitting the Great Powers to grant or claim a varying amount of land.
Pictured: Britain has decided that Afghanistan’s southeastern border should be drawn along the Indus River, whilst Russia has decided upon giving it some territory in the North.
Once both Great Powers have agreed to a treaty, it is presented to Afghanistan, which has the option to accept or refuse. If Afghanistan refuses, the Great Powers will need to do another round of negotiation, this time with additional coercive measures available to them.
If Afghanistan continues to refuse or the Great Powers fail to come to a deal, negotiations will break down, and overlapping claims will almost guarantee future wars in the region.
Pictured: Some of the shapes that a post-Pamir Delimitation Afghanistan may take. Some of these may prove more viable than others.
Persia
The requirements for successfully completing the subgoal to secure influence over Persia is similar to Afghanistan, with the caveat that the territorial integrity of Persia must be maintained, at least to some extent. The fluid borders and expansionist ambitions of Persia, which will be shown in more detail next week, mean that Persia may take many shapes over the course of a game.
Himalayan Exploration
Throughout the late nineteenth centuries, European explorers constantly attempted to penetrate through the Himalayan Mountains, to chart the Tibetan Plateau and determine the best routes for a military expedition into the interior of China. Sphere of Influence adds a new expedition into the Himalayas, with ramifications for the Great Game if successfully completed.
Whilst your explorers survey the roof of the world, they may come across many things, from mountains higher than any seen before, or fascinating wildlife.
In addition to the risk of losing life or limb to both frostbite and the wildlife’s claws, any European expeditions trespassing into this region will run the risk of causing diplomatic incidents with China. It is best to tread cautiously, lest the expedition be sent back humiliated—or not come back at all.
Country-Specific Content
In the Great Game objective, the majority of objectives are country-specific. In many cases, these objectives are linked to journal entries that are available for a country in any playthrough, with the objectives serving as a way to point out specific journal entries and grant the player points in the Great Game for completing them.
The Caucasian War
For example, in Russia, the “Secure the Persian Border” objective is tied to a new journal entry that is available for Russia at the game’s start.
The Caucasian War is a conflict that has been raging for some time at the beginning of the game, beginning with the Russian attempt to annex Circassia in the mid-eighteenth century. In 1836, the Caucasian Imamate and Circassia continue to resist Russian domination of the region, making much of the region effectively ungovernable. Russian control of the South Caucasus is exerted primarily through the Georgian Military Highway—a route constantly threatened by the unrest in the North Caucasus. If Russia loses control of the North Caucasus, it is certain to lead to the loss of the South as well.
Whilst the Caucasian War journal entry is active, events will intermittently fire, covering various situations related to the war. The options in these events often increase devastation in the region, which will make things more difficult for the Imamate and Circassia, at the cost of spilling out into Russian-controlled regions as well.
Once Russia has either successfully researched certain technologies or reached the end of its starting truce, the war may be escalated into a full-scale conflict, which permits the use of ordinary diplomatic plays against these nations.
Upon escalating the war, the Russian armed forces in the Caucasus will present the historical Milyutin memorandum to the government. Accepting this memorandum will please the command of the armed forces, but lead to the historical outcome of the Caucasian War—the devastation of the region, depopulation, and the forceful expulsion of much of the Circassian population to the Ottoman Empire.
Circassia and the Caucasian Imamate also have content related to the conflict, which will be shown off in the next dev diary.
The rest of the Caucasian War requires the Sphere of Influence DLC, but the content pertaining to the Milyutin memorandum and brutal depopulation of the Caucasus does not. Whilst this is a gruesome event in history, it is also not something which can in good conscience be overlooked.
Kazakhstan
As of 1836, the Kazakh steppes have been under the Russian Empire for several decades. The power of the Khan has recently been abolished, and the Kazakh zhuzes placed under the command of various Russian-appointed agha-sultans. However, this system of administration is beginning to fray. Early in the game, Russia will receive an event notifying them of the rise of Kenesary Kasymuli, a Kazakh aristocrat who has come to spearhead Kazakh resistance against Russian rule.
When this event occurs, a new unresolved victory appears in the Great Game central subgoal, and a new subgoal, along with its corresponding Journal Entry, appears.
The Pacification of the Steppes journal entry is completed by slowly and peacefully annexing the Kazakh protectorates, and fails if the Kazakh protectorates’ liberty desire rises too high, or if ten years pass without successfully achieving this goal.
Whilst the journal entry is active, events pertaining to Kenesary’s rebels will fire, possibly interfering with the liberty desire of Russia’s Kazakh subjects.
In addition to firing events for Russia, Kenesary will also fire events for the Kazakh zhuzes and the Central Asian khanates, giving them a chance to side with Kenesary when he eventually launches his final play for control of Kazakhstan.
If Russian rule is sufficiently disrupted, and Liberty Desire reaches too high a value, Kenesary will seize control of the Uly Zhuz and launch his independence war against Russia, along with the allies that he’s collected along the way.
If Russia can successfully crush the revolt, they will gain progress in the Great Game—but it has far more to lose than to gain. Whilst Britain is not necessarily aiding Kenesary, his victory will represent a coup for Britain, as Russia now has much more work to do to reach Afghanistan.
If Russia succeeds, it will have an opportunity to menace the other Central Asian Khanates, and, upon researching Civilising Mission, unlock a new journal entry—the Conquest of Turkestan.
Other Russian Subgoals
Throughout the course of a game, Russia will periodically unlock additional subgoals which will advance its position in the Great Game. These subgoals represent various historical aims of Russia, and are exclusive to the Great Game objective.
The Codify the Chinese Border subgoal represents the Russian Empire’s desire for the various territorial concessions in Central Asia and Outer Manchuria signed away by the Qing Empire in the mid-nineteenth century. The acquisition of Outer Manchuria was instrumental to the ability for the Russian Empire to project power into the Pacific Ocean, a situation which eventually led to British concerns over the integrity of their Pacific colonies and their later alliance with Japan.
To complete this subgoal, Russia must both acquire these territories from China, and force China to abandon claims on the territory. If a non-player China has been weakened by the Opium Wars and other calamities, the options to sign the Treaty of Aigun, Beijing Treaty, and Chuguchak Protocol provided by the Ruler of the East Journal Entry are a perfect way to see this goal through whilst minimising both the risk of war and the negative implications of a revanchist China on the border.
The Acquire Manchurian Concessions subgoal also relates to the relations between China and Russia, and is triggered by the Russian acquisition and incorporation of a state in Outer Manchuria. This subgoal encourages Russia to acquire a treaty port in Manchuria, and construct the historical Chinese Eastern Railway, which served as the furthest Eastern branch of the trans-Siberian railway until the opening of the Amur River Line in 1916.
With the Russian acquisition of Outer Manchuria also comes ambitions to secure a protectorate over Korea. Korea was considered to present a risk in the hands of a foreign power as a staging point for the decapitation of Russia’s Far Eastern naval assets. Historically, the Russian Empire contended diplomatically with Japan for influence in Korea following the first Sino-Japanese war, a period which would meet its climax with a Japanese-sponsored coup killing the Queen of Korea and forcing the King to flee to the Russian embassy.
This period of heightened tensions between the modernising Empire of Japan and Russia would cool for a brief period with the establishment of several agreements that would establish a balance of power in Korea. These agreements would come to an end following the end of the Russo-Japanese war, and the later Japanese conquest of Korea. The Secure a Korean Protectorate subgoal represents an alternate route—the ambition of both Nicholas II and factions within his government to establish full Russian control of Korea.
British Subgoals
In the 1830s, British citizens and ships played a role in assisting Circassia against Russia. Whilst Britain was historically unwilling to escalate its involvement in Circassia beyond occasional shipments of weapons or volunteers dispatched by private citizens, it considered exerting influence into the Black Sea to be in its national interest.
The Disrupt the Russian Caucasus subgoal represents the various initiatives amongst British civil and political society to assist Circassia, and react to what they saw as the threat of Russia taking control of the Ottoman Empire if it could consolidate its territories in the Caucasus.
The Expand British India subgoal represents the desire to expand the territories controlled by the East India Company into Burma and modern-day Pakistan. A strong East India Company, or British Raj, may serve as a valuable counterweight to Russian influence in the region, and a centre from which Britain may project power into the remainder of Asia.
The Contest the Russian Pamirs subgoal represents an abortive attempt in 1902 by Britain to seize control of the Pamir Mountains and establish an independent buffer state through a deeply unsubtle method—a direct military incursion with cooperation from Afghanistan.
Whilst this proposition was historically rejected by the British government before materialising, the acquisition of Tajikistan by Russia will present Britain the opportunity to launch the proposed invasion. If Britain can manage to seize Tajikistan or establish a new Tajik state in its power bloc, it will gain a decisive advantage in the Great Game.
The final unique subgoal for Britain is to counter Russian Pacific Influence. This represents the historical Anglo-Japanese Alliance of 1902, which was formed in reaction to the strengthening of the Russian presence in its Far Eastern territories. This subgoal is triggered by Russia developing naval bases in Outer Manchuria, heralding an incoming threat to the British fleet in the Pacific.
Next week, I will cover the content for minor nations involved with the Great Game, as well as how sandbox mode works with the new content. And that is all. Thank you for reading.
Dev Diary #113 - Diplomatic Catalysts
Hello and welcome to another Victoria 3 Dev Diary! As we already mentioned, there’s been some changes in the Dev Diary schedule due the release date to Sphere of Influence/Update 1.7 being delayed, so today we’ll be talking about Diplomatic Catalysts instead of the previously planned Great Game dev diary. We’ll be posting a new Dev Diary schedule as soon as it’s finalized, most likely next week.
Right then, let’s get to the topic at hand. Diplomatic Catalysts is a new system added in update 1.7, the role they play in creating Political Lobbies, and the impact they will have on how the diplomatic AI acts towards other countries.
So, what is a Diplomatic Catalyst? Put simply, a Diplomatic Catalyst is a type of diplomatic ‘occurrence’, positive or negative, between two countries. There are many different types of Catalysts, here is a small list of examples:
Relations between two countries increases by one full ‘level’ (for instance from Cordial to Amicable)
A subject has their autonomy decreased
Two countries end up on the same side in a Diplomatic Play
A country reforms their government and becomes significantly ideologically divergent from another country’s government
A country declares another country their rival
A country breaks off a mutually negotiated Diplomatic Pact with another
Each type of Catalyst may result in the creation of a Political Lobby in one or both of the countries, targeting the other country. The type of Lobby and chance for it to appear depends on the nature of the Catalyst (such as whether it is of a hostile nature), the diplomatic conditions between the two countries, and whether the overall conditions are suitable for the creation of a Lobby. For example, a ‘Relations Increased’ catalyst will only create pro-country lobbies, with an increasingly higher chance to do so the higher relations go. Conversely, the ‘Pact Broken’’ catalyst can create both pro and anti-country lobbies and is more likely to do so the more significance the broken pact had for the country that just had it taken away from them. Some catalysts, such as ‘Ideological Divergence’, can result in the creation of either a Pro or an Anti-Country lobby.
Of course, it isn’t as simple as just being a dice roll: the proper conditions must be in place for a Lobby to appear to begin with and there must be at least one non-marginalized Interest Group interested in joining the Lobby. Additionally, the calculation for whether an Interest Group wants to join a lobby or not can depend on the type of Catalyst: For example, if the ‘Ideological Divergence’ catalyst creates a Lobby, Interest Groups calculating their desire to join that lobby will place additional emphasis on their own ideological view of the country in question. After all, just because a country that’s going all in on Market Liberalism has ideologically diverged from your government doesn’t mean your in-opposition Industrialists aren’t over the moon about their new politics.
The signing of a Defensive Pact between Brazil and the USA has resulted in the creation of a powerful Pro-American Lobby comprised of the Industrialists and Landowners
Right then, onto the diplomatic AI. Since this is a topic we haven’t talked about in a while, I thought I’d give a little refresher on how the AI decides its behavior towards other countries, before telling you about how this decision-making process will change in 1.7.
Fundamentally, the most important factor in how an AI country behaves towards another country is their Attitude. Attitude is mainly determined by a country’s Attitude Score and Strategic Desire, which is in turn influenced by their Diplomatic Strategy and other factors such as active Journal Entries.
Confused yet? I’ll try to illustrate with an example: If you’ve ever played Mexico, you should be all too familiar with US aggression. They typically start as Antagonistic towards Mexico and progress to Belligerent after some time has passed. Though these are both hostile attitudes, they differ considerably in which particular hostile behaviors the AI will engage in.
Antagonistic AIs will tend to oppose you in diplomatic plays and use hostile diplomatic actions like rivalry and embargo, but will rarely attack you outright. Even if they do attack, they will do so using wargoals aimed at weakening you or at worst snatching away subjects they have an interest in: they want to keep you in check but they don’t have any interest in taking your land.
Belligerent AIs, on the other hand, are very much interested in taking your land. They may be after just a single state, or a handful of states, or they may in fact be seeking outright annexation. Regardless, when a Belligerent AI comes over for a visit, you’d better hope that your army and its allies are up to the task of seeing them off.
So why does the AI pick one over the other? It all comes down to the aforementioned Strategic Desire, which represents their long-term diplomatic goals towards a particular nation. The US tends to start with the ‘Antagonize’ Strategic Desire towards Mexico, and change to ‘Conquer’ once they research Nationalism and unlock the Manifest Destiny Journal Entry. If these sound like they line up directly with Antagonistic/Belligerent, it’s because they do! In some cases, a Strategic Desire will translate directly into a particular Attitude unless offset by the Attitude Score, while in others it’s more nuanced. I don’t want to go too on too much of a tangent into Attitude Score, but you can think of it as the AI’s calculation of whether it’s willing to set aside its long-term diplomatic goals for short-term reasons. I.e., ‘we do want to conquer a state from the Ottomans, but at the moment we need them to protect us against Austria’.
‘Maintain Balance of Power’ is one of the more common Diplomatic Strategies, and has the AI pursue more moderate diplomatic goals, avoiding excessive infamy and preferring weakening their rivals to expanding their borders in most cases.
When the AI is prompted to select a Strategic Desire towards another country, they look at the pool of available and achievable desires, assign them a score, and then select through a weighted random process. As mentioned above, Diplomatic Strategy plays an important role here: A country with the ‘Acquire Colonies’ strategy needs no particular reason to select the Conquest desire towards a juicy Unrecognized target, while a country with ‘Defend the Borders’ will only consider picking it to retake lost territories, and even then they’re reluctant to do so in an offensive war. Journal Entries also factor heavily, as we saw with the Manifest Destiny example above. There are of course many more factors in how the AI scores different desires: as an example, AI countries tend to pick more hostile desires towards a country going full-in on radical leftism if they themselves are not pursuing a similar path.
But enough with the long-winded explanations, let’s get to what has actually changed in 1.7. I mentioned above that the AI selects a Strategic Desire ‘when it is prompted to do so’, and here is the crux of the matter. In the current version of the game, the AI uses a system that you could call a ‘reroll progress bar’. For each country, it tracks the progress of said bar, which increases slowly over time but can also make larger jumps from certain occurrences, such as the country selecting a new Diplomatic Strategy or the two countries suddenly ending up opposed in a play, essentially a much simpler version of the very Diplomatic Catalyst system we’re going over in this DD.
Once the reroll progress bar hits 100, the AI will re-roll its strategic desire, often with an additional weight towards ‘staying the course’, particularly towards a country they have long-standing diplomatic pacts with. This may seem like a fairly sensible system, but the problem is that it’s entirely opaque to the player. You simply aren’t told that your long-standing ally just turned hostile towards you because they had a massive ideological shift in their government or picked up a new Journal Entry - at best you may get a custom notification that gives you a hint, such as the one for the French Borders Journal Entry.
This, of course, is where the Catalysts come in! As of update 1.7, the ‘re-roll bucket’ is gone, and replaced with a system of weights similar to those used for Lobby creation, which allows for the AI to adjust its long-term goals in a way that’s far less arbitrary and most importantly, which can be explained to the player. Just like different Catalysts have different weights and conditions for creating Lobbies, the way they potentially alter an AI’s diplomatic strategy is also tailored to the specific Catalyst.
To give you an example, ‘Country Bankrupt’ is a Catalyst that triggers for all of a country’s diplomatic ties when they go bankrupt. For most AI countries, this is of little significance and won’t result in any change in Strategic Desire, but if an AI thinks it’s in a position to take advantage of the bankrupt country’s momentary weakness, particularly if they are pursuing a strategy of Economic Imperialism, a recalculation may trigger in which the AI picks a new desire towards the bankrupt country, which will always be of a more hostile nature than whatever they had before. Other catalysts (for example ‘Relations Improved‘) may only ever change their Strategic Desire in a friendlier direction, while yet others (for example ‘Diplomatic Strategy Changed’) can potentially change it in any direction that makes sense at the time.
By declaring bankruptcy to deal with their crippling debt problems, Ashanti has displayed their weakness to the world and become a tempting target for Great Britain
So what does all this mean? Essentially, what it all boils down to is that the AI is now much more transparent and comprehensible in its behavior, and that the diplomatic relationship between two countries will flow much more from the actions of those two countries. Your AI ally will no longer turn on you just because some dice rolls behind the scenes told them to, they will turn on you because you broke a Trade Agreement they saw as vital, or because you pushed your Infamy too far, or because the ideologies of your governments simply became too incompatible. Similarly, befriending an AI is no longer just a matter of keeping relations high and praying for a re-roll, instead you can actively work to improve their Strategic Desire (and thus attitude) towards you by acting in a manner that benefits them: Make enemies of their enemies, support them in diplomatic plays, and so on.
Even if you missed the notification informing you of an Attitude change resulting from a new Strategic Desire, you can always tooltip the Attitude of an AI country to discover the reason that they adopted their current Strategic Desire towards you. You can even use this to discover why two AI countries are enemies or friends with each other by using the Attitude filter on the diplomatic map mode!
That’s all for today! Next week we’ll be switching topics and talking about the content side of Sphere of Influence, starting with The Great Game. See you then!
Sphere of Influence / Update 1.7: New Release Date
Hello Victorians, this is Martin here with an update on the release date of the Sphere of Influence expansion.
A few weeks ago we announced we were planning to release the expansion and its accompanying update on May 6th. Since that time we’ve unfortunately come to the conclusion that both the update and the expansion are in need of more time for bug fixing and polish. Both update 1.7 and Sphere of Influence contain several fundamental changes to how the game functions, particularly in the form of the Building Ownership Revision and Power Blocs, which has resulted in bugs, as well as balance and technical stability issues.
While we are happy with the features on offer in 1.7/Sphere of Influence, we simply do not believe that sticking to the original release date will allow us to deliver those features in a polished and balanced state, and we frankly do not want your enjoyment of them to be marred by excessive bugginess, crashes or general lack of polish. We believe that a delay will allow us to release the update and expansion in a state that both we as the developers and you as the players will be much more happy with.
The new release date will be Monday the 24th of June. We will continue releasing weekly dev diaries up to that point, as there is still quite a lot to cover with both the DLC and the update. We know many of you are eagerly anticipating the expansion and apologize for the extended waiting that this will create, but we really want Sphere of Influence to meet your expectations and for this release to be one that we can be proud of as a development team!
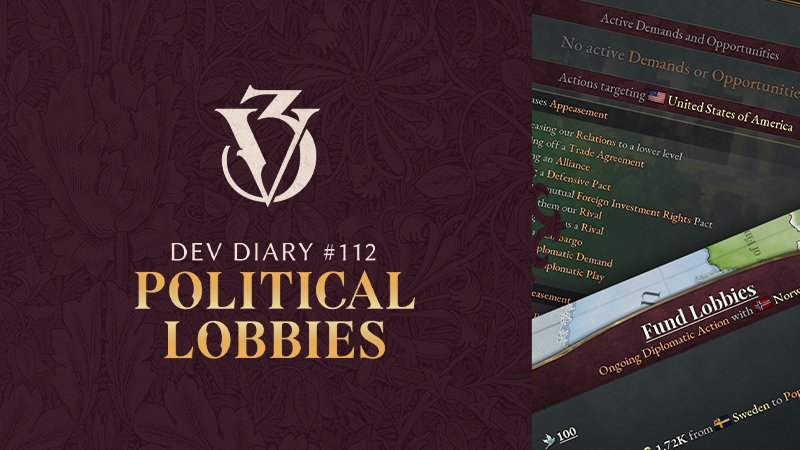
Dev Diary #112 - Political Lobbies
Hello and welcome to another Victoria 3 Dev Diary! Today’s topic will be Political Lobbies, which is a new feature added in the Sphere of Influence expansion with some elements made available for free in the 1.7 update.
So, what is a Political Lobby? Put simply, a Political Lobby is a collection of Interest Groups pushing for the implementation of a specific foreign policy agenda in their country. Superficially, this may appear quite similar to Political Parties, but there a couple key differences in how they function: Political Lobbies always form for a specific reason, often due to a Diplomatic Catalyst (more on those and the precise conditions for how they can create lobbies in next week’s dev diary) and pursue a specific long-term agenda that does not change over time Interest Groups can be members of multiple Lobbies, so long as those Lobbies do not have directly contradictory goals
The agenda of a Political Lobby is always in relation to a specific foreign power, and there are four types of Political Lobbies being added in 1.7/Sphere of Influence:
Pro-Country Lobby: This Political Lobby seeks to promote and advance the interests of their target country, both in relation to their home country and in a more global sense
Anti-Country Lobby: The opposite of the Pro-Country Lobby, this Lobby seeks to hinder the interests of their target country and ‘take it down a peg’ whenever possible
Pro-Overlord Lobby: A Pro-Overlord Lobby can only form in a subject country, and will always target the overlord. It seeks to promote loyalty towards and closer integration with the overlord.
Anti-Overlord Lobby: The opposite of the Pro-Overlord lobby, this lobby is also only for subject countries and wants to become less dependent on the overlord, and ideally secure independence for their home country if the opportunity arises.
Interest Groups can join Political Lobbies for a variety of reasons, such as ideological alignment with or opposition to the country they target, or in pursuit of an overarching goal, such as the Industrialists joining a Pro-Country Lobby for a wealthier, more advanced country in the hopes of securing foreign investment capital.
Lobbies have an Appeasement score, which goes up when you take actions that the Lobby feels aligns with their goals, and goes down when you take actions that they consider to be contrary to those goals. Appeasement acts as a modifier on the Approval of their constituent Interest Groups, which means that your foreign policy actions can now directly help or hinder your internal political goals.
For example, are those staunchly Anti-French Landowners doing the Landowner thing of blocking those voting rights you want enacted? Simple! Just declare your opposition to France in a Diplomatic Play and humiliate them, and the Landowners will be so busy celebrating their victory over the perfidious Gallics that they will graciously let you have this one little reform.
On the flipside, you might find that the very pro-British Industrialists are not at all pleased with your continued alliance to a British rival, and that your previous plan of working to strengthen them in order to enact Laissez-Faire has now backfired, as they refuse to work with you until you break said alliance, forcing you to choose which of your two goals is more important to you.
Anti-American sentiment is strong among the Armed Forces and Trade Unions of Mexico, and both have been appeased by declaring an embargo on American trade, though of course the Americans aren’t likely to be too pleased with this action…
Lobbies, of course, do not only affect Interest Group approval but have direct diplomatic benefits or drawbacks depending, once again, on whether the actions you take align with their goals. How large these effects are depends on the combined Clout of the Interest Groups that are part of the Lobby.
For example, having a Pro-Country Lobby will make it easier to conduct diplomacy with that country, both by increasing their AI acceptance for proposals and by lowering the Influence cost of any friendly pacts you maintain with them, but increasing the cost of hostile actions (such as Embargos) and lowering the Influence you gain from rivaling them. As you might expect, Anti-Country Lobbies have the opposite effect, making friendly diplomacy harder and hostile actions cheaper. Anti and Pro-Overlord Lobbies also significantly influence Liberty Desire, as mentioned in the previous dev diary.
Lobbies also have a secondary effect on AI behavior, as an AI country with a Pro-Country lobby will be more likely to adopt a friendly attitude towards the target of said lobby, with the opposite effects for an Anti-Country Lobby, with the Clout of said lobbies once again determining how likely the AI is to fall in line with them. All of these effects, as well as the actual creation of Lobbies themselves, will be available to everyone as part of the free 1.7 update.
Although Russia’s government currently has a positive attitude towards Austria and wishes to pursue closer relations, the powerful Anti-Austrian Lobby in Russia makes it more difficult for them to agree to any proposed new Diplomatic Pacts
For those with the Sphere of Influence expansion, Lobbies can also make their will known through an opportunity or a demand. Opportunities generally come in the form of some diplomatic groundwork done by the Lobby that may allow their parent country to sign a diplomatic pact that is otherwise difficult to get, or even out of reach entirely. For Pro-Country Lobbies this usually involves dealing with the target country directly, while Anti-Country Lobbies will instead work to create opportunities to cooperate with the target’s enemies and rivals. Opportunities can be declined without any penalty, and will only result in a loss of Appeasement if accepted but not followed through on. Accepting and following through on the Opportunity will of course increase their Appeasement.
Even though Great Britain is Cautious about France and thus not willing to sign a Trade Agreement under normal circumstances, the acceptance bonus granted by the opportunity created by the Pro-British Lobby should be enough to secure the deal
Demands, conversely, is when a Lobby believes that the government isn’t doing enough to pursue their agenda and well, demands action. A demand generally comes in the form of a specific action that the Lobby wishes to see taken either against the target country, or against a country relevant to them (for example, a rival or ally). A demand can be declined, but doing so will significantly decrease the Appeasement of the Lobby (though not as much as accepting the demand and then failing to follow through on it).
Feeling that the French government isn’t doing enough to foster closer ties with Britain, the pro-British Lobby demands a grand gesture of enmity with Britain’s Russian enemy
Also available for those with the Sphere of Influence expansion is the new Fund Lobbies diplomatic action. This action works in a fairly similar way to Bankroll, in that it transfers money from the treasury of the initiating country, but instead of the money going to the target country’s treasury it is paid out among the target country’s Pops instead, with who gets what share of the money dependent on the target’s political setup and how much power sharing is going on - when trying to Fund Lobbies in an Autocratic country, nobody is going to bother spreading money around to poor laborers who have no say in politics whatsoever.
The precise effects of Fund Lobbies depends on whether a Pro-Country/Pro-Overlord lobby targeting the initiator already exists in the target country. If one does not exist, the money goes towards promoting the creation of such a lobby, with a weekly chance for this to happen. If such a lobby already exists, or once one is created, the pact switches to supporting that Lobby by increasing the Pop Attraction of Interest Groups that belong to the boosted lobby, which over time will increase the combined Clout of the Lobby’s Interest Groups, which in turn translates into greater mechanical effects and impact on AI decision-making.
Seeking to tighten its grip over their junior Personal Union partner, Sweden begins to spread some money around among the politically influential Norwegian Pops
Finally, I want to wrap up this dev diary by talking a little bit about the moddability and extensibility of the Lobbies system. Besides the Pro and Anti Country Lobbies mentioned above, the system also comes with built-in support for ‘neutral’ Foreign lobbies that have a goal relating to another country which is neither directly friendly nor antagonistic, and even for Domestic lobbies that pursue an entirely internal agenda in the country they are created in. The entire system of forming, appeasing and applying mechanical effects from lobbies is completely moddable, and we definitely intend to use this system to create new and interesting types of lobbies in future updates!
That’s all for today! Since this one ended up pretty long, and we actually have a bunch of semi-related things to go over as well, we’ve decided to change the Dev Diary schedule so that next week’s dev diary will be about Diplomatic Catalysts and the Diplomatic AI. We also still want to talk more about Power Blocs, and will find a way to fit that in before release. See you then!
Dev Diary #111 - Subject Improvements
Happy Thursday, it's time for more Sphere of Influence / Update 1.7 news!
One of the many benefits of being a Victorian-era Great Power is that you might get to lord over not just your own people, but other nations as well. Whether acquired through brutal conquest, colonial machinations, or willing subserviency, countries subjugated under your leadership can benefit your empire in a number of ways:
they expand your market
they provide you with a share of their Prestige
they may compensate you with taxes in exchange for your protection
they may join your wars
etc.
This doesn't mean subjects will always just lie back and accept you exploiting them. Overlords that see their subjects as nothing but buffer zones and cash cows could in time come to learn that patience can run thin, leading to calls for independence. And in this era of nationalism, your subject declaring their autonomy could prove the perfect pretense for your worst rival to upset the balance of power.
We're introducing a number of enhancements to gameplay around managing your subjects, or indeed managing your own status as a subjugated nation if that's more your speed. These enhancements are meant to improve interactivity and AI responsiveness, while also introducing a number of quality-of-life features and highly requested additional mechanics. Some features below are available in the Sphere of Influence expansion, while others will come to everyone as part of Update 1.7.
Liberty Desire
The first and most obvious feature you will encounter relating to your subjects in Update 1.7 is Liberty Desire, a measure of how pressing the issue of autonomy and independence is to the people (particularly the ruling class) in the subjugated nation. At high levels, an AI subject could become rebellious and might make some terribly rude demands of their overlord; at low levels, they will be complacent and cooperative, enabling their overlord to relax and maybe squeeze them a bit more, as they please.
For AI countries, Liberty Desire will strongly influence their strategy with respect to their overlord. Four additional AI strategies have been added:
Break Free: the AI attempts to become independent from their overlord
Increased Self-Reliance: the AI attempts to increase their autonomy and become less dependent on their overlord, but will not seek outright independence
Maintain Autonomy: the AI wants to maintain their autonomy and relationship with their overlord just as it is
Integrate with Suzerain: the AI wants closer integration with their overlord and will loyally comply with their wishes
But Liberty Desire is not just for the AI, it also informs what human players can do, and the level of Liberty Desire can have a direct effect on the country and its pops as well. The current level of Liberty Desire is visualized much like Legitimacy, as a tiered meter with different effects at different levels. Unlike Legitimacy it is never static - Liberty Desire is always either increasing or decreasing, the question is at what speed and what you (as overlord or subject) will do about it.
The British East India Company, with its largely self-sufficient economy and powerful standing army, could become a problematic subject for Great Britain unless relations and lobbies are kept in check, and concessions may have to be granted to keep them loyal to the crown.
A multitude of factors play into Liberty Desire, providing you with a lot of different strategies for how to keep it under control (or perhaps increase it, if you're the subject).
Relations: obviously, high relations will lower Liberty Desire and vice versa
Relative Prestige: the greater the difference in Prestige between overlord and subject the lower the Liberty Desire. The less autonomous your subject is, the greater the Prestige difference you need to maintain to depress Liberty Desire.
Economic Dependence and Lobbies: explained in greater detail below
Market Isolation or supply problems: if you cannot provide your subject with effective access to your market, they will be more inclined to demand sovereignty
Change Rate scaling: the higher or lower Liberty Desire gets, the slower its rate of progression, giving you more opportunities to manipulate it with Diplomatic Actions (which we'll discuss soon)
Economic Dependence
Another metric introduced in Update 1.7 is Economic Dependence, which measures exactly what it sounds like: how dependent country A is on country B's economy. Economic Dependence doesn't do anything directly, but feeds into other metrics such as Liberty Desire and the Cohesion of Trade League-type Power Blocs.
A major aspect of Economic Dependence is how much of the nation's economy is owned by the other country through foreign investments, either directly or through pop investors. If you want to make your subjects dependent on you, make sure you provide all of their good jobs.
If you do not share a market with the other country, the secondary aspect of economic dependence consists of the value of trade between your two nations. But in most cases where Economic Dependence matters, you do share a market, which introduces another few factors.
First off, the difference in GDP between the countries in the market has an impact.
But much more interestingly, how much your economy provides for the other nation's pops - and how much they are able to provide for themselves - is a crucial factor. As a market leader, you're considered to be providing anything the market member does not provide for themselves, in this case luxuries like Opium, Fruit, Luxury Clothes, and Tobacco.
The more you're able to provide for yourself, the more you can offset this factor. In this case, Columbia produces most of the Grain they consume, which is their dominant demand. As a result they more than offset the luxuries provided by membership in the British market.
As a result, from the viewpoint of Great Britain, if I want to increase Columbia's economic dependence on me I should consider producing an excess of the goods they aren't able to fully provide for themselves, such as Liquor. Thinking longer-term, I could also try to take measures to make their domestic staple industries unviable, making me the dominant supplier of (for example) Grain or Clothes or Furniture throughout the empire, while my colonial subjects' economies consists of producing cash crops for the benefit of my own people or industries.
Note that this part of the calculation is currently WIP and may be altered for legibility and consistency before release, but the principles will stay the same.
Lobbies
In the Sphere of Influence overview we mentioned Lobbies, which are also crucial to keeping Liberty Desire under control across your empire. We will go deeper into Lobbies next week, but for now I can mention that subject nations will almost always have two Lobbies relating to their overlord: one of them a proponent of closer ties with the overlord, while the other is opposed to the overlord and devoted to independence. The relative power of these Lobbies depends on which Interest Groups support them, how powerful those Interest Groups are, and whether or not they are currently in government, which directly feeds into Liberty Desire as well.
As an overlord, with the Sphere of Influence expansion you will have some indirect influence over this by sponsoring the creation and maintenance of lobbies in other countries, which we will learn more about next week. As a subject, you have more direct control: if an Interest Group supports ties with your overlord, you can try to suppress them, remove them from power, even incite them to revolution and defeat them to keep your Liberty Desire high (though beware this could rouse your overlord into supporting their side!).
Subject Actions
So as a subject, why would you want your Liberty Desire to be high? You actually probably don't want to keep it high, since it can mean less stability in your country (as reflected by greater risk of Radical generation, as people demand their freedom). But when your Liberty Desire has reached a high enough level, you can make demands of your overlord which are hard for them to ignore.
Increase Autonomy: previously available only as a Diplomatic Demand, you can now more gently request an increase to your autonomy when your Liberty Desire is high enough. Should the overlord decline this request the subject can demand full independence, so the stakes are quite high. If the request is granted, Liberty Desire will drop to much more manageable levels.
Demand State: if your overlord controls a state that is both adjacent or a homeland to you, directly or through another subject, you can demand they give you that state under certain conditions.
Request Payment Relief: you can request that your overlord reduce your payment burden. (Sphere of Influence only)
Request Support for Regime: a pact where the overlord provides overt support for your rule, granting you Legitimacy. This is reversible, so the overlord can grant this pact on their own if they wish. (Sphere of Influence only)
Request Knowledge Sharing: a pact where the overlord provides the subject with a tech spread boost, letting them catch up to the state-of-the-art quicker than usual. This is also reversible, letting the overlord display their benevolence unprompted. (Sphere of Influence only)
For example, you might wish to demand an increased level of autonomy, or relief from excessive payments.
Once one of these demands have been accepted your Liberty Desire will decrease, reflecting the diplomatic impact of the concession your overlord agreed to.
Overlord Actions
Most of the new options are available for overlords towards their subjects, but follow the same principle - if Liberty Desire is low enough you can demand more from your subject, although this is likely to increase Liberty Desire and maybe even cause it to increase over time. Similarly, you can grant special privileges to depress Liberty Desire.
The following actions will be coming in Update 1.7 / Sphere of Influence:
Increase and Decrease Autonomy: when Liberty Desire is particularly low, the overlord can force a decrease to their subject's autonomy without making a Diplomatic Demand for it. Full annexation is possible only for Puppets / Vassals, and still requires a Diplomatic Demand.
Grant and Take State: a much requested feature, as an overlord you can now benevolently decide to grant territory to your subject. The state you select must belong either to you or another one of your subjects, and must either be adjacent to the subject or a homeland of one of their primary cultures (and in that case, it cannot also be a homeland for another subject that is adjacent, and therefore a better fit). Granting a state will of course reduce Liberty Desire, often by a substantial amount, especially if it's a homeland. Transferring a state from another subject will of course increase the Liberty Desire of the subject you transferred it from. In the case of Puppet or Vassal subjects, you can even transfer their states to yourself if Liberty Desire is sufficiently low (not their capital though).
Exempt from Service: for subjects that are forced to join the overlord's Diplomatic Plays, this pact lets overlords exempt the subject so they stay out of the conflict.
Grant Own Market: cuts the subject off from your shared market and makes them run their own. This could be useful in cases where you want your subjects to be a trading partner rather than fully integrated with your economy, limit migration, or reserve your convoys.
Reduce or Raise Subject Payments: for Subject Types that must pay a tax to their overlord, these "add-on pacts" allow you to either decrease or increase the amount paid in exchange for a change in Liberty Desire progress. (Sphere of Influence only)
Appoint Colonial Governor: lets the overlord select a new Head of State for the subject. The options the overlord has available depends on their laws vis a vis who the subject is - under some laws you could permit a local governor to take charge, while under others only hopefuls from the empire's capital are permitted. (Sphere of Influence only)
Evangelize: spreads the overlord's state religion in the subject, increasing conversion rates. (Sphere of Influence only)
A nifty cheat sheet to remind you of the effects of different subject types and compare between them has been added to the Subjects tab UI, where you also have easy access to the Liberty Desire values of your subjects, sort functions, and a list of the Overlord actions you can issue for each subject. If the symbols aren't self-explanatory to you, they're of course tooltippable!
Support Independence
Support Independence is a new Diplomatic Pact, which a country can establish to commit to support another country's subject if they declare independence from their overlord. Once the Diplomatic Play has been declared, any supporters will automatically join on the subject's side. As a side effect this pact also increases Liberty Desire progression in the subject, so over time supporting a subject's independence may lead to greater autonomy if not full independence.
Supporting the sovereignty of your subject's rivals is a common strategy among aspiring imperialists, and subjects looking to become independent can also cozy up to other nations and ask for their support, hypothetically speaking of course.
Improved Imposition of Laws
We introduced the ability to impose laws on your subjects in Update 1.5, but at that time the implementation was so rudimentary it was almost like an easter egg for the few who discovered it. In Update 1.7, you can now impose laws on your subjects directly from the Subjects tab.
When you start imposing a law, the other country will get an event where they can respond to the demand. They can choose to outright refuse, which they might do if their Liberty Desire is high or their chance of passing the law is very low.
You will now also be told what their chances of passing the law is before you commit to it.
They can also choose to start enacting it right away, giving them a +10% enactment chance for the duration, or deferring it until later. If they are already passing a law at the time you send the demand, they can choose to cancel their current law at no penalty in favor of your request, or wait until the time is right. While they're committed to enacting the law, they cannot cancel it until it's complete. They can however abandon the attempt, and may do so if they've made no progress after several years, but this will hurt relations with you.
As a player, your AI overlord may make these demands of you as well, and you have the same options to deal with them.
Conclusion
These new interactions with your subjects (or your overlord), informed by the Liberty Desire metric, Economic Dependence system, and Lobbies, is meant to add more difficulty, depth, and interactivity to your imperialist projects - or as a subject, give you the ability to plan for your eventual independence. While most of these mechanics are available in Update 1.7, several of the new interactions are a component of the Sphere of Influence expansion. Some of the mechanics, such as imposition of laws and diplomatic actions limited to countries you have special relationships with, also integrate with the Power Bloc mechanics in Sphere of Influence to give you a more unified way of interacting with countries in your sphere, whether they're subjugated to you directly or merely in the same Bloc as you.
These features also add exciting new potentials for more targeted interactions with specific countries without cluttering up the lens interface where more generic actions are shown, permitting for more custom interactions between countries to be added in the future. Modders should also be able to make good use of the new options we've added to Diplomatic Actions, such as modifier support.
As mentioned earlier, next week Wiz will be back to go into more detail on Lobbies, and what they provide for the upcoming Sphere of Influence expansion. Until then!
Overview for all upcoming Dev Diaries: [table] [tr] [th]Date[/th] [th]Topic[/th] [/tr] [tr] [td]11th April[/td] [td]Lobbies and More on Power Blocs[/td] [/tr] [tr] [td]18th April[/td] [td]The Great Game[/td] [/tr] [tr] [td]25th April[/td] [td]The Art of Sphere of Influence[/td] [/tr] [tr] [td]2nd May[/td] [td]Changelog 1.7[/td] [/tr] [/table]
Dev Diary #110 - Building Ownership & Foreign Investment
Hello and welcome to another Victoria 3 Dev Diary!
After last week’s look at Power Blocs, we are going to take a look at another major set of changes that are going to arrive with Sphere of Influence and the free 1.7 update.
Namely, a revision of the Building Ownership system and what it allows us to do: Foreign Investment, a much requested feature which makes its debut in 1.7.
You will see that the changes we are making impact your visibility of ownership and the affected Pops throughout the game.
To understand all the mechanics we will be looking at an example country in the heart of Europe.
Ownership types
It’s 1836. In Bavaria, a proud member of the Zollverein Power Bloc, all buildings are owned by the state or the workers themselves.
Capitalists, Aristocrats, and Clergymen no longer work in these buildings, and most of the Shopkeepers no longer work in production buildings directly. In addition, the Ownership Production Methods have been removed. Instead, ownership works on a per level basis, allowing a mixed ownership structure in the same building.
A popular Logging Camp it seems. Workers, a Financial District and a Manor House own a part.
In worker-owned buildings employees work for themselves basically. So any dividends they may accumulate, they split amongst themselves. This is the default at game start for many countries (not all) and is a state which you can more or less return to at a later stage of the game with the enactment of Cooperative Ownership, which will expropriate your privately owned buildings over time.
One major exception from the ownership situation at game start are subsistence farms which are owned by a new building we are introducing: Manor Houses.
Now they lounge around in luxury, instead of slumming it with the common folks in less refined taste buildings, we wouldn't want their shoes to be dirtied on a subsistence farm! Manor Houses are able to own levels of other buildings, in our case at game start all the levels of Subsistence Farms in their own states. They pay their wages and dividends by collecting dividends from the buildings they own and distributing them among their employees. What type and how many employees they have is determined by a limited set of PMs.
Clergymen or Aristocrats? You can’t get rid of both of them!
So you can see there are still jobs for Clergymen. What about the Shopkeepers and Capitalists? Well, they work in the new Financial District buildings, which behave pretty much like the Manor Houses. They too have different employment PMs, can own levels of other buildings and pay their employees by collecting dividends from owned building levels.
Both new buildings expand automatically, depending on how many levels they own. For example if a new level of a privately owned factory is created, a corresponding new level of a Financial District is also generated.
All building levels that you construct are country-owned. Under certain laws, this status can change soon after they are finished constructing. Country-owned buildings come with reduced Economy of Scale bonuses and a bureaucracy cost for each level you own. But in return they can provide additional income based on the building’s dividends which partially get transferred to your treasury.
Not all buildings can be of any ownership type of course, for example barracks or government administrations will always be country-owned.
Summing up, there are now three types of ownership for any building level:
Worker owned
Privately owned (Financial Districts and Manor Houses)
Country owned
If all buildings in Bavaria are owned by the workers or the country itself, how do the first Financial Districts appear, you may wonder!
The main way to get that to happen is the next point on our agenda.
Privatization
Enter Privatization, whereby you allow country-owned buildings to be sold to Pops.
If you are short on cash, Privatization might help you
This makes it possible for your Pops to acquire them. Depending on the type of building you are privatizing, they usually get bought either by Aristocrats or Capitalists, using the investment pool’s funds. If you don’t have any capitalists in your country yet, other Pops may step up though, using the investment pool’s funds to buy a building you put up for sale and become Capitalists in the process, which in turn leads to the first Financial District appearing.
The money will be transferred from the investment pool to your country’s treasury once that happens. The cost of buying a level is determined by its construction cost and is modified by most of the Economic System laws. These laws also affect the efficiency of these transactions, meaning how much money is lost as overhead and how much is being reinvested into the investment pool or the treasury. One particularly interesting law is Laissez-Faire which upon enactment forces all your country-owned buildings to be put up for sale and will automatically do so for every new building level you construct. Similarly, enactment of other laws like Cooperative Ownership and Command Economy doesn’t immediately change the ownership of all buildings, but rather can start a process that can convert your economy over time.
Insert witty joke about the free market here
Now let’s take a look at how the different ownership model affects investments from your Pops.
Investment
The existing logic for how the private investment pool works remains similar to before. So, different Pop types still have different priorities and they will look at factors like estimated productivity, available workforce etc. When a building is about to be constructed by private investment, we randomly determine who is building it, favoring already existing Financial Districts and Manor Houses over creating new ones.
In a worker-owned economy, the private investment pool will continue to function, but they will only expand their own buildings, not create new ones.
An important fact with this system is that investments do not need to be local. A Financial District or Manor House can invest in any of your country’s states, including your colonies overseas. This system will create a flow of money from the colonies to your homelands, a stronger centralization of wealth and power and it will end the status of colonies’ Pops making more money than your Pops at home.
Of course the non-local investments also come with some challenges with regards to other countries.
It looks like Prussia has heard about that option and has started investing in your country!
“First they took our chairs, then the tables we used to eat at. What’s next? Our beds?!”
Foreign Investment
There are a few ways to acquire Foreign Investment Rights.
First of all, overlords can always invest in their subjects. This is part of the free 1.7 update and will allow you to do Foreign Investment where it matters the most, even if you do not own Sphere of Influence.
Then there are three diplomatic pacts which you can use if you have bought the expansion:
Mutual Investment Rights which allows both countries to invest in each other
One-directional Investment Rights in either direction, so you either demand to be allowed to invest in their country or offer another country to invest in yours
The [redacted] has been [redacted]. We shall see its effects on the 11. of April.
There is also a Power Bloc Principle group that deals with Foreign Investment which on Tier 3 has the consequence of being able to invest in any member country.
No matter how you got the Investment Rights, you and also your Pops will be able to invest in the target country. Private investment does consider foreign states as potential targets for their expansions, allowing them to build profitable buildings more easily.
As nice as it is that Prussia has invested in new buildings in Bavaria, I don’t think we can let them get away with diverting the profits to Berlin instead of our own population!
Nationalization
Nationalization allows you to take control of foreign assets in your country. You cannot nationalize other countries’ assets as long as they possess Foreign Investment rights in your country.
Once that is no longer the case, e.g. if Bavaria left the Zollverein Power Bloc, you can peacefully nationalize their building levels in your country. For that you need to pay a sum of money from your treasury. Similarly to Privatization, the sum is determined by the construction cost + modifiers from laws.
You will also be able to nationalize your own Pops’ building levels, both worker-owned and privately owned, if you’d like to take ownership. Nationalization is not seen positively by the affected Pops of course and will radicalize them.
“We should compensate them to reduce the quarrels.”
But what if the Bavarian coffers are empty yet you still want to take over that juicy productive Furniture Manufacturies that is owned by Prussia?
Well, there is always an alternative.
“Pay them? I don’t think so!”
You can demand nationalization of a country’s assets in your country. If they accept, their building levels’ ownership changes to your country. If they don’t, you can try and enforce it as a wargoal. If you are successful, you will also remove their Foreign Investment Rights for your country in addition to taking control of their buildings in your country.
Building Registry
To visualize all these new mechanics, we are introducing the Building Registry, which allows you a customizable look at your country’s situation.
All the building data one could wish for
This is a major new UI, that similar to the Census Data window, comes with a lot of functionality to filter the available data. Only show buildings outside your country? Sure. See all buildings that are owned by Pops and which are currently not hiring but not fully employed? No problem.
Lots of filter groups to browse through
We hope you find this as useful as we do. You can access it via the button on the bottom of the Buildings panel.
Really recommend pressing that button
Implications for the Directly Controlled Investment Pool Game Rule
As you can imagine, this new system of ownership, geographic wealth extraction, and privatization/nationalization has far-reaching implications on the economic foundations of Victoria 3. It enables a lot of interesting dynamics we haven't been able to model until this time and adds a whole new dimension to your economic laws.
It also comes with the consequence of making the Directly Controlled Investment Pool game rule that we introduced with 1.2 (as a legacy alternative to the new Autonomous Investment system) impossible to maintain. In 1.6 and prior, if this game rule was turned on, the player would be directing all construction efforts. As long as there was money in the investment pool and the construction queue was building a privately-owned building, the cost of construction goods would be coming out of the investment pool first before being carried by the state budget. With the new rules for building ownership, investment rights, and so on in 1.7 this no longer makes sense - there's now a very clear distinction between a building project initiated by a private investor and the state, a potential source of conflict innate to both foreign ownership and the privatization/nationalization mechanics, and even differences between owners in different regions that cannot be represented if all construction projects were player-initiated.
Because of this it no longer makes sense for players to be in charge of both public and private investments simultaneously, and as such the Directly Controlled Investment Pool rule has had to be removed for 1.7 and beyond. While we can't support non-default game rules to the same degree as the standard options, removing a game rule completely is not something we'd ever do without good cause. We know that a smaller fraction of you favored this setting so we want to be clear with why its removal was a necessity to move forward with these improvements to ownership and foreign expansion.
Outlook
I would like to end today’s Dev Diary by providing a short outlook for what these changes also enable us to do in the future.
The main thing here is affecting Companies.
The way we have reworked ownership allows us to create Company headquarter buildings which can then own specific building levels of industries they care about, determining its profitability from and providing their throughput bonuses only to these. While we cannot provide a concrete timeline for that change at this point, it is something we would like to tackle for one of our next free updates.
That’s it for today. Check back next week when Mikael is going to walk you through what changes 1.7 and Sphere of Influence brings to relations and interactions between Overlords and Subjects, including how these foreign investment mechanics relate to your grip over your extended empire.
Overview for all upcoming Dev Diaries: [table] [tr] [th]Date[/th] [th]Topic[/th] [/tr] [tr] [td]4th April[/td] [td]Subject Interactions[/td] [/tr] [tr] [td]11th April[/td] [td]Lobbies and More on Power Blocs[/td] [/tr] [tr] [td]18th April[/td] [td]The Great Game[/td] [/tr] [tr] [td]25th April[/td] [td]The Art of Sphere of Influence[/td] [/tr] [tr] [td]2nd May[/td] [td]Changelog 1.7[/td] [/tr] [/table]
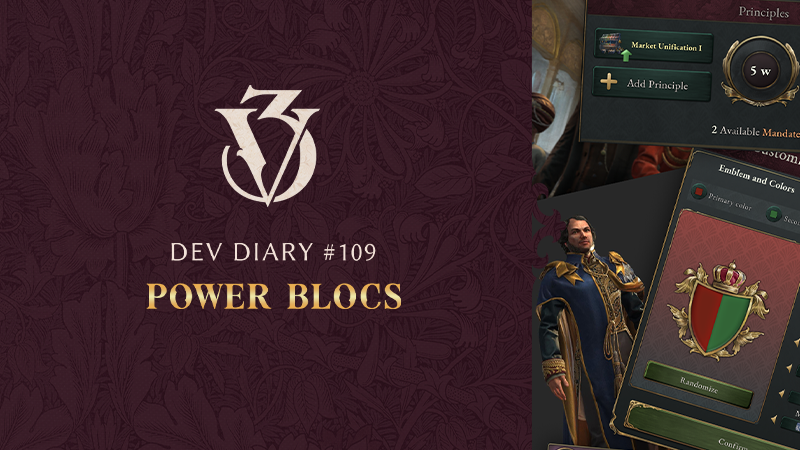
Dev Diary #109 - Power Blocs
Hello and welcome to another Victoria 3 Dev Diary! I’m Lino, a Game Design Lead on the project and today I will take you through one of the big features of the Sphere of Influence expansion: Power Blocs.
As Martin wrote last week, Power Blocs are multinational associations that are led by a Great or Major Power. They can take many different shapes, some of which I will showcase today. With your skills playing Victoria 3 (or rather: your skills picking Great Britain), you too should be able to lead one in no time, I’m sure!
Display of the most powerful members of a Power Bloc under Great Britain’s rule
But let’s get into the details, starting with some general aspects.
General
With Power Blocs, we are providing new and different opportunities for you to take control of one of these powerful empires, to assemble and customize your own Bloc, shape its effects on members to your liking and guide its expansion and struggle with other Power Blocs for domination over the region.
A country can only be part of one Power Bloc at the same time. That does not mean that a country is locked into a Power Bloc forever though. There are ways for them to leave and join another Bloc, if the conditions align or even for a Power Bloc to be completely dismantled.
Great Powers will generally have an easier time leading a Power Bloc than Major Powers, due to their higher budget of Influence which is part of the upkeep cost for Power Blocs. Additionally there is a Cohesion penalty being applied to Major Powers leading a Power Bloc to reflect that they don’t quite have the authority or respect of others. This fact and some other things we’ll get into later, should make the fight for the top of the Prestige leaderboards more rewarding and fun.
There will be some Power Blocs established at game start already, e.g. the Zollverein and the British Empire. You can start playing as Great Britain and you will already have a Power Bloc ready to go if you desire to do so. But also playing as a regular member of any Power Bloc will feel different than being outside of them. While there are good reasons why you may not want to join any Power Bloc, there is also potential for powerful effects and cooperation with other members of the same Bloc.
Some of the Power Blocs at game start
I hear you have managed to cut off Austria’s leash and were able to unite Italy. Very impressive. Now you are ready to create your own new Power Bloc. Let’s look at that process, which starts with the customization.
Customization
When you form your Power Bloc, you can customize a few aesthetic things to make it look as pretty or crazy or as historic as possible - whatever floats your boat! It starts with a name of course, I see you have called it “Venetian League”? Excellent choice. It continues with the emblem. We’ve added a number of options for you to choose from to decorate your crest. For the color selection we have added support for a traditional color picker so that you have the full freedom to express yourself, be it pink, green or Prussian yellow blue. You can also see that there is a selection for a Map pattern. This pattern will be displayed in the map modes that deal with Power Blocs and its color will be the same as your chosen primary color as you may have seen from the historic Power Blocs screenshot.
WIP Mockup of the Customization window for your emblem
In the next tab you can find the Statue customization window. Here you can shape the looks of the fantastic monuments which countries of your Power Bloc can build. There’s a variety of pedestals, statues and accessories to choose from to demonstrate your Power Bloc’s might to the world.
Countries in a Power Bloc will be able to build them and profit from their effects, which can be something like Influence, Authority or similar effects, based on how you want to shape your Power Bloc. Of course the Game Rule for Monument effects will be expanded to include Statues if you desire to disable their effects, and build them just for their looks.
WIP Mockup for the customization window
One of the many majestic statues on the map
Another addition that will bring Power Blocs more into the 3D world is a set of new vehicles, depending on the style of your Bloc. You will also find that parts of the clothing of country leaders in the Power Bloc will change. So for example you may see sabres, medals or sashes being worn by them. Which accessories are going to be worn and which vehicle will drive on your roads are based on what Central Identity Pillar you pick for your Power Bloc. We will share more information on these assets in one of our upcoming Dev Diaries, dedicated to cosmetics - stay tuned!
This fancy cape could be worn by your country leader too
When you want to get from A to B while showing off
Speaking of Central Identity Pillars, let’s have a look at them to see what might interest you for the Venetian League.
Central Identity Pillar
Power Blocs revolve around a central set of values. These can range from bringing as many subjects as possible into their “glorious” empire (looking at you Great Britain and Russia), to a Bloc whose leader is interested in spreading their own religion throughout the world.
Identity Pillars change a few aspects of your Power Bloc:
They provide a special ability to Power Bloc leaders, e.g. the Trade League Identity making everybody part of a customs union under the leader, or the Sovereign Empire letting the leader turn a member into a subject of theirs under certain conditions
They define some “rules” for your Bloc, e.g. how Cohesion is gained (which we’ll talk about later)
They can unlock groups of Principles which is what I’ll talk about next
They define the rate at which you get Principle Mandates, which allows you to enact these Principles
WIP Selection of Identities
When forming a Power Bloc, you will have to pick one of these Identities before moving on to the next step. Trade League it is? Great choice.
Principles
Next up, you will have to choose your starting Principle. While Identities provide a central idea and a sort of rule set for your Power Bloc, Principles can provide more practical expressions of that. Principles come in groups of three levels, generally providing different effects per level to all members of your Bloc. Some are beneficial for everybody, while others are particularly favoring you, their great leader. The effects from Principles of higher tiers are always added to the lower ones. So if you have the tier 3 Principle of Defensive Cooperation unlocked, you also get the effects of tier 1 and 2.
WIP Selection screen, on release there are going to be more Principles to choose from
A WIP example of the three levels of the Defensive Cooperation Principle Group
Identities have one or more Primary Principle Groups which indicate a deeper connection to the Identity than most of the other Principle Groups. You will be required to choose one of the Primary ones to form the Venetian League. Every additional Principle you pick at a later stage will grant a bonus to your Power Bloc’s Cohesion, which can be impactful. You can exchange it later on if you’d like, but you may have a very hard time doing so.
By having countries remain in your Bloc, you will unlock the potential to upgrade existing Principles or pick new ones with entirely different effects. Each member of your Power Bloc contributes a number of points towards a Principle Mandate. The higher their rank, the higher their contribution.
Each Mandate allows you to either pick a new Tier 1 Principle if you have an open slot, upgrade one of your established Principles by one Tier, or switch a Principle of any Tier to a different Tier 1 Principle.
Principles Overview section
With the fancy customized look, the Central Identity Pillar and the first Principle picked, it is finally time to form the Venetian League. Now all that’s left to do is send invitations. If at least one other country accepts, your very own Power Bloc is officially formed. Congratulations!
But how do you get other countries like the minors in the Austrian Bloc to join your Bloc and ensure they’re staying there so that you get more Principle Mandates?
Leverage
That’s what Leverage is for. Raising your Leverage to overtake Austria might be a challenge, but it might also be worth it since you’re weakening their Bloc at the same time as strengthening your own.
There’s a couple of factors that contribute to Power Blocs building up Leverage on a country, such as:
At least one of the Power Bloc's members having an active interest in the country (a hard requirement for gaining Leverage)
Positive relations and certain other pacts like Alliance or Trade Agreement
Siding with target in Diplomatic Plays
Lobbies for or against your country
Economic dependence (which we’ll cover in more detail in a future Dev Diary, but which includes e.g. trade routes between the countries)
By default, Leverage will trend towards 0. So that means if you want to keep the Leverage you have on a country, say Switzerland, active or even increase it, you will need to engage with them in some form or another.
Keep in mind that conducting Diplomacy is harder for you, now that you’re part of a Power Bloc. Countries in other Power Blocs will feel intimidated and are less likely to agree to your proposals. That would have been a good reason for you to stay neutral. Oh well, too late now!
There’s actually two values for Leverage. One that continuously builds up over time if you meet the requirements and another one, which is called Active Leverage that is the result of your own Leverage minus the next highest Bloc’s Leverage. So for example, if you have built up 100 Leverage in Switzerland and the pesky Austrian Bloc has 80 Leverage on them, your active Leverage is only 20.
WIP Animation for Leverage map mode
If you manage to get enough active Leverage, you can invite Switzerland to your Bloc. The active Leverage your Bloc has on them determines their likelihood of joining your Bloc if you ask them nicely. Their good friends came gladly after all. But what if they decline? Well, you can always apply a slightly firmer grip if they need it and threaten war with them to force them into your Bloc. This will cause an amount of Infamy though, depending on how much Active Leverage you have on them.
Even after integrating Switzerland into your Bloc, Leverage needs to be kept up. Otherwise it opens the door to another Power Bloc doing the same as you have done and convincing them to leave your Bloc and join theirs instead.
It looks like you have learned how to get more countries into your Bloc. It is prospering and growing it seems. But I feel you may have forgotten about something you had better keep in mind.
Cohesion
Cohesion is the measurement of how well the countries in your Power Bloc fit together. More than anything else it looks at the Identity to determine the target value which it will then trend towards.
There are some other things in the game that can generate or drain Cohesion though, e.g Principles providing a benefit or reducing it, actions that leaders or members can take, events etc.
Similarly to Legitimacy, the Cohesion value will be in one of five brackets, each having different effects on your Power Bloc. They are mostly around the gain of Leverage on members of your Bloc, but can even halt the progress of Principle Mandate generation.
WIP display of the Cohesion bar
Now the main problem that you are facing, is that Leverage gain on members in your own Bloc is affected by Cohesion which makes it harder to keep them around.
Most countries that you add to your Bloc will also reduce your Cohesion. The more countries you have, the higher the speed of unlocking the next Principle Mandate, but the more difficult it will also be to keep control over your member countries, potentially leading to them being pulled into a competing Power Bloc.
Kicking a less powerful member out might be worth it in order to restore balance. Similarly helpful could be picking a more generous Principle as your next one.
When you have found a way to stabilize your Bloc to comfortable levels, you should look for the next potential target to acquire. Finding the balance between how many countries you can support to keep under your reign and where you invest your diplomatic resources is going to be key if you are leading a Power Bloc. Maybe you should stick to Bavaria and Denmark as your next targets, on the other hand the contributions of a Great Power like France would bring might be worth it…
Power Struggle
So you managed to get France to join your Venetian League? Congratulations! I’d like to point your attention towards France’s Prestige. Since it is more than 20% higher than yours, they have automatically initiated a Power Struggle. If they succeed in keeping that score up for a full year, they will assume leadership of the Venetian League, demoting you to a regular member. France might even want to rename your Power Bloc afterwards. Mon Dieu!
Let’s hope Power Blocs find a better end under your leadership once Sphere of Influence releases in May.
When that happens, note that there is going to be a core version of Power Blocs that is going to launch with the free update for all players, even if you didn’t purchase Sphere of Influence. The free version allows you to pick the Trade League Identity, making it possible to recreate shared markets, whose functionality we’ve moved from a diplomatic pact into the Power Bloc feature. It also replicates the Sphering mechanics from Victoria 2 in a more natural way than subjugation or negotiating for Customs Union pacts, though of course Power Blocs take this even further with more mechanics and depth. Part of the expansion for Power Blocs is all customization and the vast majority of advanced mechanics and effects like the other Central Identity Pillars, Principles and Statues.
That’s it for today. Next week, I’m going to tell you more about the changes to Building Ownership and what that enables you to do - Foreign Investment!
Overview for all upcoming Dev Diaries: [table] [tr] [th]Date[/th] [th]Topic[/th] [/tr] [tr] [td]28th March[/td] [td]Foreign Investment & Building Ownership[/td] [/tr] [tr] [td]4th April[/td] [td]Subject Interactions[/td] [/tr] [tr] [td]11th April[/td] [td]Lobbies and More on Power Blocs[/td] [/tr] [tr] [td]18th April[/td] [td]The Great Game[/td] [/tr] [tr] [td]25th April[/td] [td]The Art of Sphere of Influence[/td] [/tr] [tr] [td]2nd May[/td] [td]Changelog 1.7[/td] [/tr] [/table]
Dev Diary #105 - Migration in 1.6
Hello! I’m Alex, one of the system designers on Victoria 3 and I’m here to tell you a bit about what changes we have been planning for Migration in 1.6. I have also conscripted volunteered one of our programmers, Konrad, down from the code mines to give us some of the nitty gritty details about what’s going on.
Goals for the changes
To begin with I’d like to clarify what the goals for these changes are, and (importantly) what they aren't. Unlike say the military rework, the goal here isn’t to completely change the gameplay surrounding migration. In fact, gameplay should feel somewhat similar, particularly if you don’t know the exact details of how it used to work.
So what is the purpose of this? Primarily, it’s about performance. We hear your concerns about mid- to late-game pacing and we’re constantly looking for opportunities to improve how well the game runs. Part of that is making small optimizations here and there, caching this or that value, pushing how much we can run in parallel and so on. Another aspect of it is looking at what design decisions we have made and considering if we can change them so gameplay still works but the mechanics are more performance-friendly.
These changes fall into the second category. In the current version of the game, migration works by regularly splitting Pops up and moving the pieces all over the place, which of course results in a higher number of Pops and worsened performance as the game goes on. In 1.6 we avoid splitting Pops for migration as much as possible so we can keep the number of Pops down.
On top of performance, another reason we are doing these changes is to make the system more maintainable and easier to work with in the future. The new implementation is simpler to understand when you are working with it which is a big plus for us, and incidentally should also make life easier for modders!
Finally, we also wanted to take the opportunity to sneak in some QoL and UX improvements while we were at it, which you’ll find towards the end of this dev diary.
General Concepts
Before I go into details below, it’s important we are on the same page for what different terms mean and how they work. Migration in Victoria 3, as you might know, comes in two main forms: Market Migrations and Mass Migrations.
We also took the opportunity to fine tune the wording on a few of our concepts!
Market Migrations happen exclusively within your market and are largely due to economical factors in a Pop’s life. Mass Migrations on the other hand are the mechanism for Pops to migrate between different markets and have a stronger cultural focus.
How we select where people go and how many people move is highly dependent on the Migration Attraction a state has. This is a metric which indicates how much people want to move there due to factors like available employment, arable land, trade and so on. When migration attraction is used, what matters is the difference in migration attraction between two states and not the absolute value in a vacuum. It is also worth noting that migration attraction can change fairly quickly and in particular if a state receives a lot of migration, its migration attraction is likely to go down which then leaves room for other states to receive migrants.
Finally, you will often see mentions of terms like “Pops”, “number of Pops”, “Population” and so on and it is good to understand the difference between them. A Pop (also known as a Part Of Population) is a segment of a population with a specific job, culture, religion, living in a particular state and working in a specific building, e.g. Swedish Protestant engineers working at a Tooling Workshop in Stockholm. The number of Pops is how many different unique Pops we have in a building, state or even the whole game. This means that if the Tooling Workshop above employs both Swedish and Norwegian engineers, then the number of engineer pops in that building is two. Lastly, population is how many individuals we model through the use of Pops. The Swedish engineers above might be 5000 people large for instance.
These general concepts remain unchanged between 1.5 and 1.6.
You might notice the mention of a new concept: Mass Migration Attraction. We’ll go into what that means further down in the dev diary.
So, what has changed?
Pop Selection
On a very basic level what you need to know about how the system used to work is that we’d pick small portions from a lot of Pops all over the place and then move them around between states. In other words, migration as a system was taking consolidated larger pops and turning them into a larger number of smaller pops, which is bad for performance.
What we instead are doing now is that when we pick people to migrate, we try to pick as many “whole” pops as possible, sort them from smallest to largest and start sending them to new states. When they arrive we attempt to merge them into existing local Pops. Sometimes we still need to fragment pops, for instance if they’re too large, but we try to do so with more restraint.
Migration Destinations
Previously, pops would migrate to essentially any state that seemed attractive enough and that would allow them based on your Migration and Citizenship laws. This led to a very spread out many-to-many migration system, which again, coupled with the Pop Selection system resulted in more pop fragmentation.
In the new system, we only allow pops to migrate to states with a so-called Cultural Community for the culture that pop belongs to. If there are multiple available cultural communities, we send migrants to all states within a certain margin of the highest migration attraction state, distributing them according to their migration attraction and if they’re actually able to take in that many migrants.
I’ve heard that Michigan is lovely this time of year. Maybe we should create a Swedish cultural community there?
Cultural Communities
If you played the 1.5 open beta, you might recall when we tried introducing some of these changes (and how it accompanied some… interesting bugs with pops ignoring migration laws and all that). One of the changes was this notion of Cultural Communities. The idea is for them to model that you are more likely to migrate somewhere you know people of your culture already live in. You can of course move somewhere completely new, but that is not as common.
Do you tend to look through the in-game concepts like this one often? Did they help you when learning the game? We’d love to hear your thoughts!
Cultural communities exist everywhere there is at least one pop of a given culture. Additionally, every month there is a chance for a new cultural community belonging to a culture in your market to spawn in one of your states. If no one of that culture moves to that state, the cultural community disappears after a few weeks.
It is important to note that the relevant factor for performance is not the size of the population, but rather the number of Pops. This means that if the migration mechanics produce more homogenous results, we end up with a better performing game without having to compromise on the fidelity of the other aspects of the simulation (employment, pop consumption, population growth, qualifications, etc) at all. Since the concern we've heard from players previously is not at all that the simulation produces too homogenous results but rather a sometimes immersion-breaking mix of pop cultures in any given state, this system lets us scale down the average number of cultures present in each state.
If you are into modding, the weights and conditions for cultural communities to spawn are completely customizable through a script value that runs every month for every combination of state and culture in a market. I’m looking forward to seeing what you come up with!
Mass Migrations
Mass migrations used to be more tightly coupled to market migration in 1.5. For 1.6 they work more in parallel having their own limits and conditions. Essentially, when evaluating if we should spawn a mass migration we go through the following steps:
For every culture, go through the countries where that culture has homelands and calculate the chance for a mass migration to spawn from there. This includes filtering out countries or cultures that don’t fulfill the requirements for mass migrations, like having enough cultural turmoil or actually allowing migration to happen
Pick one of the eligible countries above as the origin for the mass migration
Calculate the Mass Migration Attraction for that culture to migrate to all different countries. This is the average migration attraction of the eligible states in the target countries.
After adding a small random factor so we don’t send all mass migrations to the same place, pick the country with the highest Mass Migration Attraction
Go through the eligible states in that country and pick the one with the highest migration attraction (after adding a small random factor)
After all this we spawn the mass migration for the selected culture and country we picked in step 2 to the state we picked in step 5.
You might also have noticed that we now mostly display migration as a weekly value, instead of an annual one. The reason is that migration can change pretty quickly between weeks which used to make it confusing or even misleading when we focused on the annual value.
At this point, similarly to market migration, we select pops we want to move, trying to prioritize smaller whole pops and send them on their way to their new home. We do keep track so we don’t send too many people from any one state or to any one state so we neither depopulate nor overwhelm states during mass migrations.
Results
So how did all these changes turn out? For now our own tests have given us positive results with a reduction of around 15-20% in the number of pops towards the end game. This comes both from a reduction in fragmented pops, but also in pops getting more concentrated in which states they are sent to, which also leads to somewhat fewer buildings overall.
For all you gamers economists out there, in this case line go down is good!
New shiny UX improvements
I bet you’re thinking “What about the UX improvements you mentioned though? Give them to me!”. Also hello to all of you impatient readers who skipped through the details right to the shiny screenshots and UX changes. As mentioned, with the migration changes we wanted to also make the system a bit more accessible from a UX perspective as development itself showed there was a lot of information that felt way too hard to access and understand given how important it is.
One change I personally am quite a fan of is that we now clearly display if a state can actually receive a mass migration now:
Who’d ever want to go to Rhode Island of all places?
If you are wondering about what the requirements for this are, they are now displayed in the updated concept for Mass Migration targets:
These requirements are not new, we just haven’t properly exposed them before. It can of course be tedious to check states one by one if they are eligible for mass migration, so we also added a map mode that shows you this:
Remember to integrate your states if you want them to get any mass migrations! Also, it’s probably a good idea to make sure they are properly connected to your market..
While we are on the topic of map modes, we have also added a map mode that tells you roughly what country is most likely to receive a mass migration:
The New World displaying its promise for greatness in bright green!
This map mode also includes a new concept for Mass Migration Attraction:
Can’t get a mass migration if you’re so small people can’t even spot you on a map
Something I’ve felt has been missing from the game for a long time is a map mode that shows you where people are actually moving, rather than where there’s high migration attraction. We have that now!
What’s up with Idaho, though?
Finally, we also reworked the old migration attraction map mode so it only shows states in your market, rather than the whole world. This should better communicate the difference between market and mass migrations as well as show you where in your market people are likely to move to and from:
Now you should be able to more clearly understand the migration flow in your market even in other countries.
For the modders out there, you’ll find we also restructured, renamed and removed a bunch of defines (this is your reminder to update your mods when 1.6 drops):
Next Time
That’s it for today! Hope you enjoyed reading about how we’re working with migration and that you are looking forward to playing with these new map modes and other improvements when free update 1.6 releases on March 6! If you can’t wait until then, the next dev diary (two weeks from now) will have the full changelog for 1.6, which will include all the other things we've done outside of migration and UX improvements. See you then!
Dev Diary #104 - Quality of Life improvements in 1.6
Hello and welcome to this Dev Diary that will mainly focus on the Quality of Life improvements we will add to the game with 1.6. The improvements for this update are mainly focused on three areas: Diplomacy, the Outliner and the Census Data panel, with some additional bug fixes and improvements sprinkled on top.
Diplomacy
The “Start Diplomatic Play” popup has gotten an overhaul that should make it much easier to get an idea of how likely any Country is to side for or against you. The “Relative Preference for Country” tooltip has also been polished up. It now gives you more information on the first level of the tooltip, which in turn should make it clearer which factors go into the AI’s decision making process.
The tooltip for a Country has gotten completely reworked to include better contextual information, more data and clearer information hierarchy.
The Country details panel has gotten a slight tweak to the layout, which makes it possible to see both the Country’s Attitude towards you, and their current Strategies at a glance. Since these factors are important in the AI’s decision making process, having them more easily accessible should help make a Country’s behavior more comprehensible.
The Diplomacy Map Mode has gotten a new Map Marker that shows any ongoing Pacts you have with that Country, their Attitude towards you and Relations (+ any eventual rate of change)
Diplomatic Pacts have been reworked to more clearly state what could cause them to break. This change is also reflected in the “Pact has broken” Notifications, making them easier to understand.
Outliner rework
The Outliner now has tabs (Pinned / Economy / Politics / Diplomacy / Military / All). Most Outliner items also had a design pass, and most of them now show some additional information. We have also added a new Outliner item for Countries, showing their Rank, Attitude towards you and Relations.
In addition to these changes, you are now able to unpin Political Movements, Diplomatic Plays etc, giving you more control over what is shown in the Outliner. We have also added an option to move the Notification feed to the left of the Outliner, similar to what Nugget’s mod “Notifications not over Outliner” does.
Notifications are now color-coded to give you more information at a glance.
The Census Data panel, formerly known as The Pop Browser
In the previous Dev Diary we introduced the Pop Browser (which has been renamed to the “Census Data” panel, based on a suggestion by forum user Buladelu). Since then we have also added Literacy, Job Satisfaction and Needs as columns in a second “page” in the spreadsheet. The common suggestion of visualization of Interest Group membership sadly had to be postponed to a later date due to implementation difficulties and performance concerns. You can of course still see which pops are part of an Interest Group through the Population tab and on the relevant Interest Group details panels, like before. For upcoming updates we are looking at the feasibility of implementing similar screens for other central types of data, with Buildings, States, Countries, and Goods currently being in the very earliest stages of planning.
Showing columns for Radicals, Loyalists, Standard of Living, Political Strength and Interest Groups
Showing columns for Literacy, Job Satisfaction and Needs
Misc improvements
Scroll positions within the left-side panels are now saved and restored when opening/closing or navigating between panels, which results in less unnecessary scrolling.
Input Goods Shortage Map Markers are now collected per State on mid zoom level, similar to Construction, reducing the overall map clutter
An “Upgrade All” button has been added, both for Upgrading all Formations in your Country, and for Upgrading all Units within a particular Unit Group in a Formation
The Employment Indicator has gotten a reworked tooltip that more clearly explains why a Building is able to hire or not.
The way we display Qualifications has also received some significant changes. Previously, we would display all Qualifications for a particular profession in the State Panel, regardless of whether the Pops that held those Qualifications actually had any real chance of becoming that Profession. For example, your Capitalists might very well have tons of Machinist qualifications, but it’s not too likely that they are going to quit their jobs and make the switch from factory owner to factory worker. Adding to this confusion, the ‘Insufficient Qualifications’ warning when constructing a building or changing a PM would only look at Qualifications among Peasants and the Unemployed, meaning its predictions would often not play out that way in practice.
In 1.6, we now always show something we call ‘Employable Qualifications’, which is Qualifications held by Pops that are reasonably able to take a job, defined by meeting the following criteria:
Isn't already the relevant pop type
Is unemployed or a jobseeker
Is not enslaved
Isn't working in a government building or subsidized building
If employed, wouldn't consider the change in pop type to be a downgrade (ie, Aristocrat qualifications for Farmers aren't likely to be considered - based on wage weight and how well their current workplace is paying)
What this means is that when you get a warning for a building that’s to be constructed not having enough Qualifications to fill, that warning can actually be trusted, and you’ll have a much easier time determining which Professions are a bottleneck for your industrialization efforts.
The tooltip for changing Production Methods now has much more accurate predictions as it now takes more factors into account than before (Employment changes, Throughput, State Traits among others), plus had a few bugs fixed.
The Construction Interaction now has two modes for the list items: “Condensed” (which is what is currently in game in 1.5) and the new “Full” mode, which has additional information like State Traits, Employment, Production Methods and Local Prices for Input and Output Goods.
The Transfer Units panel has gotten some extra functionality compared to what is currently available in 1.5 based on many requests from our players. First and foremost, you can now with one quick button press move all or half of the Units and Commanders over to the other side. You may of course want to be more detailed when setting up your transfers, something we now provide additional tools for, namely:
Text input box (write the number you want immediately)
Slider + Arrow buttons (slide the number to whatever you need it to be)
A list of all individual Units (if you want to be really nitty gritty and select/deselect individual units)
We want to have most lists sortable and/or filterable by suitable factors in our game, which is becoming more and more of a standard for us to help you find the exact thing you want especially in lists with more than 10 entries. In the Transfer Unit window we have included a filter for you to get the Units from a specific State in the selected Formation.
During one of our Personal Development Time days we finally made a working prototype for what has internally been referred to as the Holy Grail of Tooltips UX: Tables in Tooltips. This implementation is only used in two places as of 1.6, but we’ll most likely start using these more often in the future, as they make it much easier to present certain types of information with greater clarity.
Closing thoughts
Working on the Quality of Life improvements for 1.6 has been both really fun and rewarding, as it includes some improvements with a high positive impact on the overall UX of the game. The high point for me was either finally seeing the Census Data panel take shape (after having been one of those features that we have had scheduled for “the next patch” for a very long time) or solving how to move the Start Diplomatic Play predictions out from the tooltips into the popup panel.
That’s it for this week! In two weeks Alex will discuss the upcoming changes to the migration mechanics and their impact on game performance.
Hotfix 1.5.13 is now LIVE!
Hello Victorians!
Today we have released a hotfix targeted at a few key crashes in the game today, whilst we previously had said in the last Dev diary that we were unlikely to have more hotfixes. It was deemed important to fix these key crashes in a separate hotfix prior to update 1.6 releasing. Not for problem reports, but rather file any bug reports in the bug reporting forum, thank you!
Patchnotes:
Bugfixes
Fixed a crash caused by peace deals allowing to-be-annexed countries to press conquer state wargoals.
Fixed an out-of-bounds access crash related to Military Path Arrows
Fixed a crash related to Military Path Arrow length