SPGs have always had their own place in World of Tanks, and they’ve seen many changes that have affected their gameplay. A few months ago, we suggested several new mechanics for both artillery and its opponents. After testing them together with you, we’ve come a long way. Now, we’re ready to introduce all these changes into the game. In anticipation of the release of Update 1.13, let's take a closer look at the new features and how these mechanics will work.
Counteracting SPGs: Sound Detection
Let’s start off with the features for counteracting SPGs and alerting players. Until now, non-SPG Commanders lacked useful information, which meant they didn’t have effective tools to actively counteract artillery. It was difficult to track an enemy SPG's actions and predict the direction of potential incoming damage. Now you’ll have more opportunities for tactical analysis, which will help you make smarter decisions and, as a result, take less SPG damage or even avoid it completely.
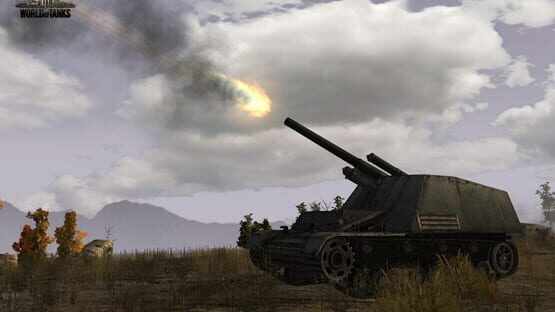
Sound Detection (aka "Sixth Sense for Arty") is a brand-new commander perk that will warn you of incoming shells from enemy SPGs. When an SPG fires a shot, players whose vehicles are inside the danger zone will see a special indicator. The size of the danger zone will depend on the splash radius of the SPG’s shells.
NOTE If a vehicle is outside the potential danger zone at the moment when an SPG fires a shot, but moves into the area while the shell is flying, the indicator will not trigger. This can happen with vehicles that are moving fast.
Also, Sound Detection won't trigger if your vehicle accidentally drives into the shell’s trajectory, provided that the distance to the point of impact exceeds 75 meters. If your vehicle is within this radius, you will see the indicator.
Depending on the shell velocity and travel distance, you will have a short time to react, so try to make the most of it. If you are playing in a slow, well-armored vehicle, these valuable seconds may be enough to move the hull and protect your tank more effectively. These actions will be enough to reduce (sometimes quite significantly) the damage you take.
Fast and maneuverable vehicles can even try to leave the affected area, and the further you are from the center of the explosion, the less damage and stun you will take. It may seem too little to make a difference, but even moving away from the blast center by at least half a meter will already help reduce the potential amount of damage and stun, regardless of which vehicle you are playing in.
Brighter Shell Tracers
SPG shell tracers are now much brighter and clearer, so you can easily see and identify them from a distance. Such shell tracers will allow you to gauge:
Approximate positions of SPGs
Directions (from where and when) they fired
Previously, you could only approximate an SPG’s location on the battlefield, but the brighter shell tracers will allow you to confirm your suspicions. Plus, you’ll be able to tell when arty is shooting specifically at you, so you can find a safer position to avoid getting hit.
NOTE The starting point of the tracer is calculated randomly along the trajectory of the artillery shot and appears at a distance of at least 10 meters from the SPG.
Although you won’t be able to pinpoint the location of artillery to within one meter, this feature will still enable you to better plan your battle strategy.
And while they will now be much easier to spot, competent SPG players should already be planning to change positions after a shot. Even if the opponent has seen your tracer, it doesn't mean you need to stick around to get caught!
Field of Fire Markers on the Minimap
Field of fire markers on the minimap will help you track the actions of artillery and better plan your tactics in battle. Once an artillery shell hits the ground, a vehicle, or any other object, a shot marker will be displayed at that spot on the minimap. It will be visible for only 10 seconds before disappearing, giving you enough time to spot the shot.
Keeping an eye on the minimap has always been very useful—all strong and skilled players constantly do it. A lot of important information can be gleamed from the minimap, and now there will be even more of it. Attentive Commanders will be able to take full advantage of this feature. For example, if a shell tracer is visible next to you, and a marker for another shot appears in a different part of the minimap, this means that both SPGs are now reloading their guns. You won’t take damage from above for the next 20–30 seconds, which gives you time to execute your next move. You can continue the attack, change your position, or even flank an enemy while still having time to find cover before the SPGs fire again.
Reworked Intuition: Helping You Make the Right Shell Choice
Another important new feature all non-SPGs now have at their disposal is the reworked Intuition perk. It will become a skill and be available for the loader to learn. Thanks to this feature, an already loaded shell can be quickly replaced with a different shell type.
You can see the exact time it will take to change the shell type under the reload timer. Fully training the Intuition skill will speed up the reload process by 60%, and another 6% can be obtained through the commander's bonus. Bonuses from Brothers in Arms, Improved Ventilation, directives, and food consumables, such as Extra Combat Rations, can further increase this value up to 84%.
NOTE If you change the shell type while reloading, the Intuition skill will not work and a full reload of the next shell will begin. This skill will be available for all tanks.
Finally, non-SPGs Commanders will spend less time stunned. Artillery will have a wider selection of shells, and two of their shell types will not cause stun, which will significantly reduce the total stun duration in battles.
More SPG Shell Types
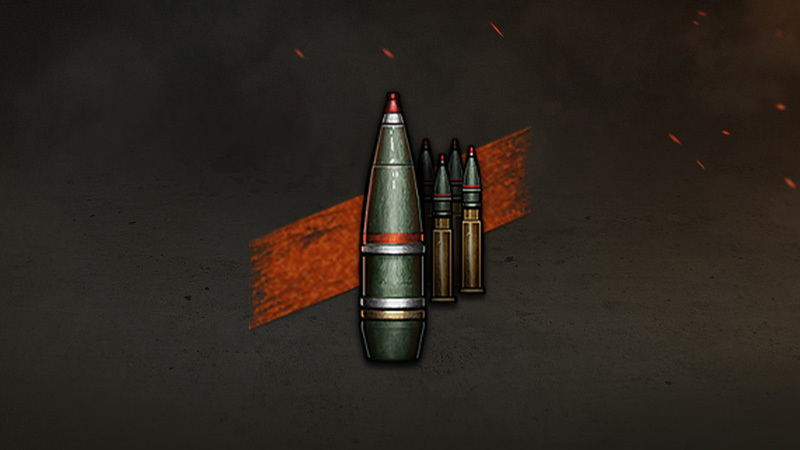
SPGs will now have three shell types at their disposal. Each of them will feature its own combat purpose, trajectory, and velocity. Standard HE shells with stun: The easiest shell type to use. It causes low damage and stuns the crews of several targets with a single shot. It features the lowest velocity of all three shell types, but the most comfortable, high-angle trajectory. As a result, it will be easier for SPG players to hit targets behind small hills and other obstacles. Alternative HE shells without stun: The optimal choice for shooting at vehicles with light and medium armor. It will have a higher velocity but a slightly lower trajectory. Unlike standard ammo, the alternative shell will be able to damage internal modules and injure the crew. They will also have higher penetration and damage values. AP shells (tactical shells): These rounds will have the flattest trajectory (traveling the closest to the ground among all artillery shells) and the greatest penetration values. Their velocity will also be the highest of all three shell types, so you can shoot them without much need to lead the shot.
NOTE You don't need to constantly use AP shells. They’re meant to be rare, situational shells that require well-weighted choice and use when both HE shell types are less effective. Use them to deal damage to poorly armored vehicles or slow tanks equipped with Spall Liners. It makes no sense to compare them with HE shells, which differ in characteristics and damage mechanics. Unlike HE shells, AP rounds can ricochet or deal no damage on a miss.
Due to the different travel trajectories, it will be more effective to retarget the gun after changing the shell type if you want to shoot at the same point. You should also be aware of the combat situation and react quickly to it, so using the right shells at the right time is the key to success in battle. For example, if you see a group of opponents on one of the flanks, it would be wiser to shoot at them using a standard HE shell. You will not only cause damage, but also stun them. As for firing at a single vehicle with good armor, it is better to use an AP shell.
Changes to the SPG Ammo Interface
The changes in the arsenal of artillery led to the refinement of the interface for SPG players. Each shell type will have colored indicators that will inform you whether this shell can reach what you’re aiming at:
If the indicator is green, it means that there are no obstacles in the path of the shell.
If the indicator is red, the shell will not be able to reach the target.
In addition, a zoom scale will be displayed on the interface. By scrolling the mouse wheel, you can switch from the regular top-down view—Artillery mode—to Trajectory View. You can also press the G key to do this if you prefer.
As the velocity and trajectory of all three shell types are different in the new system, we decided to add one more feature to make SPG players’ lives easier: an estimated shell travel time indicator next to the crosshair. It will help players understand when to make a shot to increase their chance of hitting a moving target.
More Tactical Options for Both Sides
After the release of all these changes, both SPGs and their opponents will have more tactical options. SPG players will have to observe the course of the battle and respond to changes on the battlefield, keeping in mind that the enemy team will receive more information about them than they do now. On the other hand, three shell types in the arsenal will help them better adapt to different combat situations.
Commanders facing SPGs will receive much more strategic information and will be able to use it to actively counteract SPGs. Sound Detection, brighter shell tracers, and field of fire markers on the minimap will help you read the combat situation better and reduce the amount of damage you take from artillery fire. The reworked Intuition skill will make it easier to react to changing combat situations. Finally, the total stun time in the game will decrease, which is surely a change for the better.
Good luck on the battlefield, Commanders! We hope you’ll enjoy all these changes!
Reworked HE Shells: How to Play to Their Strengths
Greetings, Commanders!
After a series of Sandbox and Common Tests, the reworked HE shells will be introduced to the game in Update 1.13. Their damage-dealing mechanics are about to change, so let's go over how the new HE shells will work once more. We also want to take a closer look at some striking gameplay examples to demonstrate how World of Tanks will change and give you some tips for using the reworked HE shells.
Main Goals of HE Shell Rebalancing
When starting the complex HE shells rework, we wanted to change their damage-dealing mechanics in the following situations:
Dealing high frontal damage to well-armored vehicles. This is especially frustrating for commanders in vehicles with good armor who cannot play to their vehicles' strengths.
Lack of demand for HE shells for low- and medium-caliber guns due to their unpredictable damage-dealing potential. The unpredictable nature of HE damage from these calibers means HE shells are hardly used.
Some other unrealistic or frustrating aspects of the previous mechanics. For example, an HE shell fired at the commander's cupola can set the enemy vehicle’s engine on fire.
At the same time, we wanted to keep all the things that you love about HE shells, including:
Exciting and fun gameplay.
Ease of use.
High chance of causing damage.
Here's how the new damage mechanics will work.
HE Shells: Changes to Damage Mechanics
1. HE shells now deal damage at the point of impact.
Upon penetration of enemy armor, nothing will change—if a shell gets inside the vehicle, you will still be able to cause a lot of damage. But if its penetration value is not high enough, damage will be calculated at the point of contact with the armor. At the same time, after exploding, small pieces of spall will be scattered inside the vehicle, injuring crew members and causing damage to modules, as well as to the armor itself. The spall radius will be the same as the shell’s burst radius in the previous system.
When using HE shells, remember that if the shell reaches the armor, it will deal damage. The amount will depend on the armor thickness at the point of impact—the thinner the armor, the lower its nominal value and the greater the damage. And vice versa—the thicker the armor at the point of impact, the less damage the shell will cause if it does not penetrate.
Just like when using Armor-Piercing (AP) shells, you should aim at vulnerable areas and wait for a good moment to cause high damage. As a result, firing HE shells at well-armored areas of enemy vehicles will become less effective—it will be impossible to cause as much damage as before.
2. HE shells will be able to penetrate screens, tracks, and the wheels of wheeled vehicles at the point of impact. They will also be able to penetrate insignificant and/or destructible objects (fences, destructible structures, etc.)—this is a direct consequence of changing the HE shell damage model from the area of influence to the point of impact.
When an HE shell penetrates a screen, its armor penetration values decrease. Accordingly, the chances of penetrating the armor are reduced, so when the shell hits the armor, it will already be "weakened", and penetration will only occur if the armor is rather thin. If an HE shell penetrates a screen and explodes on the armor, the "spall" mechanic takes effect and is guaranteed to cause damage. The amount of damage will depend on the thickness of the armor plate on which the HE shell exploded.
Compared to the previous version of damage mechanics that was available before Update 1.13, we added the ability to penetrate screens, external modules, and destructible objects. However, after penetration, the armor penetration of HE shells will be reduced by a special coefficient.
There will be two different coefficients of armor penetration loss: 1.0 for destructible objects and 3.0 for screens, tracks, wheels, and external modules. This means that, for example, after penetrating a screen with 20 mm of armor, the HE shell will lose 60 mm of its penetration value, and the next attempt to penetrate a vehicle's armor will be calculated considering this reduced value.
As a result, the probability of penetrating the main armor after penetrating the screen will greatly decrease, especially for vehicles with weak side armor. The probability of taking high HE damage when your vehicle is penetrated with an HE shell will also be lower.
If an HE shell does not penetrate a screen and therefore does not reach the armor, it will not cause any damage at all. To fire HE shells effectively through screens, you will need to consider the thickness and slope of the screens.
If an HE shell penetrates the tracks, screens, and wheels, but there's no armor behind them, it will deal no damage. If there is armor, it will cause damage.
Reworked HE Shells: Gameplay Tips
Now let's see how the new mechanics will work, with a few striking gameplay examples.
Let's imagine that there are two heavies in a duel—the M103 and the 60TP Lewandowskiego, equipped with a 150+ mm gun. The Polish brawler loads an HE shell and shoots at the opponent’s front without aiming. The shell hits the gun mantlet of the M103, which is a screen with very thick armor. Due to the insufficient penetration values, the shell doesn’t penetrate it and deals no damage.
Instead, it should have fired at the opponent’s vulnerable areas and not at the silhouette. To deal significant damage with HE shells in situations where you can only fire at a well-armored area, you need to spend significantly more time and shells. In this case, it will sometimes be wiser to change the type of shell or choose a different tactic.
Well-armored vehicles can reduce the damage they take from HE shells by exposing thicker areas of armor. In fact, you should follow the same tactics as when countering Armor-Piercing shells.
When facing heavily armored vehicles, try to shoot at vulnerable areas for a chance to deal damage. To do this, some preparation is required. Consider the new mechanics when planning tactical actions, or when choosing a direction of attack or a place to brawl with opponents.
Another illustrative example:
The FV4005 Stage II fires an HE shell at the side of the Maus’ frontal cheeks (which are 260 mm thick). The shell hits the armor, but due to an insufficient penetration value, it does not penetrate the armor. Instead, the shell explodes on the surface. Spall is created inside the vehicle, causing damage to the Maus, but the value is noticeably smaller (250–350 hit points) than it was with the previous mechanics.
Now you also need to aim carefully at weak points, not only when shooting at heavy tanks with good armoring, but also at any other vehicle. It would be unwise to fire an HE shell at random in the front or at the enemy's contour. When shooting blindly, you run the risk of hitting a well-armored area or a screen that you can't penetrate. Here’s an example.
The Type 5 Heavy loads an HE shell and wants to hit a vehicle with light armoring, say, the Progetto M40 mod. 65. Thinking the old way and not considering the peculiarities of the new mechanics, it shoots at random at the silhouette of its opponent. But the shell hits a screen, and its penetration values are not enough to penetrate it. In this case, the Type 5 Heavy won’t deal any damage to the Progetto M40 mod. 65.
Instead, it should have waited for a more opportune moment to shoot at the sides, in the areas with the thinnest armor, or at the tracks (if there is armor behind them), which are now also considered a screen. In this case, the Type 5 Heavy would most likely cause maximum damage (if penetrating the armor) or some amount of damage (if penetrating the tracks and hitting the armor).
To help you determine the outcome of your shot, we’ve improved the armor penetration indicator. In Sniper mode, you will be able to use the indicator’s color to predict the outcome of your shot:
Red: no damage (the shell will not penetrate the screen/track/wheel and will not cause damage)
Yellow: damage will be caused, but not in full (the shell will penetrate the screen/track/wheel, and it will reach the armor but not pierce it)
Green: full damage (the shell will penetrate the screen/track/wheel and pierce the armor).
HE Shells Rework: Vehicle Rebalancing
After all the tests, considering the data received and your feedback, we’ve refined the characteristics of vehicles with HE-based gameplay, which required rebalancing (the KV-2, Type 5 Heavy, and some other tanks) to make them feel more comfortable under the new conditions. Some of their parameters have been improved, while others have been slightly decreased. Take a look.
The test results also indicate that wheeled vehicles demonstrate high combat effectiveness in the new system. They feature speed, agility and one of the best gun stabilization values in the game. To better balance these speedy scouts, we've reduced the penetration of HE shells of the three top-tier Tech Tree vehicles (VIII–X). For the Panhard AML Lynx 6x6 and the Panhard EBR 90, it was decreased from 90 to 75 mm, for the Panhard EBR 105—from 105 to 75 mm. We have also increased the dispersion of those guns.
There are other vehicles with HE guns in World of Tanks. But after all the tests on Sandbox we completed together with you, we see that their effectiveness has not changed, so there is no urgent need to adjust their characteristics. We will continue to monitor their effectiveness after the release and, if necessary, make changes to their performance.
[previewyoutube="w5Q0PUOCrQI;full"]
Gameplay Under New Conditions
In the new system, HE shells are best suited to the role of tactical shells in the following situations:
If you want to reset a base capture.
To knock off an enemy’s track*.
To finish off vehicles that are low on HP.
Beware, it will be a bit harder now because you need to aim at the drive wheel to do so!
Thanks to the new mechanics, it will make more sense to use HE shells in certain guns (especially medium and low caliber ones) than before.
Of course, you can continue to use HE shells to fire without aiming, but when hitting the armor, your shot effectiveness will be lower. And when hitting the frontal or well-armored areas, it will be much less effective. As a result, when brawling with vehicles with good armoring you will need to rely more on basic, established and understandable game mechanics, instead of spamming HE shells. Those commanders who use HE shells will need to aim and focus on the weak areas of the tank they are brawling with.
The way the HE shell system will work from now on means you will not be able to completely avoid taking damage when fired upon. However, on occasions when the enemy's HE shell hits a thick screen that it can't penetrate or penetrates a screen which doesn't have armor behind it, you will not receive any damage.
To counter the new HE shells effectively, try to expose sections with thicker armor, or thick screens or screens that have no armor behind them. For example, you can take a position in which the opponent will be able to penetrate the tracks, but not hit the armor. In this case, HE shells won't cause any damage. This way, you can not only safely expose screens and/or tracks, but also provoke your opponent into shooting prematurely.
Get ready to experience battle with the reworked HE shells, Commanders!
Battle Pass Season V: Event Guide
Commanders! Are you ready? The fifth Season of Battle Pass begins on June 23!
The new Season will run for three months. It comprises three Chapters, each with 50 consecutive Stages—and there are tons of rewards on the line for each Stage you complete!
The core rules of this epic activity remain unchanged. However, we’ve increased the number of Battle Pass Points you can earn by fulfilling Daily Missions. Plus, you’ll now receive Points for completing Bonus and Special Missions (for performing 45 missions).
We’ve also continued to expand the list of game modes in which you can earn Battle Pass Points. You can now receive them when playing in all current modes, including the experimental Recon Mission, where you can explore maps that are in the later stages of development.
To earn Battle Pass Points and advance through Stages, perform your best in Random Battles (except for Grand Battles) in Tier VI–X vehicles, Ranked Battles Season X in Tier X vehicles, and Recon Mission and Frontline modes. You can also get Points for completing Daily Missions in vehicles of any tier.
Three new Battle Pass Core Vehicles—the AMX 50 B, the CS-63, and the FV217 Badger—have special rules for obtaining Battle Pass Points.
For every Stage completed, you’ll earn valuable in-game Base Rewards. These include a new piece of Bounty Equipment—Bounty Exhaust System—which we’re introducing this Season. You’ll be able to grab it once you’ve complete Stage 90 in the second Chapter.
If you want to get even more rewards, you'll need an Improved Pass to get the prizes in the Improved Rewards Track. The Improved Pass will be available for both gold and real money.
After completing each Chapter of Season V, you’ll get a unique crew member.
You’ll be able to choose one of three progressive styles for the three Core Vehicles at the beginning of each Chapter. They will change the appearance of the vehicles and receive new 2D and 3D elements once you complete certain progression Stages.
You’ll also get Tokens, which you can exchange for rare vehicles in a special section of the in-game Store. All Battle Pass Tokens you earn will be accumulated throughout the year, and you can even spend them in the next Season of Battle Pass.
Fight for Battle Pass Points and earn tons of cool rewards in Season V, Commanders!
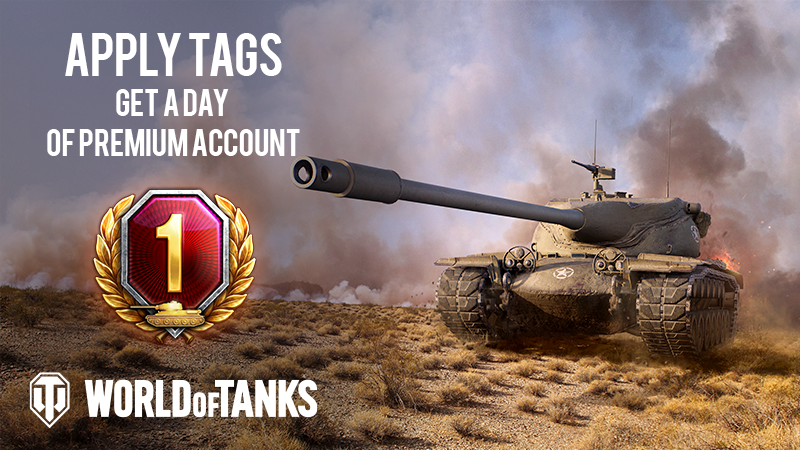
Do you think a "Collectathon" tag is right for WoT? Are visual components, such as “Historical” or “Realistic” important to you? Maybe you like the tank driving experience or contests with worthy rivals? Tell us more by adding the tags you think are suitable for World of Tanks, and we'll grant you one day of WoT Premium Account!
Go to the Store page
Find "Popular user-defined tags for this product" section on the right-hand side of the Store page and click on "+".
Select from existing tags (by clicking the "+" symbol next to the tag) or create your own.
Share your tags in the comments under this post.
NOTE! During this event, the 1 day of WoT Premium Account will only be granted once, regardless of the number of tags suggested/added. Please allow for a few days for the Premium Account to be granted to your account.
Make tag suggestions, add them and get free Premium Account. Sounds like a good deal to us!
Guide: Directives
Directives are special game items that can be mounted on Tier V–X vehicles before combat. They give an additional advantage over the course of a single battle. This advantage may prove critical in certain situations, giving you an edge over your opponents.
Two Types of Directives
For equipment. These directives increase the effect of mounted equipment for the entire duration of a single battle. You can purchase them for bonds. For crew. These directives will improve the trained skills or perks of crew members or provide the effect of a skill or perk not yet trained. They are applied for the duration of a single battle. You can purchase them for credits.
For equipment
Aim Tuning Reduces aiming time. Effect: +2.5% to aiming speed (with Enhanced Gun Laying Drive, Wear-Resistant Gun Laying Drive, or Bounty Gun Laying Drive mounted) Orderly Ammo Rack Reduces gun reloading time. Effect: −2.5% to loading time (with Gun Rammer, Innovative Loading System, or Bounty Rammer mounted) Stabilizer Greasing Improves precision by reducing dispersion during firing, turret traverse, or vehicle movement. Effect: −5% to dispersion after firing, during movement, and turret traverse (with Vertical Stabilizer, Stabilizing Equipment System, or Bounty Stabilizer mounted) Optical Calibration Increases your vehicle’s view range, allowing for earlier spotting of enemy vehicles. Effect: +2.5% to view range, up to 445 m (with Coated Optics, Experimental Optics, or Bounty Optics mounted) Vent Purge Improves crew skills that affect vehicle characteristics. Effect: +2.5% to all crew skills (with Improved Ventilation, Venting System, or Bounty Ventilation mounted) Pre-Battle Maintenance Increases the repair speed of destroyed modules in battle. Effect: +10% to repair speed (with Modified Configuration, Improved Configuration, or Bounty Protection Technology mounted) Fuel Filter Replacement Increases engine power. Effect: +4% to engine power (with Turbocharger of any class or Improved Compressor mounted) Polished Lens Reduces aiming circle size. Effect: −2% to the aiming circle size (with Improved Aiming of any class or Bounty Aiming mounted) Exhaust Insulation Increases the concealment of a stationary or moving vehicle. Effect: +2% to concealment of a stationary or moving vehicle (with Low Noise Exhaust System of any class mounted)
For crew
Natural Cover Grants the Concealment skill, which reduces vehicle visibility. If the skill is not trained to 100%, grants all crew members the Concealment skill trained to 100%. If the skill is trained to 100%, grants an additional 10% to vehicle concealment. Gearbox Intricacy Grants the Smooth Ride skill, which improves accuracy when firing on the move. If the skill is not trained to 100%, grants the Smooth Ride skill trained to 100%. If the skill is trained to 100%, doubles the effect of the Smooth Ride skill. Steady Hand Grants the Snap Shot skill, which improves accuracy during turret traverse. If the skill is not trained to 100%, grants the Snap Shot skill trained to 100%. If the skill is trained to 100%, doubles the effect of the Snap Shot skill. Combat Course Grants the Clutch Braking skill, which increases hull traverse speed. If the skill is not trained to 100%, grants the Clutch Braking skill trained to 100%. If the skill is trained to 100%, doubles the effect of the Clutch Braking skill. Shell Organizer Grants the Safe Stowage perk, which increases ammo rack durability (the shells don’t come into contact with each other). If the perk is not trained to 100%, grants the Safe Stowage perk trained to 100%. If the perk is trained to 100%, provides an additional 37.5% to ammo rack durability. Increased Focus Grants the Sixth Sense perk, which allows the commander to determine whether the vehicle has been spotted by the enemy. If the perk is not trained to 100%, grants the Sixth Sense perk trained to 100%. If the perk is trained to 100%, the Sixth Sense perk is activated one second earlier. Duty Comes First Grants the Call for Vengeance perk, which allows a Radio Operator who has survived the destruction of their vehicle to report enemy positions for an additional two seconds (12 seconds in total). If the perk is not trained to 100%, grants the Call for Vengeance perk trained to 100%. If the perk is trained to 100%, allows an additional three seconds for the Radio Operator to report enemy positions (13 seconds in total). Focus on Target Grants the Designated Target perk, which makes targeted enemy vehicles visible for an additional two seconds. If the perk is not trained to 100%, grants the Designated Target perk trained to 100%. If the perk is trained to 100%, adds an additional two seconds to the time a targeted enemy vehicle stays visible (4 seconds in total). Experienced Firefighters Grants the Firefighting skill, which enhances the crew members’ firefighting abilities. If the skill is not trained to 100%, grants all crew members the Firefighting skill trained to 100%. If the skill is trained to 100%, adds an additional 50% to the Firefighting skill.
Mounting Directives
You can mount only one directive on your vehicle before a battle. The mounted directive is effective for one battle. To mount a directive: 1. Click the directives slot. 2. Select the desired directive and click on it. 3. Click “Apply”. The directive is purchased and mounted on the selected vehicle. If the directive has already been purchased, it is mounted on the selected vehicle from the Depot.
You can purchase more than one directive by clicking “Purchase” under its name. Spare directives are stored in the Depot in the Stock section under the Consumables tab. To automatically supply and mount the selected directive after it has been used in battle, click the Auto‑resupply checkbox.
Currently, some directives can only be received in limited quantities as a reward for in-game events. The following directives are unavailable for purchase: ● Fuel Filter Replacement ● Polished Lens ● Exhaust Insulation These directives are only automatically resupplied until they are available in the Depot.
Removing Directives
To remove a mounted directive: 1. Click the directives slot. 2. Click “Send to Depot” under the name of the mounted directive. 3. Click “Apply”. The directive is sent to the Depot and can then be mounted on another vehicle. Please note that directives cannot be sold.
Good luck (and maximum efficiency) on the battlefield!
Guide: Exterior Customization
Customization Methods
To make your vehicle a truly individual and unique battle machine, you can customize its exterior. To customize the whole vehicle or just some parts, you can use one of the following customization methods: • Preset styles • Custom styles
Preset Styles
Preset styles are a pre-made set of customization elements for all map types. Each preset style can include paints, camouflage, decals, inscriptions, emblems, and visual effects. Preset styles can be divided into the following types: • Rental styles: Styles that can be rented for any vehicle for a number of battles using credits • Main styles: Permanent styles that can be purchased using gold for some vehicle tiers for an unlimited number of battles • Special styles: Styles that can be received as a gift in special events or earned in missions and some battle modes like Ranked Battles • Unique styles: Rare 3D styles that can be obtained from Large Boxes during Holiday Ops and applied to Tier X vehicles
Apart from the balanced design for all map types, preset styles usually provide a concealment bonus. Preset styles are applied to the whole vehicle. Depending on the adjustability, preset styles can be: • Adjustable: Allows you to remove or replace elements that come with certain styles, such as the Flora adjustable 2D style • Adjustable after receiving progressive decals: Allows you to make adjustments to most preset styles in the game once you receive a progressive decal for the selected vehicle • Unadjustable: Does not allow you to edit styles, such as rental styles
How to Apply Preset Styles
To apply a preset style to your vehicle: 1. In your Garage, click Exterior. In the lower part of the screen, the exterior customization panel is displayed. 2. Go to the PRESET STYLES tab on the customization panel. 3. Select a style—it is automatically applied to your vehicle. To see the exterior design for other map types, switch between them using the tabs on the left side of the screen. To learn more about some of the styles, click (Style Details). The style's concealment bonus, historical accuracy, type, and description will be displayed in a panel on the right side of the screen. While applying a Rental style, you can turn on automatic rent extension by clicking (Extend Rental Period) in the radial menu in the center of the screen. 4. If you are applying an adjustable style, click (Adjust Style) to edit it with the available customization elements. 5. To rent or buy the selected style, click Go to Purchase in the upper-right corner of the customization panel. In the screen with the elements for purchase, click Purchase and Exit.
NOTE: To undo all changes and cancel the purchase, click Cancel in the window above the Go to Purchase button. If you change your mind and decide not to buy one or more customization elements, clear the corresponding checkbox in the screen showing the elements for purchase.
How to Remove Preset Styles
To remove a preset style from your vehicle: 1. In your Garage, click Exterior. 2. Go to the PRESET STYLES tab. 3. Click the vehicle, then click (Remove Style) in the radial menu. 4. Click Apply and Exit in the upper-right corner of the customization panel. The removed styles are preserved and can be reapplied to the same vehicle or to any other that this style is available for. You can also sell permanent styles that were purchased using credits: right-click the style and select Sell.
NOTE: Rental styles can be removed and reapplied to the same vehicle until the end of the rental period. However, they can’t be sold.
Custom Styles
Custom styles are a range of customization elements that you can apply to your vehicle in various combinations.
The following elements are available for creating a custom style:
Paints Every nation has a range of paints available for vehicle decoration. Paints can be applied to five vehicle parts: the hull, turret, suspension, gun, and gun mantlet. It takes one paint bucket to paint one part, which means a maximum of five buckets are needed to paint the entire vehicle for a map type.
Camouflages This exterior customization is functional and can enhance your vehicle’s concealment. You can apply three types of camouflage that change automatically depending on the map you are playing on. Camouflage can be applied separately to the hull, turret, and gun. This allows you to combine camouflage. Apart from different combinations, you can also edit the scale and, in some cases, the color palette for each camouflaged vehicle part.
NOTE: To get a concealment bonus, you have to apply camouflage to the hull. If you camouflage only the turret and gun, your vehicle’s visibility is not affected.
Decals These are large images that spread over several vehicle parts. You can scale and flip the image horizontally. The number of available slots on the vehicle for decals depends on the aspect ratio. Note: The number of decals applied simultaneously to a vehicle is limited to three.
Emblems Vehicles can be decorated with emblems instead of standard flags and signs, like red Soviet stars or German crosses. Depending on the vehicle model, you can apply one or two emblems to it.
Inscriptions These are decorative elements represented by a short text or number. Textual inscriptions are non-editable and can be either specific to a certain vehicle nation or applicable to any vehicle in the game. As an option, you can decorate your vehicle with a tactical number—an editable digit combination with a range of fonts available. Depending on the vehicle model, you can apply one or two inscriptions to its turret or hull.
Effects Effects can give your vehicle a battle-hardened look or make it shine like a brand-new combat machine fresh from the garage. Effects allow you to add wear or gloss to the paints and camouflage applied to your vehicle.
All exterior customizations are layered on each other in the same order as they are presented in the customization panel. For example, if you apply camouflage after painting your vehicle, the camouflage will cover the paint.
Progressive Elements
Progressive elements are customization elements for a vehicle that are earned for fulfilling certain battle conditions in the vehicle, such as earning mastery badges. Each progressive element has levels that can be reached after fulfilling conditions of increasing difficulty. The element's appearance changes with each level. Upon receiving a progressive element, you get one instance of it for free. To use this element for different map types or multiple slots, you will need to purchase additional instances of this element. You can apply a progressive element of any achieved level to your vehicles. Once acquired, progressive elements can be used for most preset styles.
To learn about progressive elements and the levels you have unlocked, go to the Progressive elements tab in the left part of the screen.
How to Apply Сustom Elements
To apply a custom style element to your vehicle: 1. In your Garage, click Exterior. In the lower part of the screen, the exterior customization panel is displayed. 2. Go to the CUSTOM STYLES tab on the customization panel. 3. In the left part of the screen, select the map type for which you want to customize your vehicle. 4. In the customization panel, click paint, camouflage, or any other element. The element’s icon is displayed to the right of the cursor . To select elements of a particular group or aspect ratio (for decals), use the filter on the left side of the customization panel. 5. Click all the vehicle parts you want to customize with this element. To speed up, click Paint Whole Vehicle for paints and camouflage or Apply for All Types of Maps for emblems, inscriptions, and styles in the window to the right of the vehicle. 6. To buy the applied customization, click Go to Purchase in the upper-right corner of the customization panel. In the screen with the elements for purchase, сlick Purchase and Exit.
NOTE: To undo all changes and cancel the purchase, click Cancel in the window above the Go to Purchase button. If you change your mind and decide not to buy one or more customization elements, clear the corresponding checkbox in the screen with the elements for purchase.
To view the current list of applied customization elements for the selected map type, click to the left of the Go to Purchase button.
Customization elements can be purchased without applying them to the vehicle: 1. Right-click the element and select Add to cart. 2. In the Purchase Confirmation window, set the necessary number of elements and click Purchase. To view only the elements you have in stock, use a special filter: click (In Depot) on the left side of the customization panel.
How to Remove Custom Elements
To remove a custom style element from your vehicle: 1. In your Garage, click Exterior. 2. Go to the CUSTOM STYLES tab. 3. Select the map type and the type of customization you want to remove. 4. The vehicle parts with the selected customization applied are marked with a special icon . Click the part you want to clear. 5. In the radial menu, click the Remove button—for example, Remove from Turret or Remove Emblem. To remove uniform painting or camouflage, click Remove from Vehicle. To remove emblems, inscriptions, and visual effects applied for all map types, click Remove for All Map Types. 6. Click Apply and Exit in the upper-right corner of the customization panel.
NOTE: To remove all customization and restore the basic exterior for the selected map type, click to the left of the Go to Purchase button, then click Remove All in the window displayed. The removed element is preserved and can be reapplied to the same vehicle or on any other that this element is available for. You can also sell elements: right-click the element and select Sell.
Historical Accuracy
All customization elements in the game can be historical or non-historical. The latter are marked with a icon. How does it affect the game?
By default, all vehicles are displayed only with a historical or basic exterior. The display of non-historical designs can be turned on in the game settings. To turn on the display of non-historical exteriors: 1. In your Garage, press Esc and select Settings. 2. In the General tab, unselect the Hide non-historical elements checkbox, then click OK. After you turn on the display of non-historical exteriors, you will see all customization styles on the battlefield.
Be aware of these settings when creating a custom style. If there is even one non-historical element in your vehicle customization, the whole exterior is considered non-historical and will not be displayed for other players with default settings.
Pay attention to the button in the upper-right corner of the customization panel. Once you apply a non-historical element, a special icon is displayed. If you want all players to see your vehicle’s custom style, click [icon] and remove all non-historical elements from the list. If necessary, pick alternative options from among the historical elements.
Show your teammates and your enemies who you really are!
Warhammer 40,000 Tanks Storm the Battlefield
In honor of the 2021 Warhammer Skulls event, Warhammer 40,000-themed content is now available in World of Tanks. Here’s your chance to get a truly terrifying Tier VI Premium heavy tank, the KV-2 (R) Valhallan Ragnarok and the Mordian style set for BDR G1 B.
This new piece of DLC will be available from 3 June (5:58pm BST / 9:58pm PST) to 10 June.
[previewyoutube="yTlha_8R2jU;full"]
The KV-2 (R): At a Glance
Firepower: The 152 mm howitzer will do lots of damage to any and all tanks in its path, regardless of tier, with its HE shells. Hunt big game like Tier VIII tanks or cripple Tier V ones!
Protection: Although not particularly thick, the KV-2 (R) armor is perfect for side scraping. Make sure your front plates protected and you good to go into firefight.
Speed: Although it won’t offer much in terms of acceleration, the KV-2 (R) can hit 35 km/h if given enough time on flat ground, or when going downhill.
KV-2 (R) Valhallan Ragnarok comes with a 100% Crew with the Brothers in Arms perk trained.
Also in the package:
The Mordian style set for the BDR G1 B
7 days of Premium Account
30 tokens with x5 XP (can be applied after the battle) for KV-2(R)
1 Garage slot
NOTE: In a future update, we will rework the HE shell mechanics. However, we will also improve some of the KV-2's characteristics, so the overall gameplay will remain largely the same. You can read more about it on our portal.
KV-2 (R): Latest news from the Supertest
The KV-2 (R) can do a lot without demanding much in return. In discussions related to HE shells on the Sandbox, feedback on the KV-2 and its Warhammer 40K counterpart was a central theme. These vehicles are very popular and dear to the heart of many tankers.
The statistics showed that no significant changes in their performance had been introduced. The difference in the values of damage caused during the first HE shells test on the live server was less than 6%. During the second test, this difference was even smaller: nearly half at 3%.
We will be closely monitoring the situation and will let you know of any changes before they go live.
This is your chance to get truly terrifying vehicles from the Warhammer 40,000 universe. Don’t miss out!
A Platoon is a unit of several players who will go into battle on the same team. You can play in a Platoon in the following modes:
Random Battles (Standard Battles, Assault, Encounter, and Grand Battles)
Frontline
Steel Hunter
Some special modes for game events
You must select a mode before creating a Platoon. The number of players in a Platoon depends on the selected mode.
Random Battle: 2–3
Frontline: 2–3
Steel Hunter: 3
NOTE: Your actual player name is displayed to the other members of the Platoon, even if you selected Anonymize your nickname in battle in the game settings.
Platoons: Bonuses
+15% XP For playing in a Platoon, regardless of vehicle tier, battle results, or Premium Account +15% credits If you have WoT Premium Account +10% credits If you don’t have WoT Premium Account, but at least one of the Platoon members does
NOTE: These bonuses do not work for Dynamic Platoons.
Creating a Platoon
To play in a Platoon, you can create one and invite your friends, or choose Find Players to be matched with other players. To create a new Platoon:
Click Create a Platoon to the left of the Battle! button.
In the drop-down menu, click New Platoon. The Platoon window will be displayed.
Once the Platoon is created, you will be the only player in it. To form a Platoon, invite your friends or find other players.
NOTE: You can also create a Platoon with one of your friends from your Contacts in the bottom left of your Garage. To do this, right-click the player's name in the contacts list and select Create Platoon. After accepting your invitation, the player will join the Platoon and appear in the Platoon window.
Searching for Players
An automatic search allows you to find players who want to play in a Platoon and correspond to your mastery level and search preferences. An automatic search considers the following criteria:
World of Tanks Rating (WTR): Players in a Platoon should have a similar WTR.
Number of battles in each vehicle tier: The system compares the number of battles that each player has fought at a specific tier. Only tiers of vehicles that are present in the player's Garage and ready to battle are considered. Players with similar numbers in each available tier join the same Platoon.
Server: The search is performed within one server.
Available vehicles: Players are matched according to the number of vehicles of each tier in their Garages. Only ready-to-battle vehicles are considered. The selected vehicle does not affect the search results. You can select a different vehicle before going into battle with your Platoon.
Players of the same clan: Members of your clan have a higher chance of joining a Platoon with you.
In addition to the main criteria, you can set your own search preferences:
Vehicle tiers. Select vehicle tiers for Platoon players, and the system will search only for players with vehicles of the corresponding tiers.
Voice chat. Select this parameter if you want to use voice chat to communicate with your Platoon. This option is not available if you disabled voice chat in the game settings.
You can use the Platoon menu in your Garage and search for players before creating a Platoon. In this case, the Platoon is created automatically and includes you and the players found. If the Platoon has already been created and has vacant places, you can activate the player search in the Platoon window. Note that starting an automatic search cancels all sent but unanswered invitations.
Search From the Garage
To set search preferences and find suitable players:
Click Create a Platoon to the left of the Battle! button.
In the drop-down menu, click (Set Search Preferences) and select the desired parameters.
Click Find Players. The search for players begins.
Search From the Platoon Window
NOTE: Only the Platoon Commander can find players from the Platoon window.
To set search preferences and find suitable players:
In the Platoon window, click (Set Search Preferences) and select the desired parameters.
Click Find Players. The search for players begins.
If there are no players within the selected tiers, the system continues to search for players outside them. The Platoon Commander is marked with a special icon . The player with the highest WTR becomes a Commander in the following cases:
If the search is performed before the Platoon is created
If the search is performed from the Platoon window and there is only one player in the Platoon
The Commander will not change if the Platoon already consists of two players.
NOTE: A Platoon Commander can transfer their permissions to another player. To do this, right-click the target player in the Platoon window and select Transfer Commander's permissions.
Inviting Players
If the Platoon is created and has vacant places, you can invite players to join you. You can send invitations to several players. However, the number of places in a Platoon is limited and only those who accept your invitation first will join the Platoon.
NOTE: Only the Platoon Commander can invite players.
To invite players to a Platoon:
In the Platoon window, click Invite Players.
In the Invite to Tactical Unit window, drag the players from your contact list to the right part of the window. If a player is not among your contacts, click Search Outside Contact List.
Add a message to your invitation if you'd like.
Click Invite. The invitation is sent to the selected players. They will be added to the Platoon as soon as they accept the invitation.
Accepting an Invitation
If you are invited to a Platoon, a special notification appears in the bottom right of the Garage. It shows who sent you the invitation along with a message, if there is one. To accept the invitation, click Accept. The Platoon window will be displayed.
The invitation expires after a while. You also won’t be able to accept the invitation if the Platoon is full or has been dismissed.
NOTE: You can set from whom you want to receive Platoon invitations. In the game settings, go to the General tab and select Accept invitations only from friends in the Garage, then click Apply.
Excluding Players
The Platoon Commander can exclude a player from the Platoon before the battle starts. To exclude a player, right-click the player in the Platoon window and select Exclude from tactical unit.
If you search for players after this, the excluded player will not appear in your Platoon again.
NOTE: If you want to leave the Platoon yourself, click Leave Platoon in the Platoon window.
Communication in a Platoon
Members of the Platoon can exchange text messages in the Platoon chat and talk to each other using the voice chat. These are available both in the Garage and during battle.
Platoon Chat
In the Garage, find the Platoon chat in the right part of the Platoon window. During the battle, two chat modes are available: one for the whole team, and one for your Platoon. Press Tab to switch between modes.
Voice Chat
To enable or disable the voice chat, click in the Platoon window or press H during the battle.
NOTE: Voice chat is disabled in Dynamic Platoons by default.
If voice chat is enabled and you want to say something to your Platoon, press and hold Q. Release the button when you are done. You can disable the voice chat with specific users in battle or in the Garage. Right-click the player's name in the formation or ally team roster and select Disable Voice Chat.
NOTE: If you do not plan on using voice chat at all, you can disable it in the game settings.
Final Preparations
Careful preparation for battle is one of the most important factors when playing in a Platoon. Use Platoon and voice chats to discuss vehicles for the battle, excluded maps and battle types, tactics, and other important issues.
Vehicle Selection
There are several rules that determine which vehicles you can select while playing in a Platoon:
Platoon players can only select vehicles of the same tier as the Platoon Commander’s vehicle.
Only one SPG per Platoon is allowed.
A Platoon for Frontline must include only Tier VIII vehicles.
A Platoon for Steel Hunter must include only special vehicles used in this mode.
NOTE: There are certain vehicles in World of Tanks which benefit from Preferential Matchmaking. This means that they can't go into battle with enemies above a certain tier. If you play in a vehicle with Preferential Matchmaking, but at least one of your Platoon mates doesn’t, you will not benefit from this feature.
Excluded Maps and Battle Types
A Platoon cannot play on maps and in battle types excluded by the Platoon Commander. Note that only the Commander’s settings are taken into account.
Once you have selected your vehicle, click Ready! to confirm that you are good to go. When all players have confirmed that they are ready, the Commander can send the Platoon to the battlefield. To do this, click the Battle! button.
NOTE: After players confirm that they are ready, their vehicles are displayed in your Garage. This function can lead to low performance or graphics issues. To disable it, unselect Display vehicles of Platoon members in the Garage in the game settings under the General tab, then click Apply.
Dynamic Platoons
You can also create a Platoon during a battle. This is known as a Dynamic Platoon.
To create a Dynamic Platoon:
During a battle, hold Ctrl and mouse over an ally’s name in the Team Panel.
If the player can be invited to a Platoon, this icon is displayed to the left of the player’s name.
Click (Add to Platoon) to send an invitation to your ally.
The icon is displayed next to the ally’s name. Your teammate is notified of the invitation and can accept it during or after the battle.
If you want to cancel an invitation, hold Ctrl and right-click the player’s name. Select Recall Invitation.
Joining a Dynamic Platoon If you are invited to a Platoon, you'll receive a notification in the battle chat and see an icon next to the player who invited you. To accept an invitation, hold Ctrl and click the icon—you’re now in their Platoon!
It’s dangerous to go alone: Create Platoons and fight side by side with your teammates!
What to expect from Update 1.13
Commanders, Update 1.13 looks to be one of the largest updates in recent memory and we’ve got the lowdown on everything you can expect to see!
In this article we will share some information about the reworked mechanics for causing damage with HE shells and new features for countering SPGs. We’re also continuing to rebalance and improve the performance of four Tier VIII Premium vehicles and six reward tanks that you can obtain for achievements in battles on the Global Map. Plus, we’re introducing a new mode called Recon Mission, implementing a fresh set of interface solutions, and adding several other new features. Let’s get down to it!
[previewyoutube="hVdW1zVavWg;full"]
Contents
HE Shell Reworking
New Tactical Features to Counteract SPGs
Changes to SPGs
Vehicle Rebalancing Continues!
Changes to the Mode Selection Interface
Explore New Maps in Recon Mission!
Minsk Map Rebalancing
Interface Improvements
Battle Pass: Season V Is Coming!
Ranked Battles Season X
Creating New Blueprint Fragments
A few months ago, we completed a whole series of Sandbox iterations in which we all tested important changes to key game mechanics. Together, we have come a long way and achieved a high-quality result. We fully assessed the impact of the new mechanics on the game's ecosystem and made sure that it works correctly and remains stable. Each Commander can now try out these important changes during the Update 1.13 Common Test.
One of the most important features of the Sandbox test that will be added to the game in this update is the complex rework of HE shells. Our main goal was to rework HE shells while keeping all the best things that you love about them—fun and exciting gameplay unique to the game, ease of use, and high chances of causing damage. We had to solve many issues, but we succeeded! Here’s a quick refresher on how the new mechanics for causing damage with HE shells work.
1) In the new system, HE shells will be able to penetrate armor and deal damage at the point of impact.
Upon impact with armor, an HE shell will still try to penetrate, but if its penetration value is not high enough, then damage will be calculated at the point of contact with the armor. At the same time, after exploding, small pieces of spall will be created inside the vehicle. By scattering inside the vehicle, the spall will injure crew members and cause damage to modules, as well as to the armor itself. The spall radius will be the same as a shell’s burst radius in the current system.
There is now a direct relationship between armor thickness and the amount of damage: the thicker the armor, the lower the damage. Heavy tanks with good frontal armor will feel more confident as they will take less HE damage. The use of HE shells by medium and small calibers will make more sense, since they tend to do minimal damage when hitting armor.
2) With the new mechanics, HE shells will be able to penetrate screens, tracks, and the wheels of wheeled vehicles at the point of impact. They will also be able to penetrate insignificant and/or destructible obstacles (fences, destructible structures, etc.).
The principle of their action will be the same as that of AP shells. However, if after penetrating a screen, an AP shell hits armor that is thicker than the remaining penetration value of the shell, no damage is caused. For HE shells in this situation, the "spall" mechanic takes effect and is guaranteed to cause damage. If an HE shell penetrates the screen and explodes on the armor, it will deal damage. The amount of damage will depend on the thickness of the armor plate on which the HE shell exploded.
If an HE shell does not penetrate a screen and therefore does not reach the armor, it will not cause any damage at all. To fire HE shells effectively through screens, you will need to consider the thickness and slope of the screens.
3) We adjusted the characteristics of vehicles with HE-based gameplay.
During Sandbox trials, there were concerns about the KV-2, Type 5 Heavy, XM551 Sheridan, and some other vehicles with HE-based gameplay. Recently, we launched a dedicated Supertest for them. Based on the results, we adjusted their performance.
After all the tests, we can see that the new mechanics work and solve the problems we set out to address.
New Tactical Features to Counteract SPGs
Starting with Update 1.13, non-SPG players will have 3 new tactical features at their disposal to counteract artillery:
Sound Detection (aka "Sixth Sense for Arty")
Brighter shell tracers
Minimap shot markers
Let's start from the top.
Vehicle commanders will be able to learn a new special skill—Sound Detection. When an SPG fires a shot, players whose vehicles are within the damage area will see a special indicator. It will trigger if their vehicle is inside the affected area. Depending on the shell velocity and travel distance, you will have a short time to react. These seconds may be enough for you to escape the blast zone or turn your vehicle so that a shot will hit thicker armor and minimize damage. Sound Detection turned out to be useful for both maneuverable and slow vehicles, but it may take you some time to learn how to maximize its full potential.
Brighter and more noticeable shell tracers will also become an important tactical feature for non-SPG players. Such shell tracers will allow you to understand the approximate positions of SPGs, as well as the direction they fire. Thus, it will be easier to find a safer position that is not vulnerable to artillery fire.
Once an artillery shell hits the ground, a vehicle, or any other object, a shot marker will be displayed in that spot on the minimap. It will be visible for 10 seconds before disappearing. There are not many positions for SPGs on any map, so combined with the brighter shell tracers, you will get an even clearer idea of the positions and targets of enemy SPGs. In addition, once a shot marker has appeared, you can be sure that you will not take damage from above for the next 10–20 seconds, giving you time to find cover or plan your next move.
Changes to SPGs
SPGs will now have three available shell types. Each of them will feature its own combat purpose, trajectory, and velocity. Let’s look at them individually. Standard HE shell: The easiest shell type to use, it causes low damage and stuns several opponents with a single shot. It will have the lowest velocity of all three shell types, but a more comfortable, high-angle trajectory. Alternative HE shell: It causes no stun and has a relatively small burst radius, but features better armor penetration and higher damage per shot values than the standard shell. This shell also has a higher velocity but a lower angle trajectory. Tactical AP shell: In cases where the previous two shells are not as effective, try using an AP shell that can only hit one target. Its penetration value will be higher than that of HE shells, and its velocity will be the highest of all three shell types, allowing you to cause some serious damage. However, you should remember that the trajectory of this shell type is the flattest and travels at the lowest angle to the ground.
In the new system, you will need to use a range of shell types for different situations on the battlefield, so you will now have a greater variety of strategic opportunities. Learn to use them appropriately and secure your victory!
The changes in the arsenal of artillery led to the refinement of the interface for SPG players. You will now be able to easily see which shell type is currently loaded, and each shell type will have colored indicators (green and red) that will inform you whether this shell can reach what you’re aiming at. In addition, a zoom scale will be displayed on the interface. By scrolling the mouse wheel, you can switch from the regular top-down view of Artillery mode to Trajectory View.
Another important new feature is the reworked Intuition perk, which will be available for all crew commanders in the game. It will become a skill that allows you to quickly change between shell types, enabling both SPGs and other vehicles to instantly replace the loaded shell.
After the first Sandbox test, we noticed that the performance of tactical AP shells was lower than expected. To improve the situation, we increased their damage per shot and made the flight trajectory more comfortable for firing. As a result, the battle performance of AP shells increased. These changes did not affect the popularity of this shell type—AP shells remain a situational shell type that requires careful consideration and use.
We also see that tactical AP shells are less popular than HE shells for vehicles featuring high damage per shot. It’s harder to hit a target for SPGs like the G.W. E 100, the T92 HMC, and the Conqueror Gun Carriage, so the rewards for accurate shots in these vehicles should be appropriate. Therefore, we slightly increased the damage per shot for the AP shells of these particular SPGs.
We will monitor the combat effectiveness of these vehicles and artillery as a whole and, if necessary, adjust the characteristics of both SPGs and the shells they use.
[previewyoutube="x_m9kHW29Rk;full"]
Vehicle Rebalancing Continues!
We are continuing to work on rebalancing popular Premium tanks and improving their combat effectiveness. In Update 1.12.1, we rebalanced four Tier VIII vehicles. This time, three light tanks of different nations will receive their own improvements. We’re updating their combat parameters and enhancing their strengths to emphasize their gameplay. At the same time, the next several Premium vehicles that need to be rebalanced have already headed to a dedicated Supertest. Stay tuned to find out more about the next series of improvements!
The M41D, a modernized version of the American M41A3 Walker Bulldog, will now become more confident in its role as a fast and mobile scout. We slightly increased its maximum forward and reverse speed, and increased its view range from 390 to 410 meters.
The British FV1066 Senlac also received an increased view range (from 400 to 410 meters), and its gun became more accurate. This will make the vehicle more competitive.
The T92 received a slight increase in armor penetration for both standard and special shells. These improvements will help this tank to not only effectively fulfill the role of an active scout, but also increase the chances of causing damage.
We took a closer look at the combat performance of the following 6 reward tanks that you can get for achievements in battles on the Global Map:
М60
121В
IS-5
Т23Е3
T95/FV4201 Chieftain
KV-4 Kreslavskiy
We already improved the characteristics of the Tier X tanks (the M60 and the 121B) several years ago, but we think there is still some room for improvement. The gameplay of these vehicles will not change, but we see an opportunity to adjust some of their battle parameters so that they can better perform their proper roles. Let’s look at each tank individually.
The M60 received more durable turret armor, which will allow it to perform more effectively in battles at short and medium ranges.
We improved the turret armor of the 121B, while strengthening its upper frontal plate. In addition, this Chinese medium tank now boasts a faster reload time, which means its DPM has slightly increased. Plus, we’ve improved its maximum forward and reverse speed.
We also want to update the characteristics of the Tier VII–VIII reward tanks. These vehicles are becoming more accessible, so their audience in the game is growing. It’s high time to revise their performance and make them correspond better with the current environment.
The T95/FV4201 Chieftain received a more comfortable gun with improved stabilization and a reduced reloading time. In addition, this vehicle now features an increased view range and better engine power.
The KV-4 Kreslavskiy has more HP. We also strengthened its frontal turret armor and the sides of the gun mantlet. Its engine has become more powerful, and its maximum forward speed has been increased. Taken together, these changes will increase the survivability of this heavy tank.
Slight changes were also made to the IS-5 and the T23E3. The gun stabilization of these vehicles was improved, and the gun depression angles of the Soviet tank were increased from –5 to –7 degrees.
Changes to the Mode Selection Interface
We improved the Garage mode selection interface to make it clearer and more informative. Now it will be more convenient for you to choose the mode you want to play. Instead of a dropdown menu to the right of the Battle! button, a standard full-size screen with separate windows for the available modes will be introduced. Random Battles and other modes that may be of the greatest interest will have large windows. For permanent modes, their windows will be smaller.
Each mode will feature a brief preview and a more detailed description on a separate page with information about the core rules and rewards. You will also be able to track your progression in some of the modes you play.
Explore New Maps in Recon Mission!
In Update 1.13, we will add a new mode to World of Tanks—Recon Mission. In this experimental mode, you will be able to try out maps that are in the late stages of development. It will become a collaboration platform where we will work together with you to improve and refine new locales.
After playing a certain number of battles in Recon Mission, you’ll be able to vote for one of three maps available for your consideration (this number may change in the future) and complete a detailed questionnaire. Your feedback will help us better understand what adjustments need to be made to the game balance on a particular map to make battles on it more exciting.
Battles in Recon Mission will take place in vehicles Tier VIII and higher and will follow the rules of Standard Battles. In this mode:
Personal Missions will be unavailable, but you’ll be able to complete other battle missions (including Daily Missions).
The battle economy will be the same as in Random Battles.
You will be able to earn Battle Pass Points.
You will also have the opportunity to earn various rewards for participating in this mode.
We’re still working on Recon Mission and improving the feedback collection system. We need your help right away, so join the Common Test, try out this mode, and share your opinions! More details on Recon Mission will come later, so stay tuned!
Minsk Map Rebalancing
After analyzing the statistics and your comments, we decided to make several improvements to the Minsk map. We've also made some visual changes to address pressing gameplay issues and make battles on it more comfortable and exciting.
Autumn has come to Minsk, and as such, visibility on the map has improved in some areas. We also removed some objects that interfered with shooting and optimized the volume of flying helicopters and planes on the map. Now their noise will not distract you from what is happening on the battlefield.
Based on your feedback, we lowered the water level in the Svisloch River, which resulted in the formation of many hills and lowlands. We also provided additional passages through it. Now, you will be able to quickly change flanks and reach additional firing positions.
We changed the red line that marks the border of the map in some places. This will create areas with additional safe passageways and help avoid fire from enemy vehicles in the center.
While working on improving the Minsk map, we tried to preserve the historically accurate appearance of the Belarusian capital while at the same time making it more convenient for playing a variety of vehicle classes. Now the map will become more versatile in the choice of flanks and allow teams to implement creative new tactics.
Interface Improvements
We continue to introduce the best solutions from popular mods into the game, making your experience more enjoyable. You can now track the HP of both allies and opponents in the player list and on the minimap. You will also be able to better analyze the combat situation on the battlefield and find new opportunities for attack or retreat thanks to Commander View.
All three modifications can be enabled or disabled in the settings under the "Game" tab.
Battle Pass Season 5 Is Coming!
Season 5 of this epic progression-based activity is just around the corner! It will run for 3 months and comprise three Chapters, each consisting of 50 consecutive Stages. Battle Pass Season 5 will feature three new Core Vehicles:
AMX 50 B
CS-63
F217 Badger
You’ll be able to choose one of the three new progressive styles for the three Core Vehicles at the beginning of each Chapter. These striking custom looks will change their appearance and gain new 2D and 3D elements when you complete certain Stages. After completing each Chapter of the Season, you will also get a unique crew member.
Additionally, we extended the list of in-game modes where you can earn Battle Pass Points. You can now receive them when playing in Frontline and Recon Mission, our new mode where you can test maps currently under development. In Season 5, you will also have the opportunity to get your hands on a new piece of Bounty Equipment—Bounty Low Noise Exhaust System. We will tell you more about Battle Pass Season 5 in a dedicated article shortly before its release, so stay tuned!
Ranked Battles Season X
A new test season—Season X—is coming to Ranked Battles, and it will be noticeably different from the previous ones. This stand-alone game event is not associated with the upcoming cycle of Ranked Battles 2021–2022 and will feature an updated format of battles. They take place between two teams of 10 players instead of 15 so that you have greater influence over each battle’s outcome. Plus:
The number of chevrons needed to move from one rank to another will be reduced. Now it will be easier for you to get new ranks and reach Leagues.
The test Season will run for two weeks instead of the usual three. Shortening its duration will make battles even more intense.
The Role Experience system was reworked to better match each vehicle’s characteristics and its purpose in battle.
You'll be able to earn a new piece of improved equipment (Improved Compressor), brand-new Fuel Filter Replacement directives, and other rewards. We want to receive your feedback to help us decide what format the next cycle of Ranked Battles should take in 2021–2022, so join the fray and share your impressions! Learn more about the experimental Ranked Battles Season X in the dedicated article below.
We’ve slightly improved the blueprints system. Now countries of different national formations in the "Second Front" Personal Missions campaign will provide each other with mutual assistance.
If, when creating a blueprint for a specific vehicle, you don't have enough national fragments, you can create them from national fragments of the allied nation at a 1:6 ratio. For example, if you don’t have enough Chinese national fragments to create a blueprint for a Chinese vehicle, then you can use Soviet national fragments instead, but you will need 6 times as many.
NOTE You can only use national blueprint fragments of one nation for conversions. For example, to create 10 Chinese blueprint fragments, you will need 60 Soviet fragments, but you cannot take 5 Chinese ones and get the remaining 5 Chinese fragments by converting 30 Soviet fragments.
Here are the nations in each national formation:
Alliance: Poland, U.K., U.S.A.
Bloc: Germany, Japan
Coalition: Czechoslovakia, France, Italy, Sweden
Union: China, U.S.S.R
To create a national fragment from allied national fragments:
Go to the blueprint research interface of a specific vehicle.
Select one of the allied nations to create a new national fragment.
Get ready the reworked HE shells, new anti-SPG tools and much more coming with Update 1.13.
Good luck on the battlefield!
Guide: Daily Missions
Greetings, Commanders! In this guide, we will tell you just what Daily Missions are, how they will help you throughout your tanking career, and what rewards you will get for completing them!
Daily Missions: The Basics
Daily Missions is a series of three missions with increasing levels of difficulty (Tier I, Tier II, and Tier III). You can complete these missions in Random Battles and in Grand Battles, and all three can be completed simultaneously and over any number of battles. Once completed, a mission renews at the end of the game day. If not completed, the missions remain until they are completed or re-rolled. Each completed mission grants you a reward, and after completing all three, a Bonus Mission becomes available.
Rewards
You will receive a reward for each completed mission. The reward depends on the level of difficulty of the mission—the harder the mission, the better the reward.
As you complete Daily Missions, a special progress bar is filled. Each completed Standard, Premium, or Bonus Mission earns you one point. Upon earning 45 points, you will receive the Epic Reward. As part of the Epic Reward, you're guaranteed to receive: • 100 bonds Plus, some of the following: • Personal Reserves • Universal Manual • WoT Premium Account • Demounting Kit • Vehicle Blueprint Fragments • Personal Training Manual • Equipment After reaching the end of the cycle, it starts anew. The Epic Reward cycle does not have a time limit and can be completed at any time.
Where Can I Find My Daily Missions?
You can find your Daily Missions by clicking on the MISSIONS tab below the Battle! button in your Garage.
Types of Daily Mission
In World of Tanks, there are three types of missions: Standard, Bonus, and Premium. Standard Missions are random conditions that can be completed every day and are renewed daily. Similar to Personal Missions, the progress in Standard Missions is updated only after the end of each battle.
Re-Rolling a Mission
You can re-roll an unwanted Standard Mission to receive a new one with a different condition from the same difficulty category. You may lose your progression after re-rolling the mission if one or several of your vehicles are in battle. You can re-roll the next unwanted mission after 4 hours.
What Are Bonus Missions?
After completing three Standard Missions of different difficulty levels, a Bonus Mission becomes available with even more valuable rewards. The Bonus Mission must be completed by the end of the day, otherwise it will expire. Bonus Mission conditions cannot be re-rolled.
How Can I Speed Up My Progress?
WoT Premium Account gives you access to a set of three Premium Missions that must be completed sequentially. Daily Premium Missions don't contribute toward unlocking the Bonus Mission, but they speed up your progress towards getting an Epic Reward. The progress for Premium Missions is updated only after the end of each battle.
So, go out and earn yourself some extra goodies like bonds, WoT Premium days, vehicle blueprint fragments, and much more by completing Daily Missions!


 “Purchase” under its name. Spare directives are stored in the Depot in the Stock section under the Consumables tab.
 “Send to Depot” under the name of the mounted directive.

 (Style Details). The style's concealment bonus, historical accuracy, type, and description will be displayed in a panel on the right side of the screen.
 (Extend Rental Period) in the radial menu in the center of the screen.
 (Adjust Style) to edit it with the available customization elements.
 (Remove Style) in the radial menu.


 .
. on the left side of the customization panel.
 to the left of the Go to Purchase button.
 (In Depot) on the left side of the customization panel.
 . Click the part you want to clear.
 icon. How does it affect the game?


 (Set Search Preferences) and select the desired parameters.
 . The player with the highest WTR becomes a Commander in the following cases:


 in the Platoon window or press H during the battle.
 is displayed to the left of the player’s name.
 is displayed next to the ally’s name. Your teammate is notified of the invitation and can accept it during or after the battle.
 next to the player who invited you. To accept an invitation, hold Ctrl and click the icon—you’re now in their Platoon!


 100 bonds
 Personal Reserves
 Universal Manual
 WoT Premium Account
 Demounting Kit
 Vehicle Blueprint Fragments
 Personal Training Manual
 Equipment
